Glasshouse is the in-house brand of Hi-Fi collective, a UK components retailer founded in 2003 by Nick Lucas previously of World Audio Design, who ran the kits division of Hi-Fi World magazine. These days major mags are hesitant to publish technical specifications, let alone DIY kits and advice lest they compromise their advertising budgets, such is the current audiophile product landscape.
Yet the DIY hi-fi sector remains alive and well. Glasshouse provide a range of components and kits for the DIY builder. Historically they’ve focused on valve amplification and stepped-attenuator preamps, but the recent introduction of the ‘Speaker Kit No. 1’ peaked my interest.
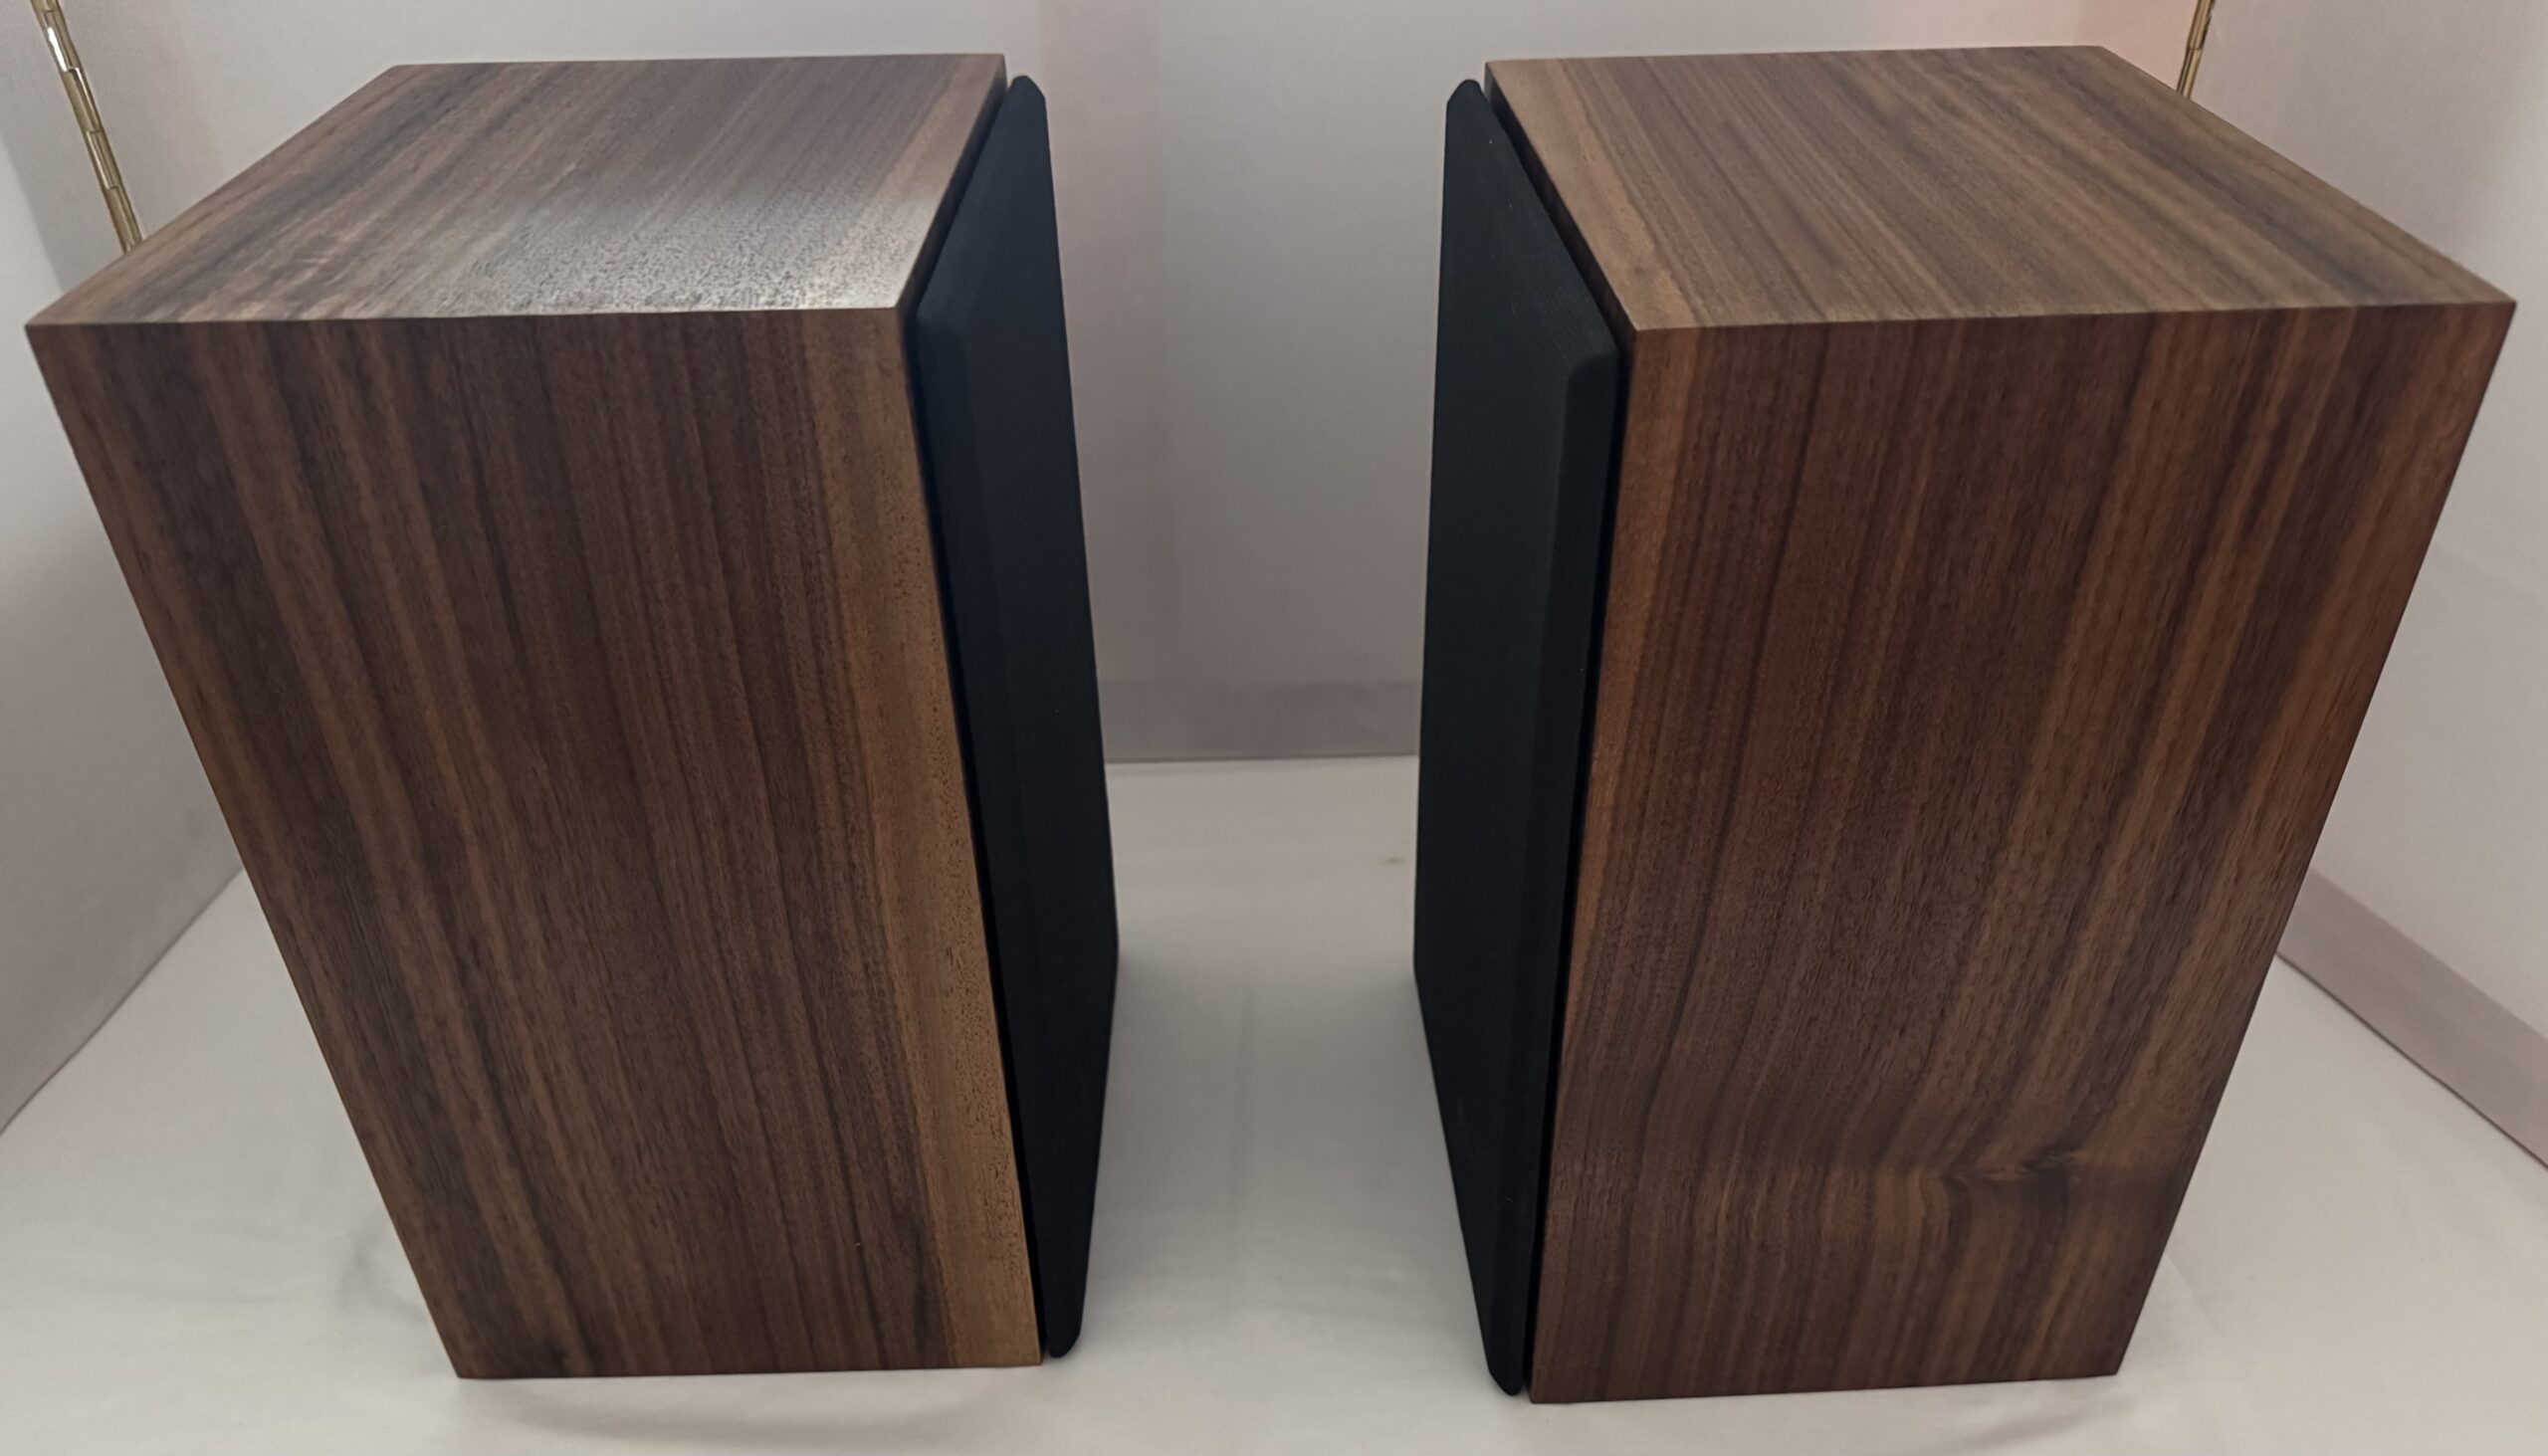
The kit is a small bookshelf design as a nod to Britain’s bookshelf loudspeaker legacy. In those long-forgotten days when our manufacturing industry was thriving, we produced many a classic from the Goodmans Maxim to the BBC LS3/5A, The Wharfedale Laser and Diamond, Celestion SL-6 and Ditton 15, Mordaunt Short MS-10, Acoustic Energy AE1, Acoustic Research BX (which were UK designed and built), and so the list goes on.
The No. 1 peaked my interest as it is a sealed box, unusual even for a small bookshelf design these days. Most designs, DIY or otherwise are ported to give more bass output at the expense of control and tone. A sealed enclosure gives a more accurate low-end performance, even though the bass rolloff occurs at a higher frequency. I like bass, though I’m not a bass head per se. That’s not to say sealed boxes can’t do bass, they just do it in a more convincing, pleasing and tonally accurate way.
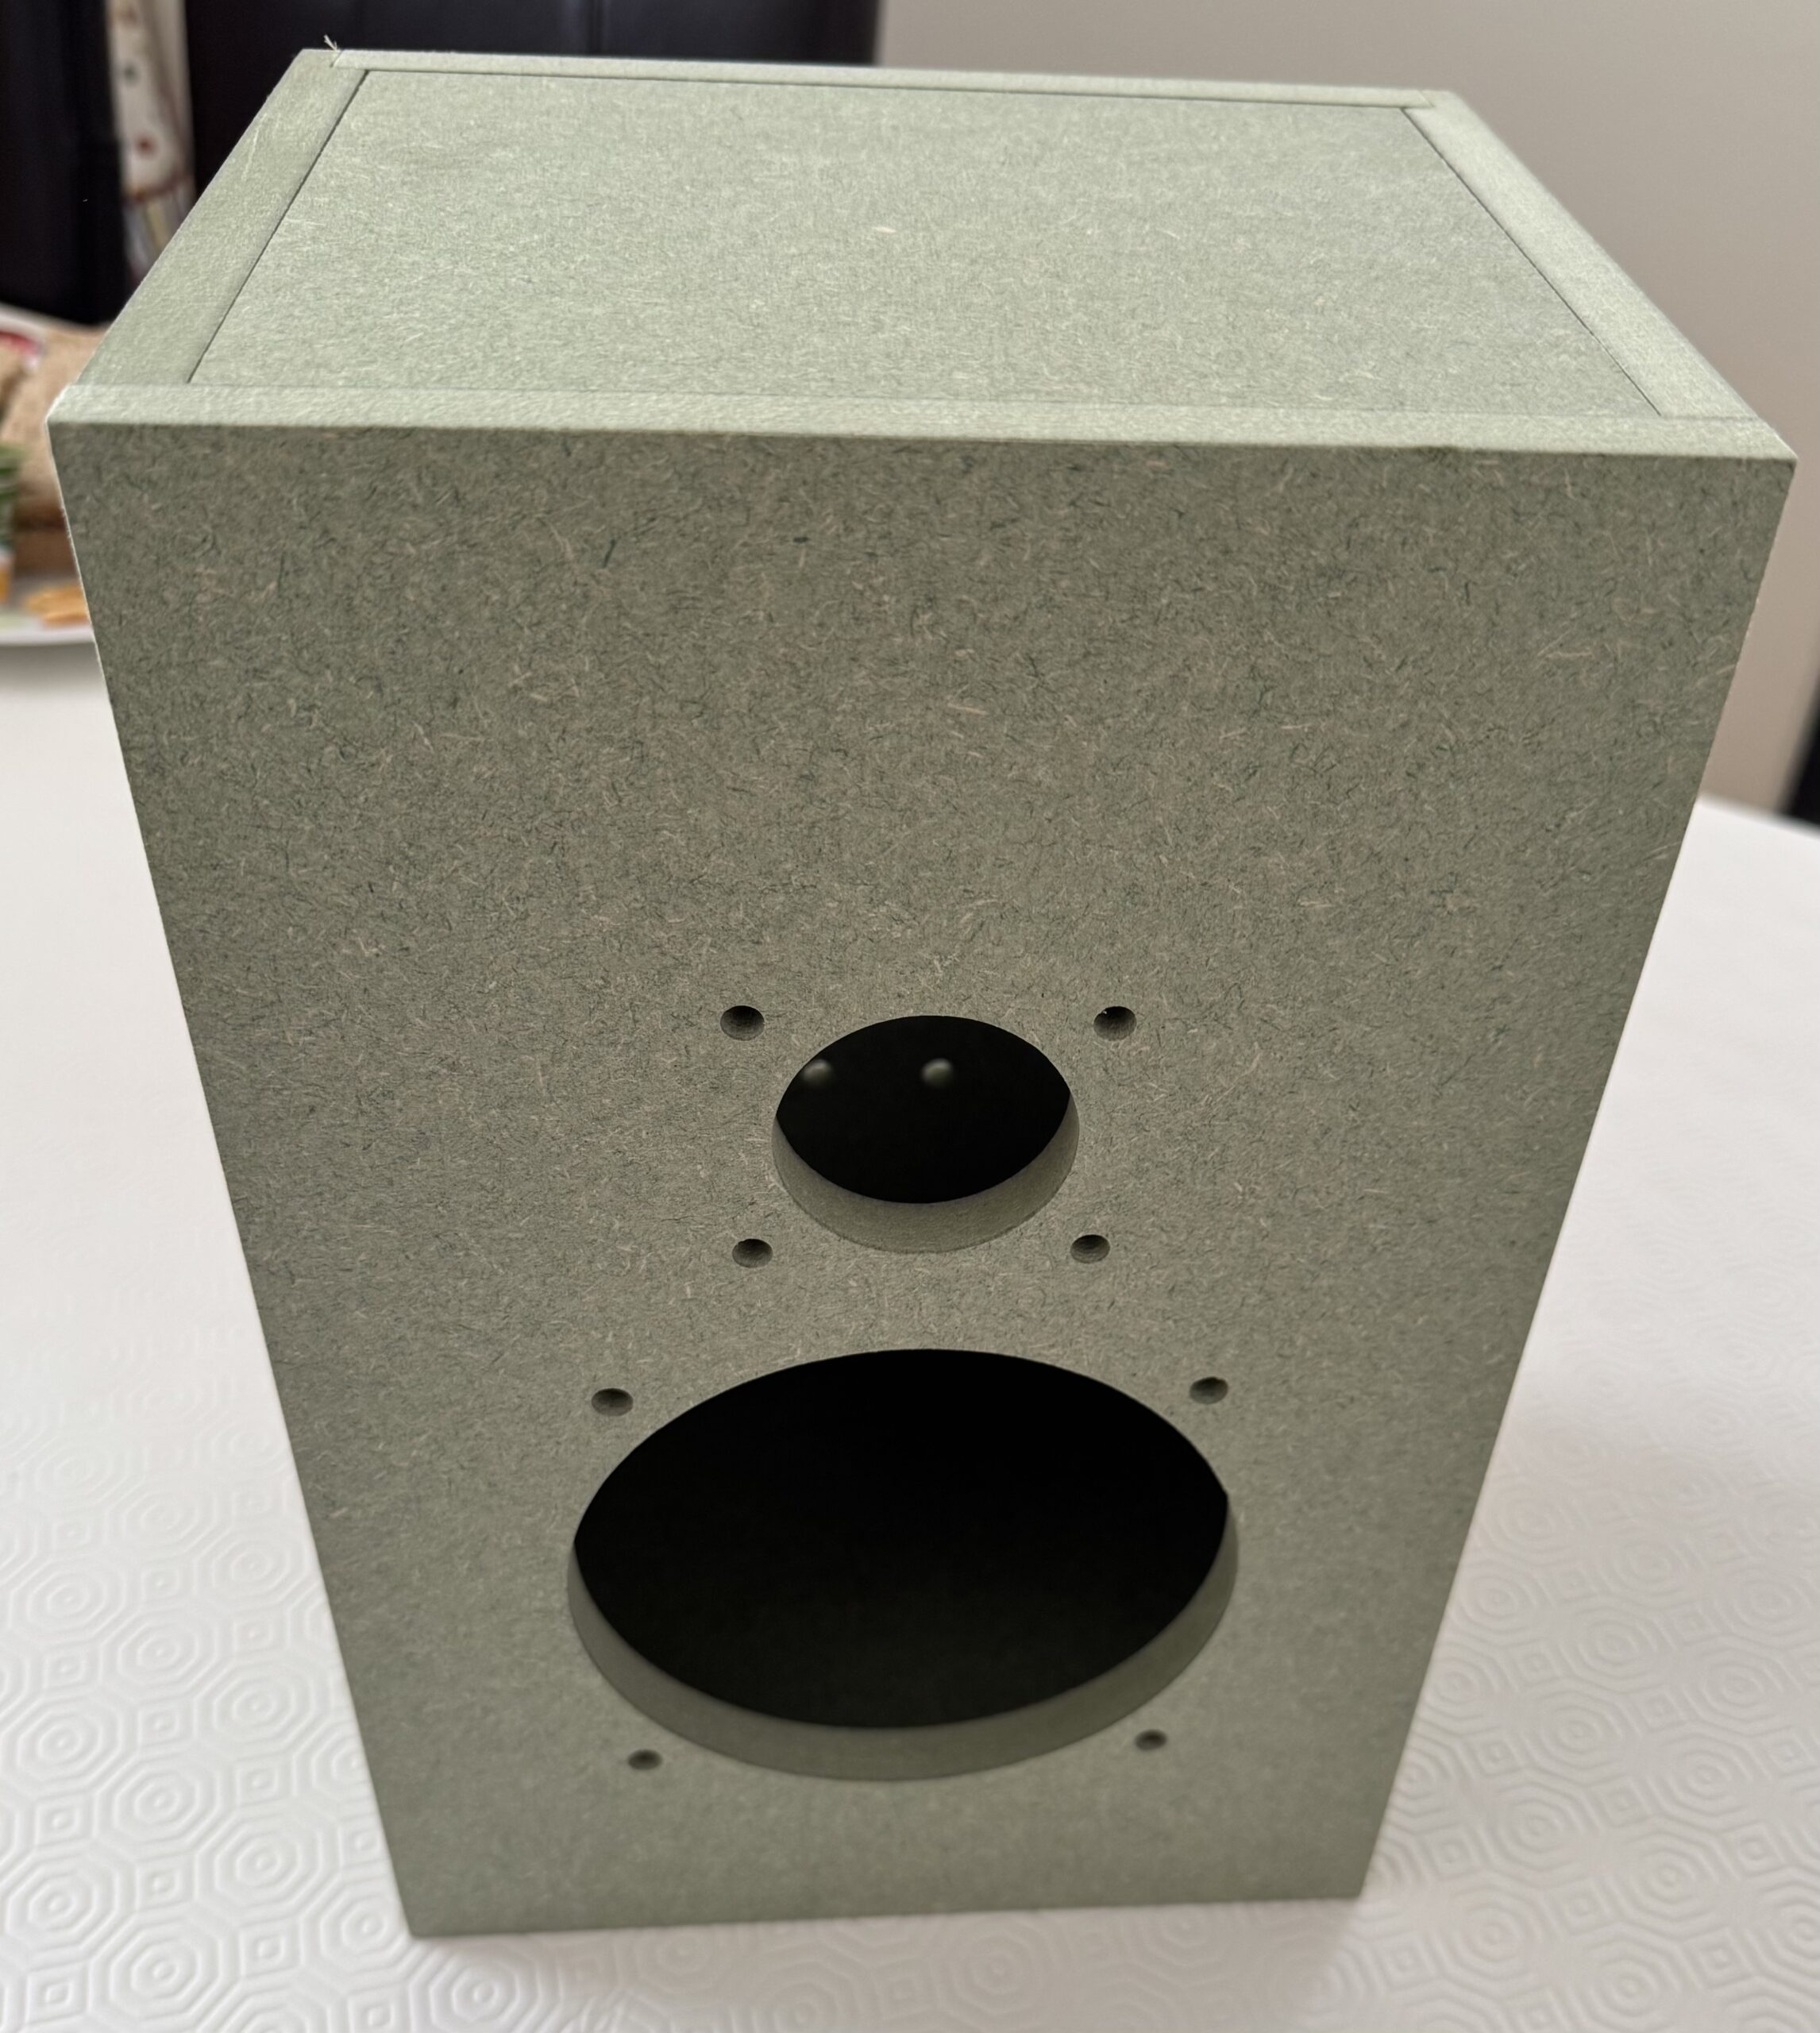
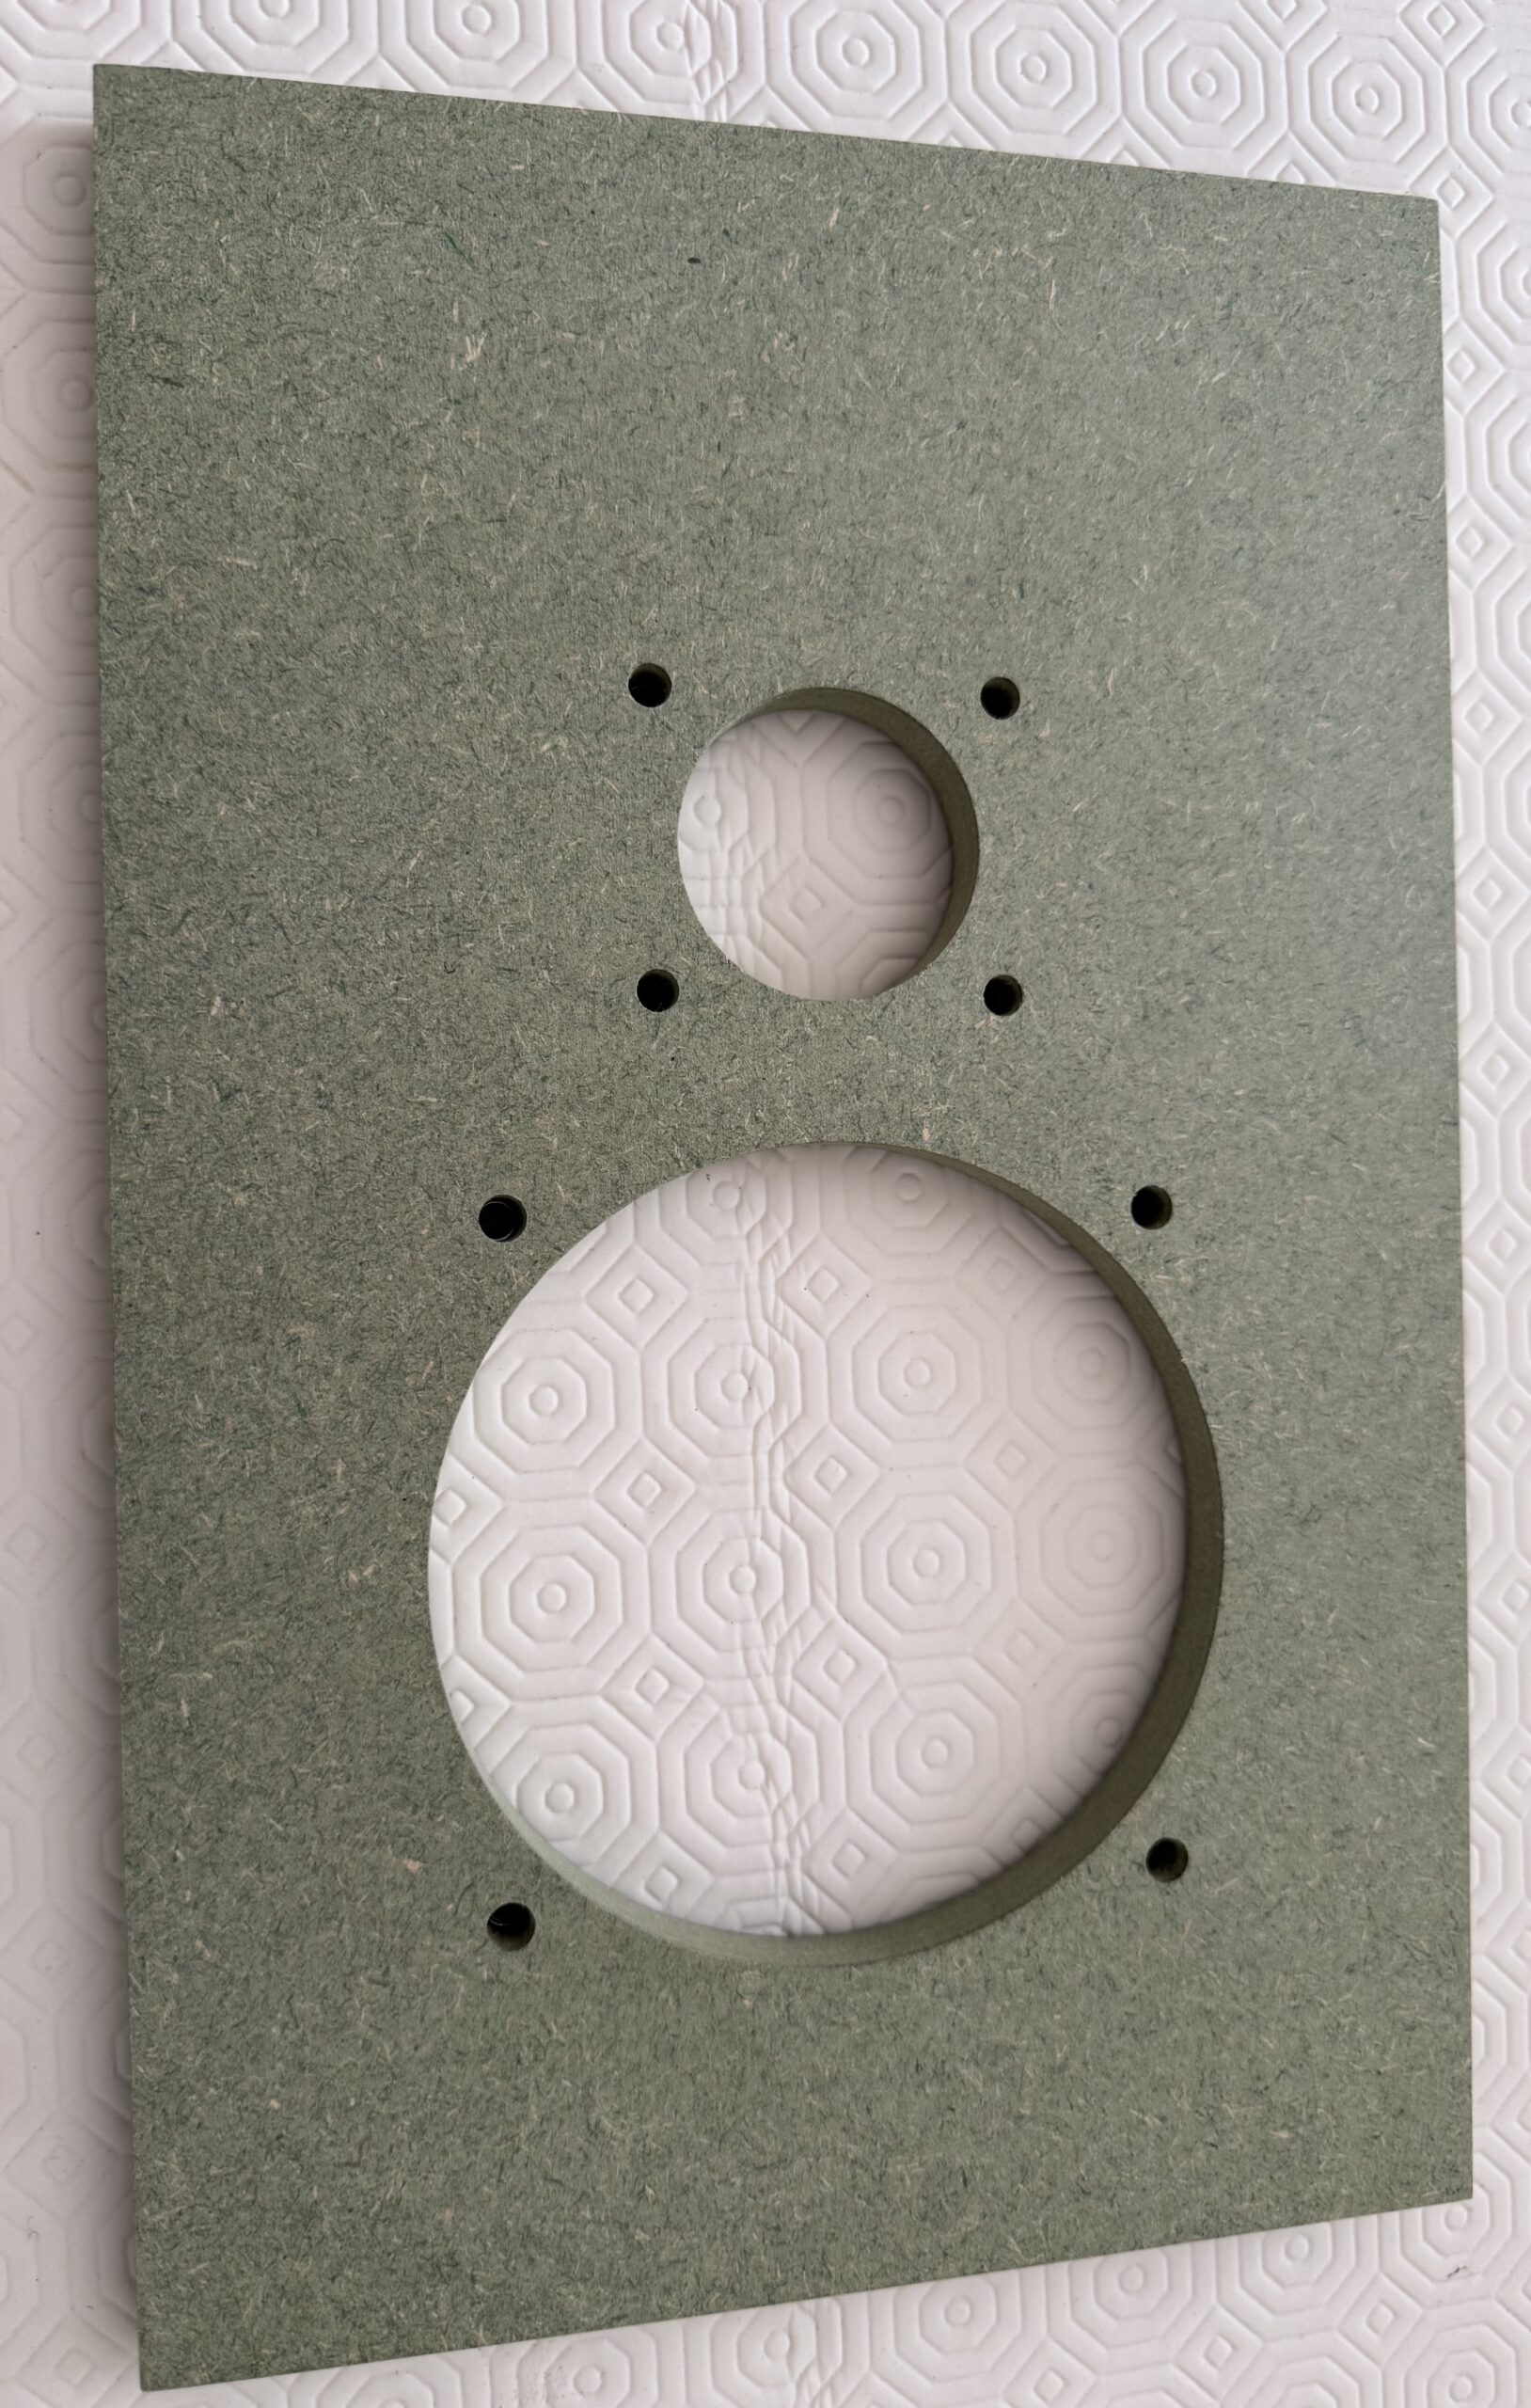
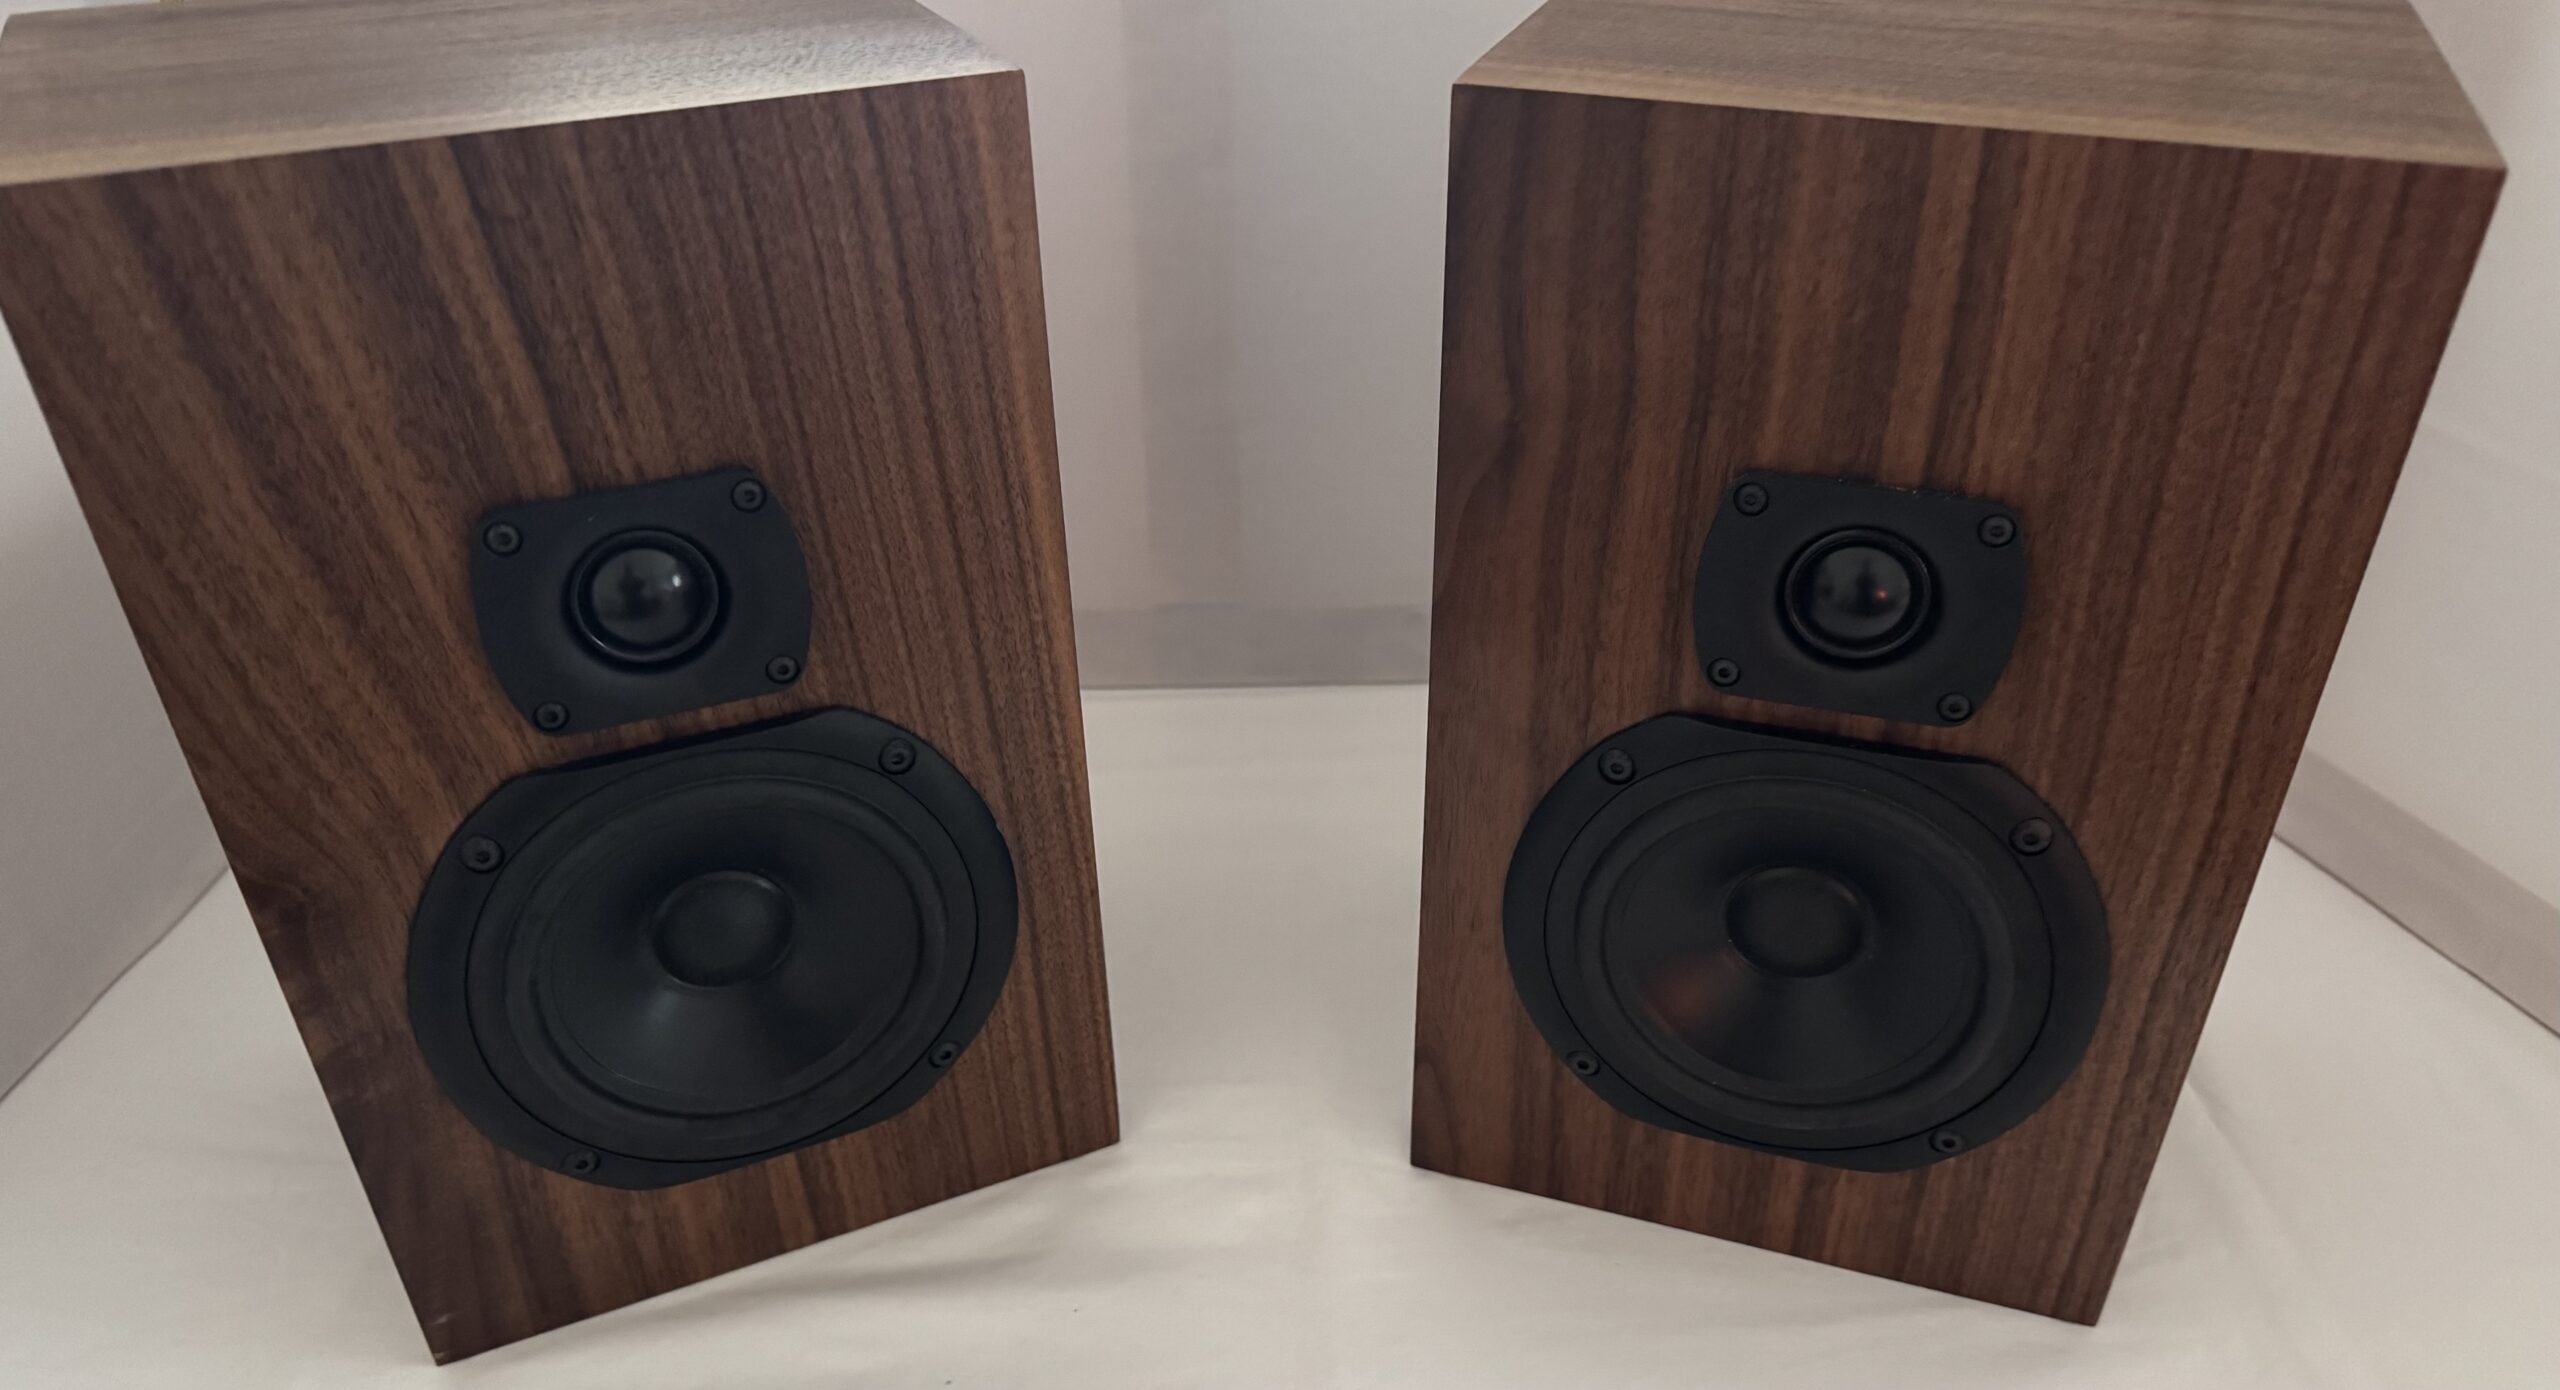
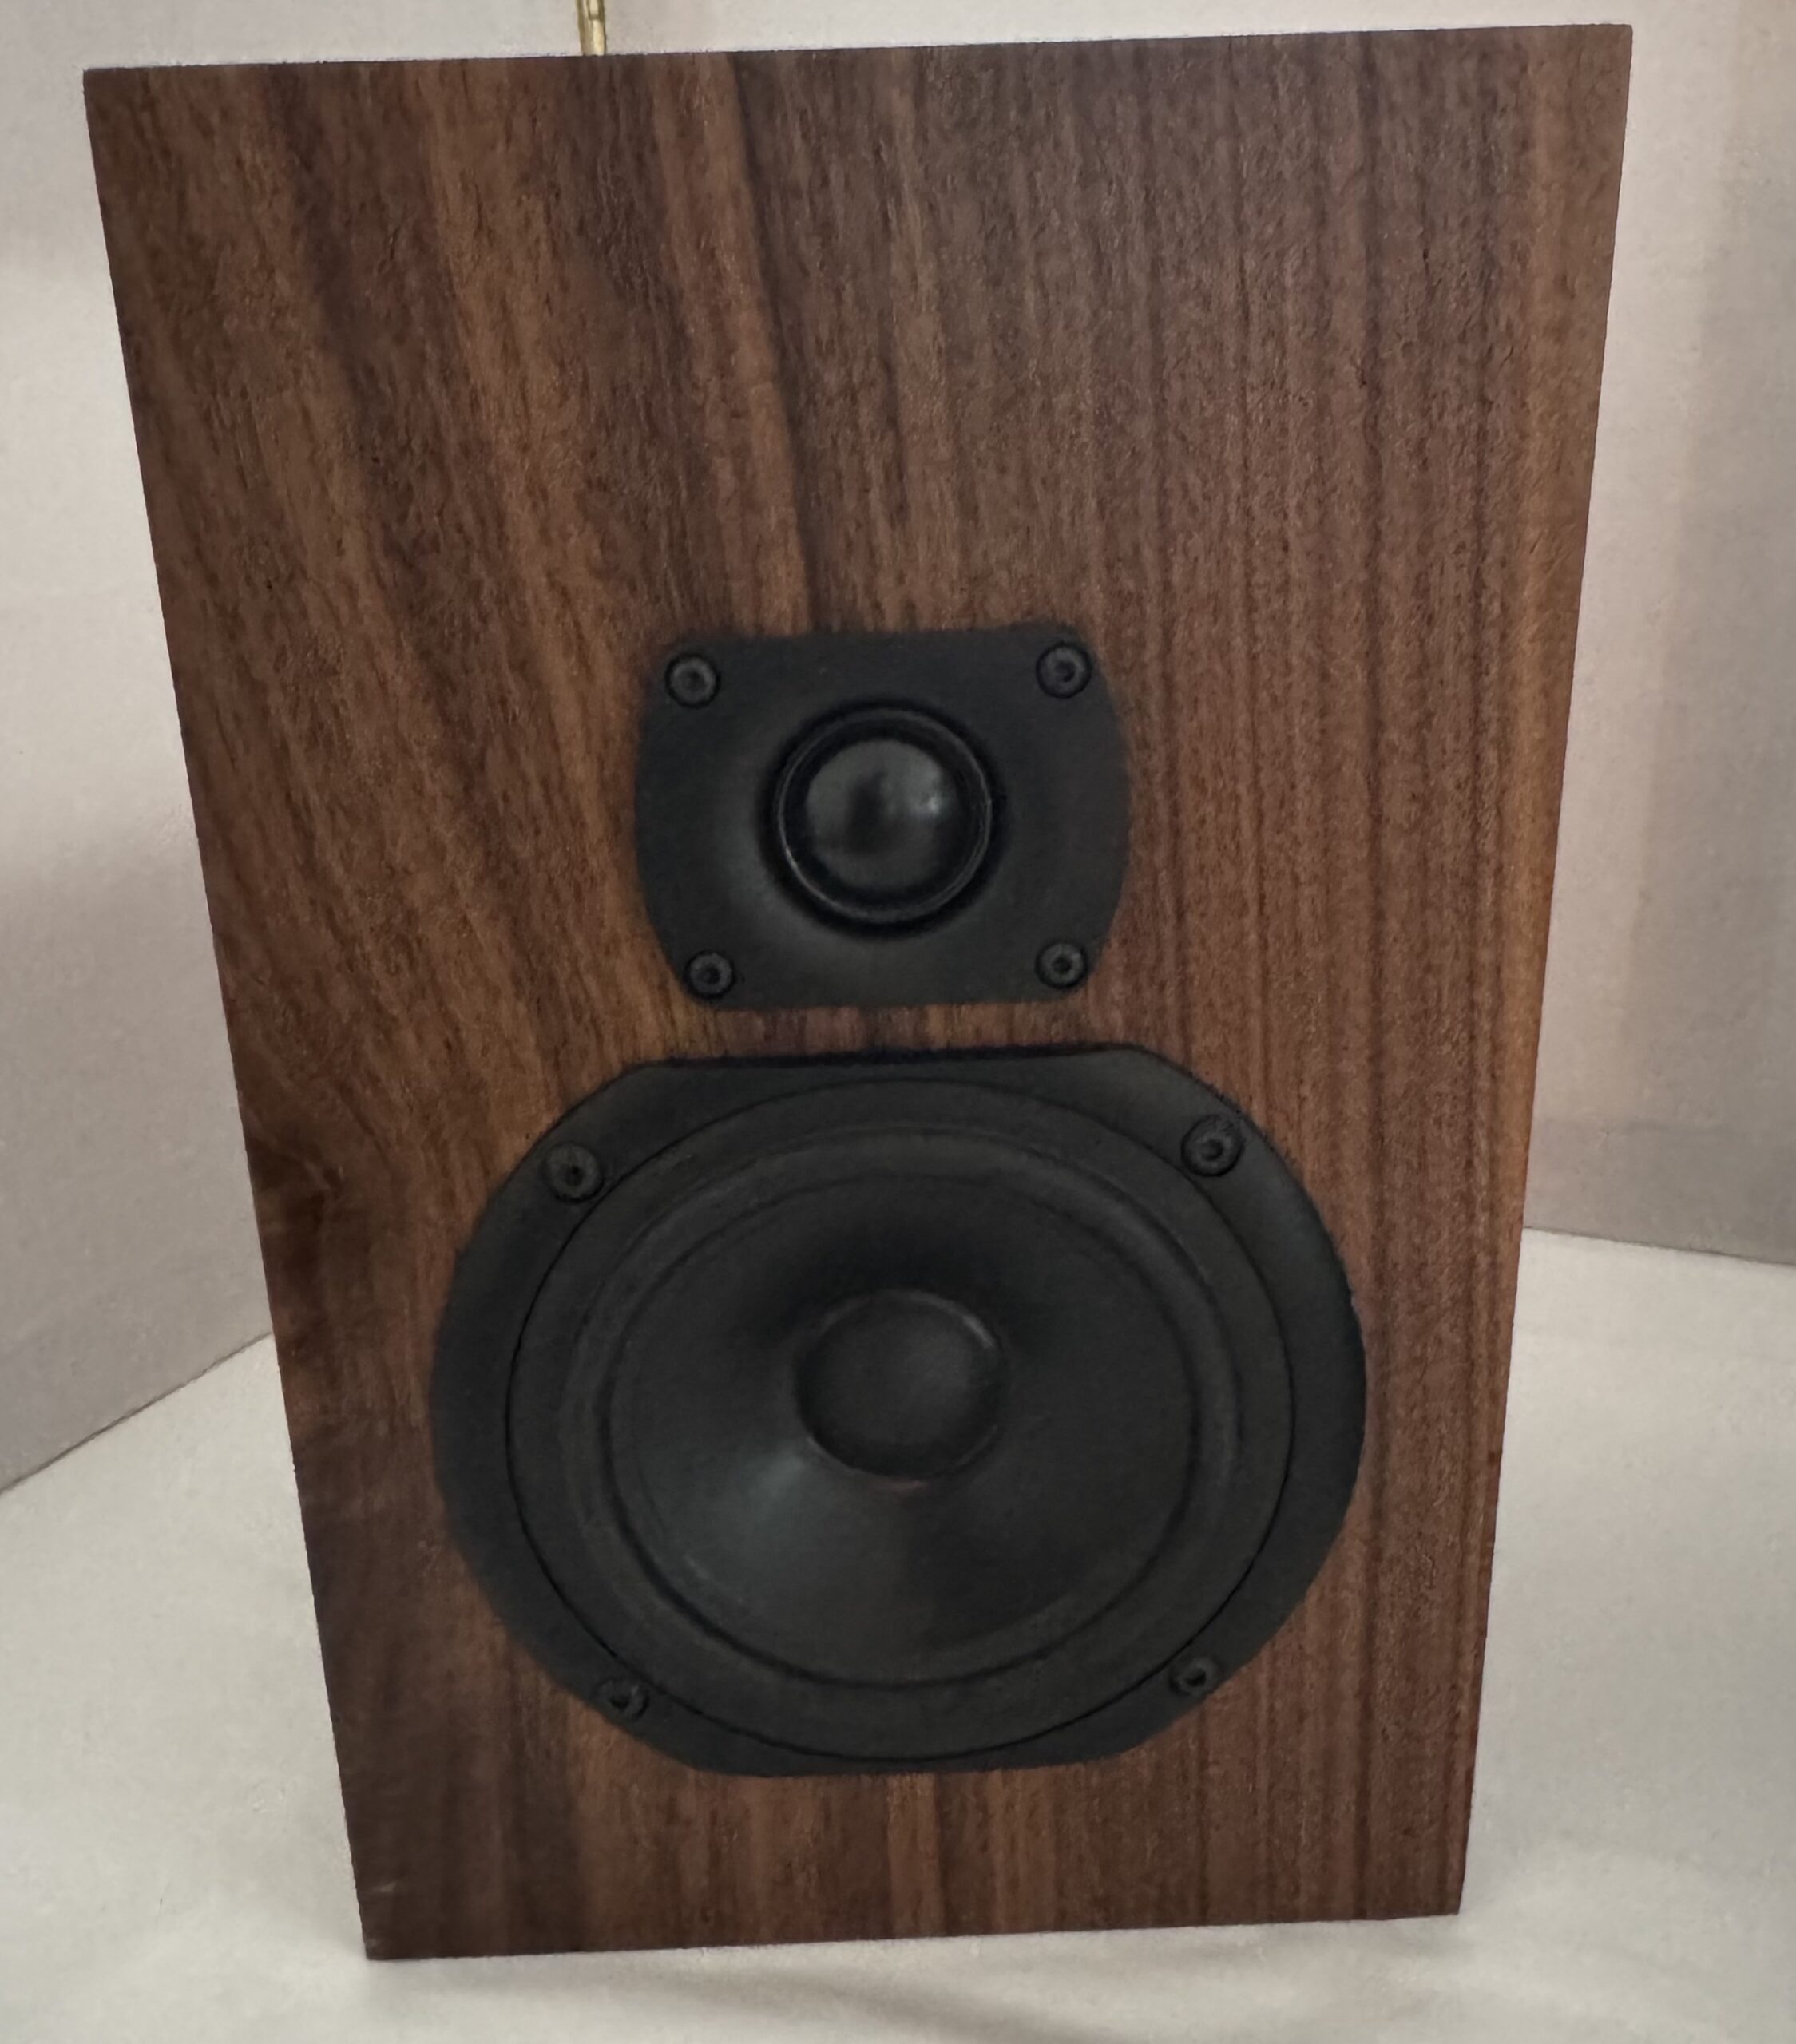
The No. 1 uses Vifa drivers, a BC25SC15 fabric dome tweeter and TC14WG67 5 inch paper cone woofer. The cabinet is constructed of 12 mm MDF and measures 195mm (width) x 165mm (depth) x 305mm (height, CNC-cut for accuracy by OB Audio.

The six-panel construction slots and glues together and is supplied as an unfinished flat pack, so can be veneered, wrapped or painted as you wish.
The kit is comprehensive and includes everything you need to construct a pair of speakers, minus glue, tape and tools. To complete a basic build you’ll need a drill with 1/4 inch or 6 mm bit, soldering iron, hammer, side cutters, box spanners and Allen keys. At the time of writing, the kit costs £250GBP plus VAT and delivery.
Gluing The Boxes
“Get on with it”, I hear you beg. I started by laying out the panels and performing a dry fit to check that everything was good to go.
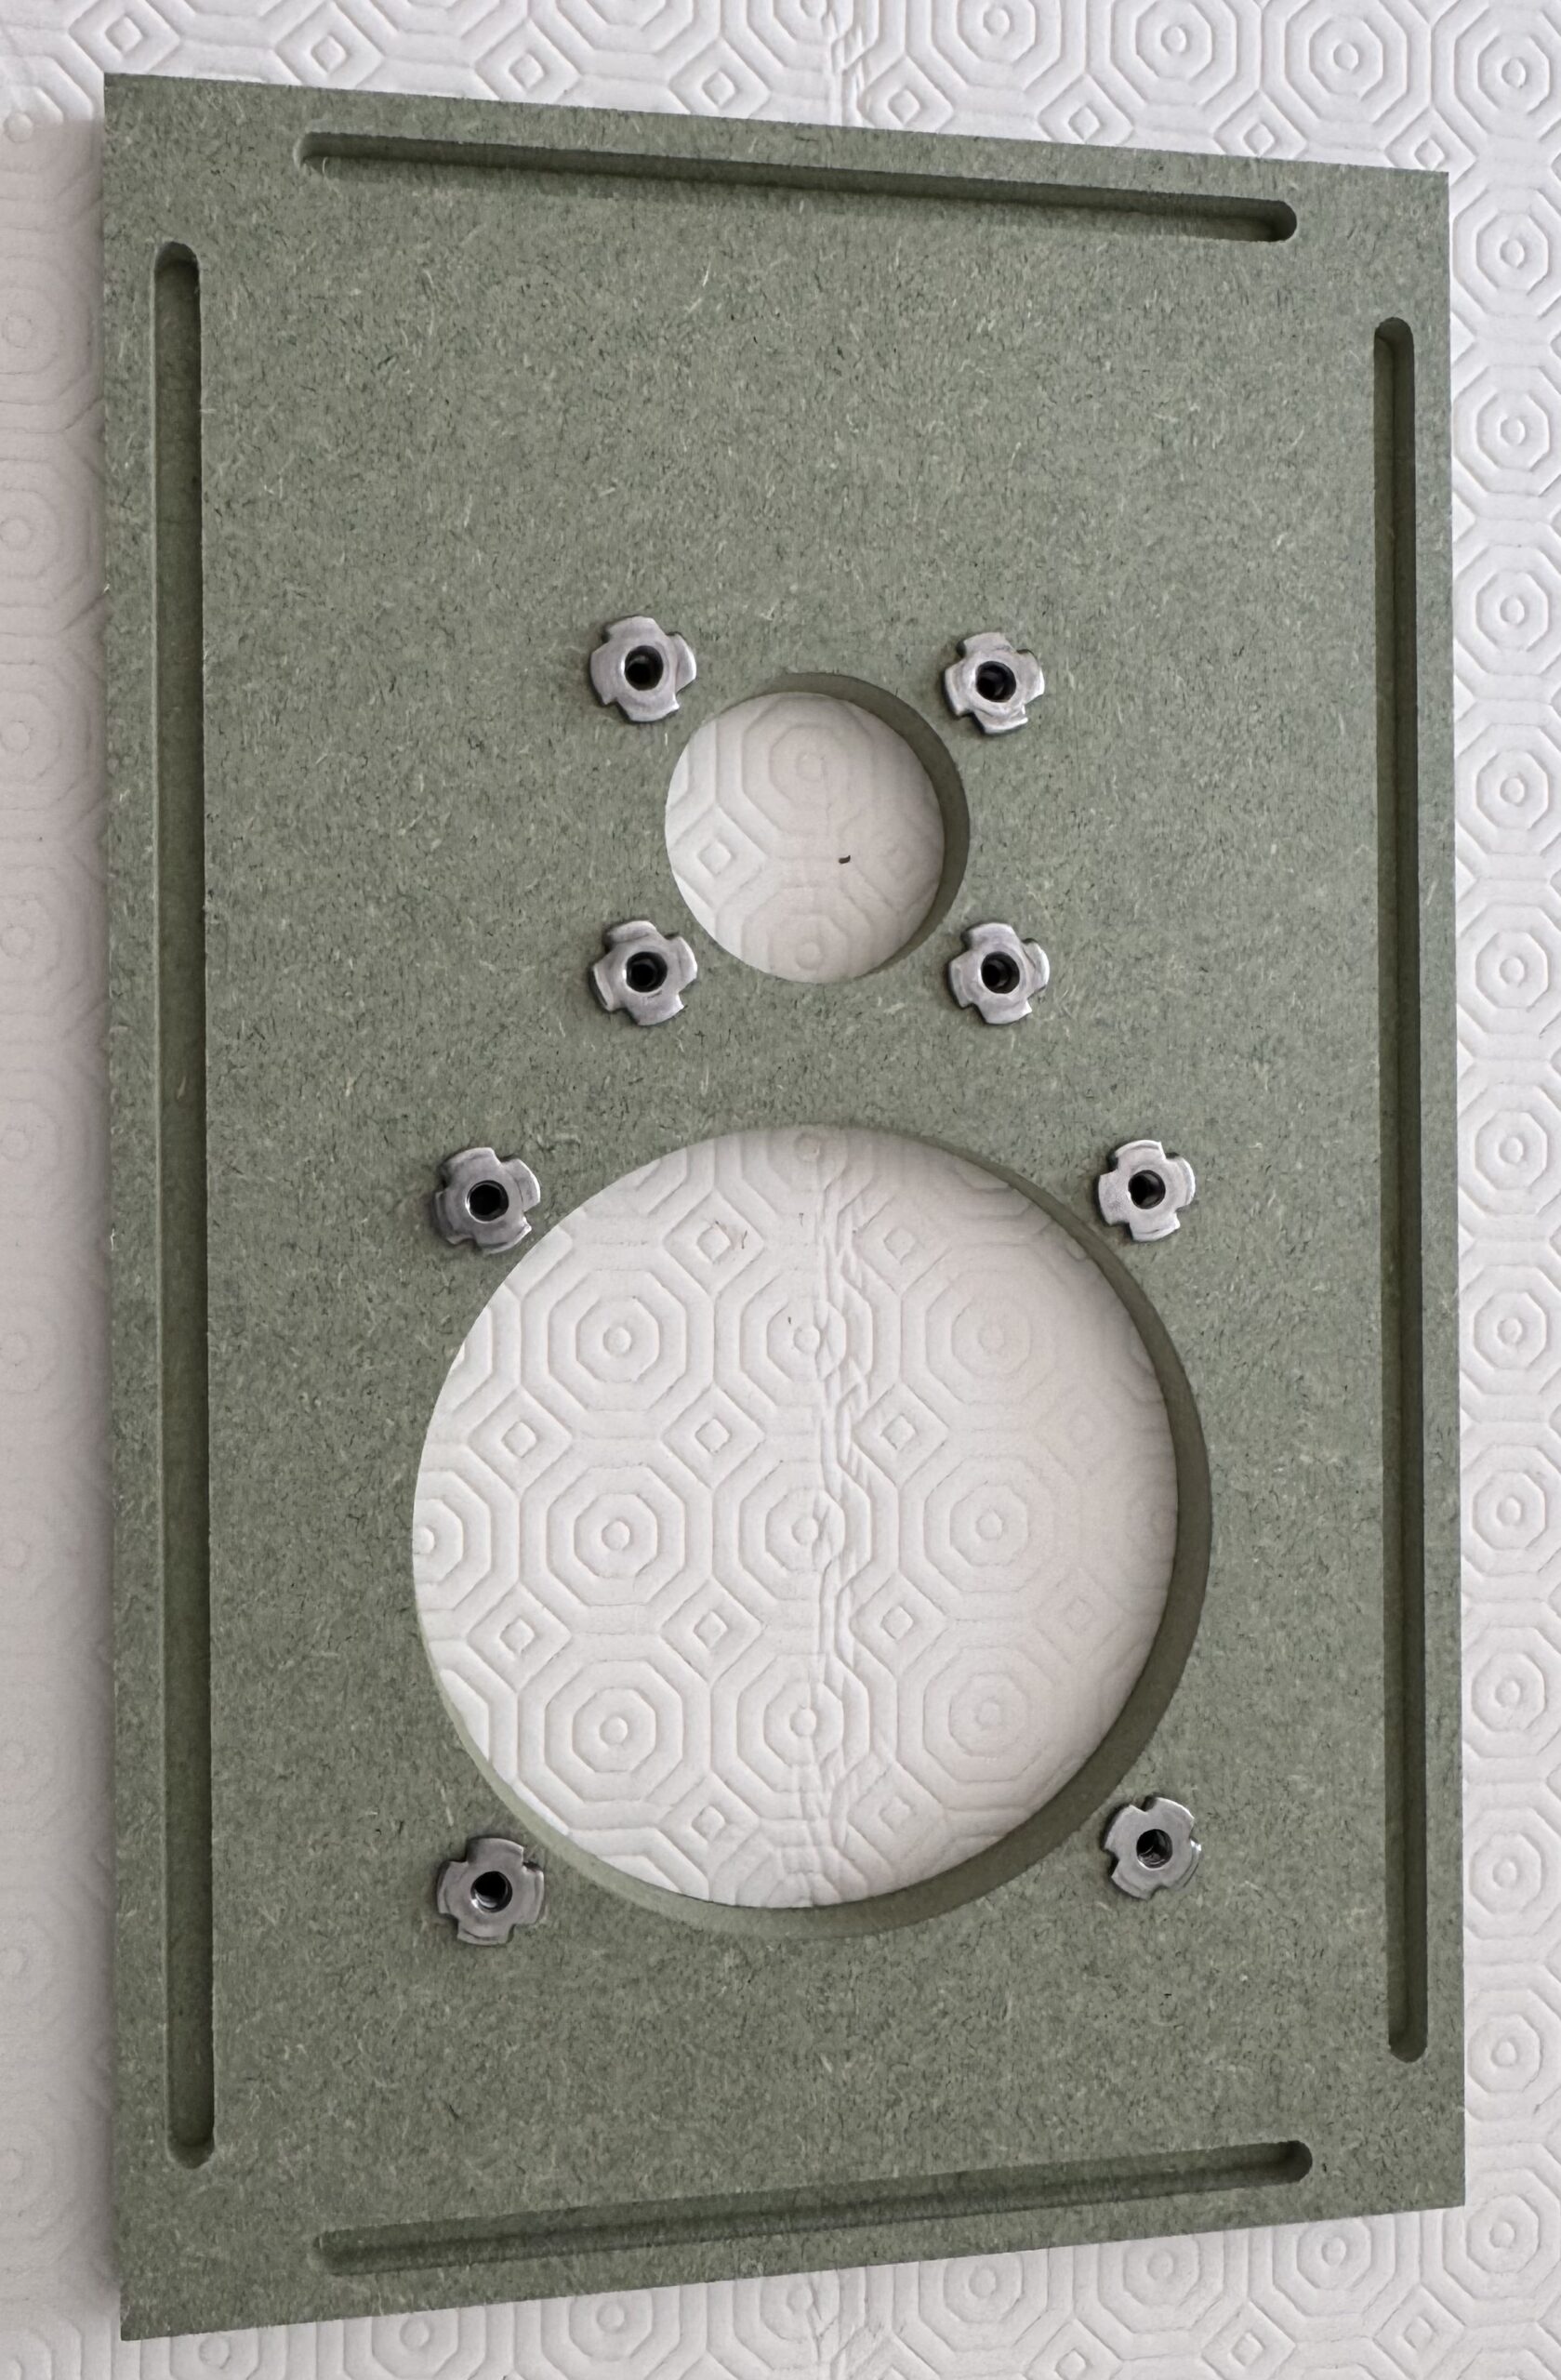
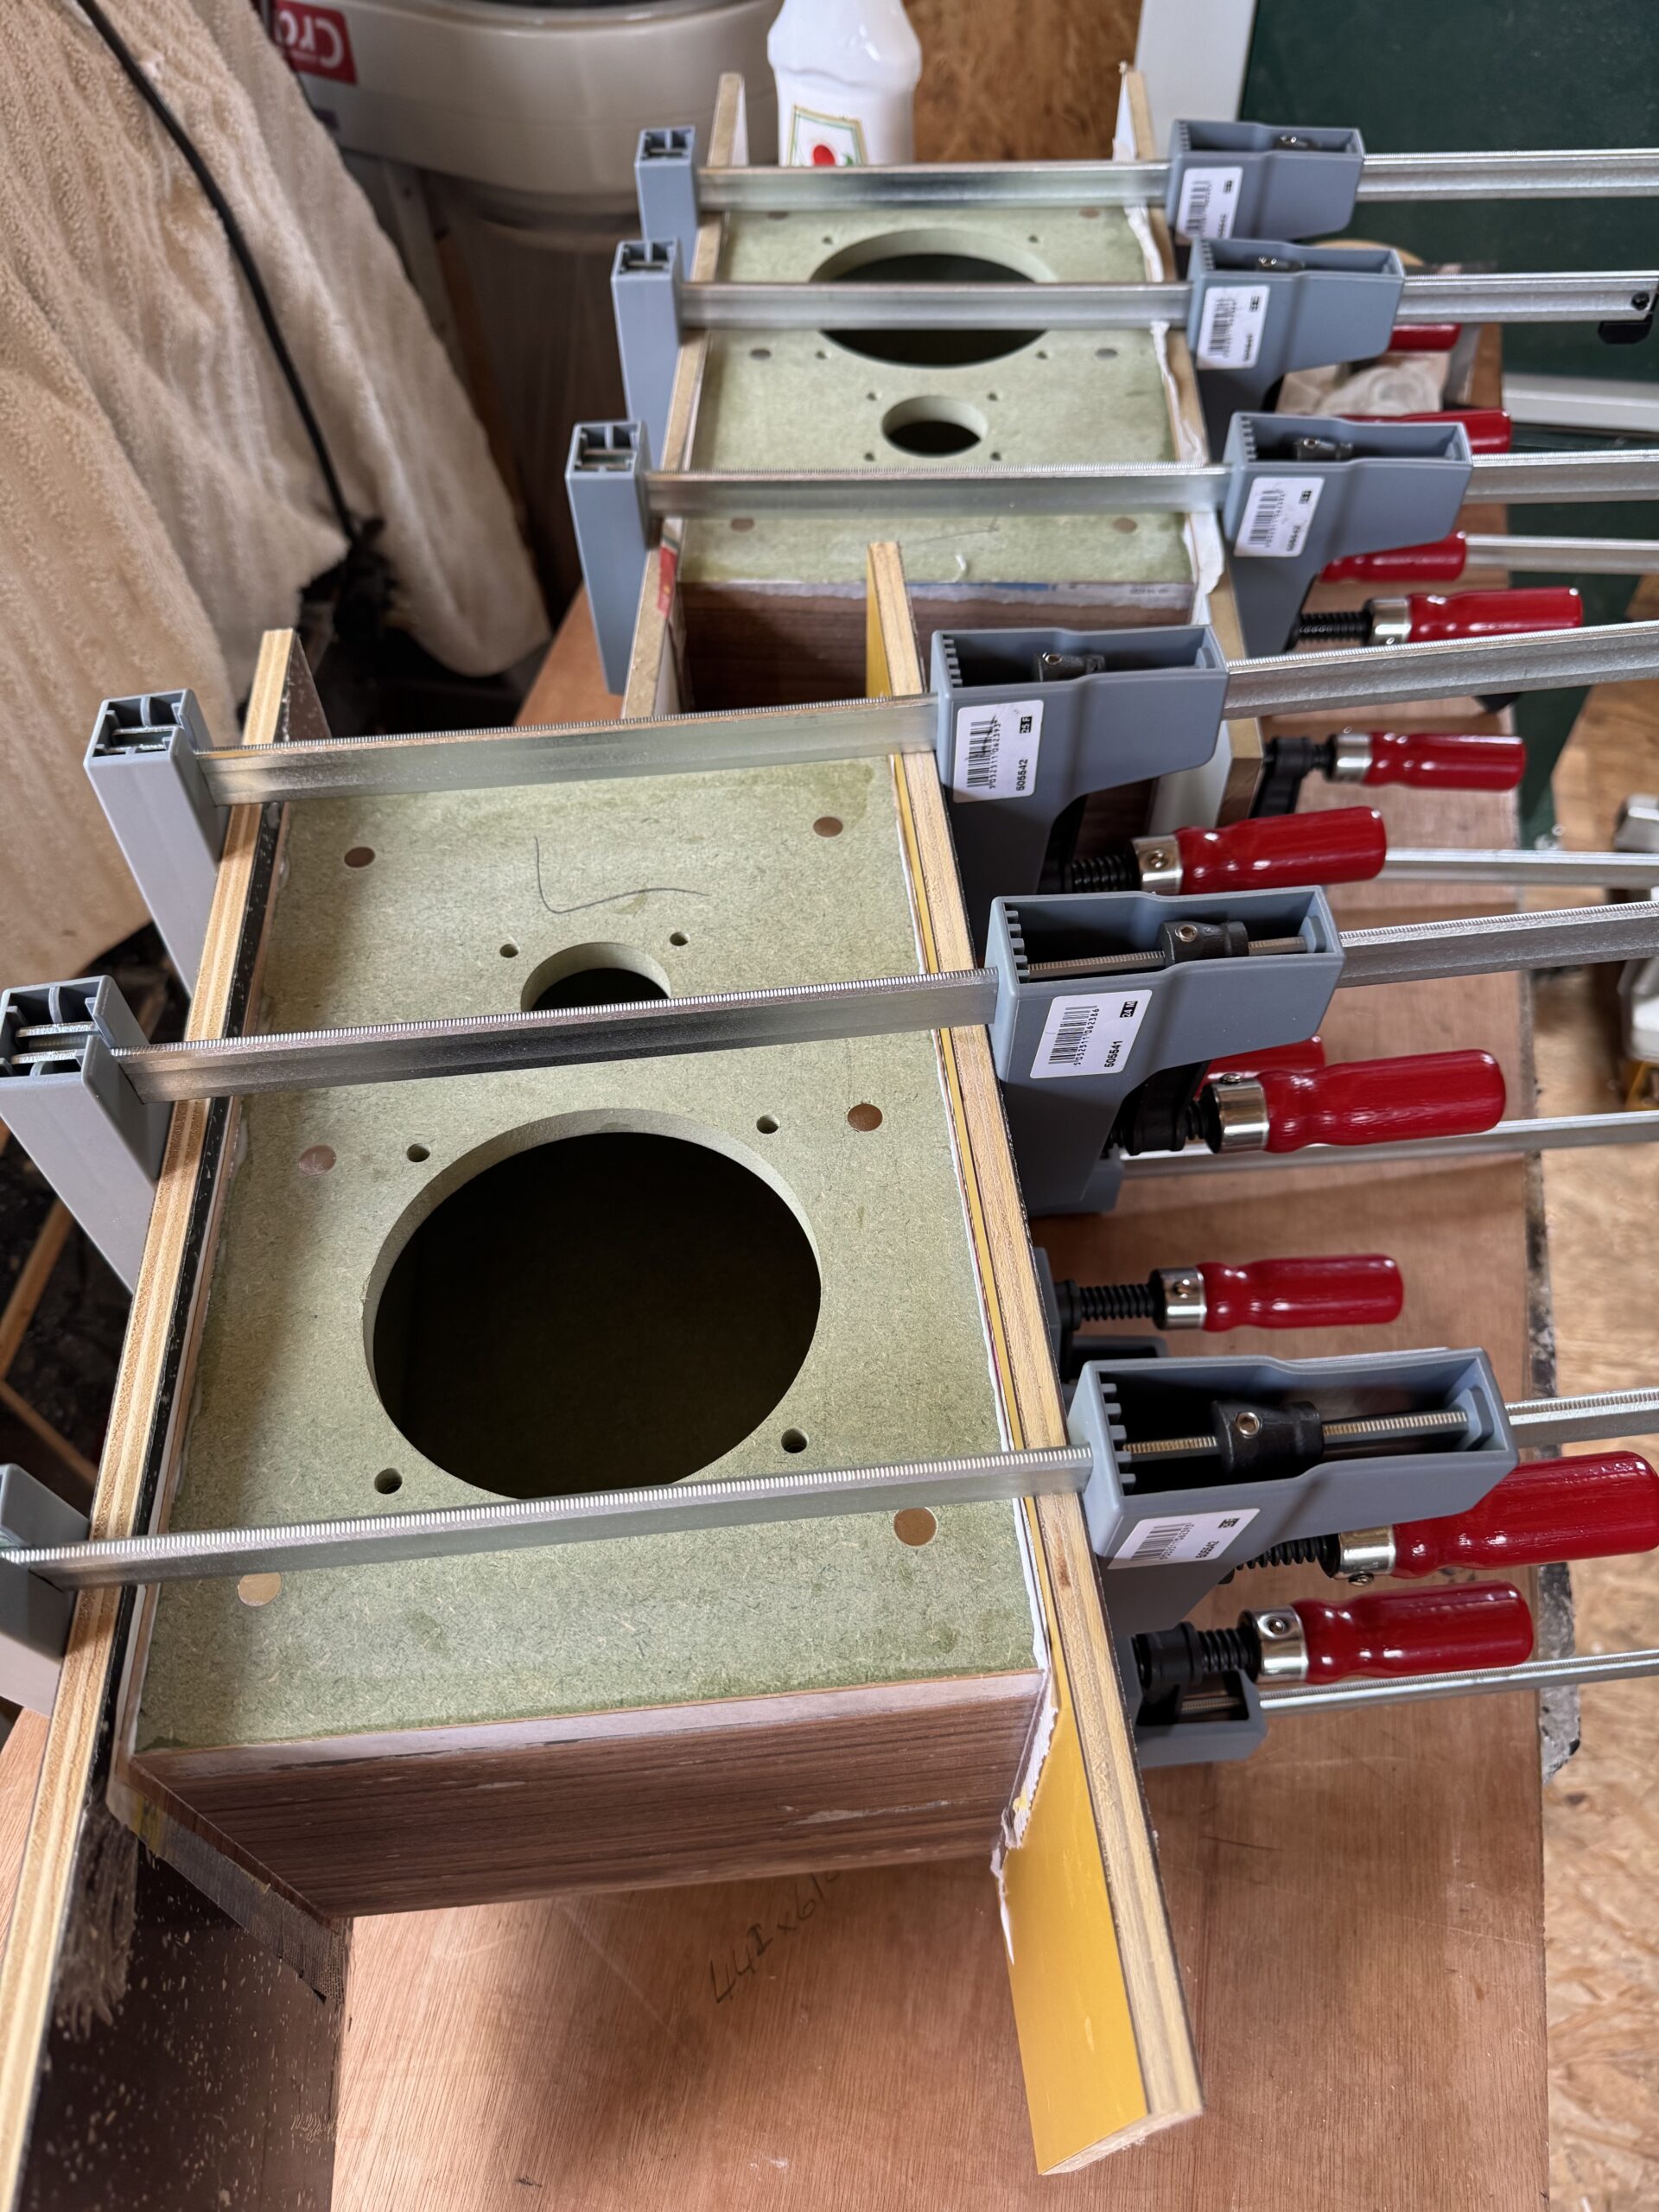
I installed the t nuts into the rear of each front baffle first. You can pull them in later using a bolt and a block of wood, but it’s a lot easier to do it now with the panel face down on a bench and the assistance of your favourite hammer.
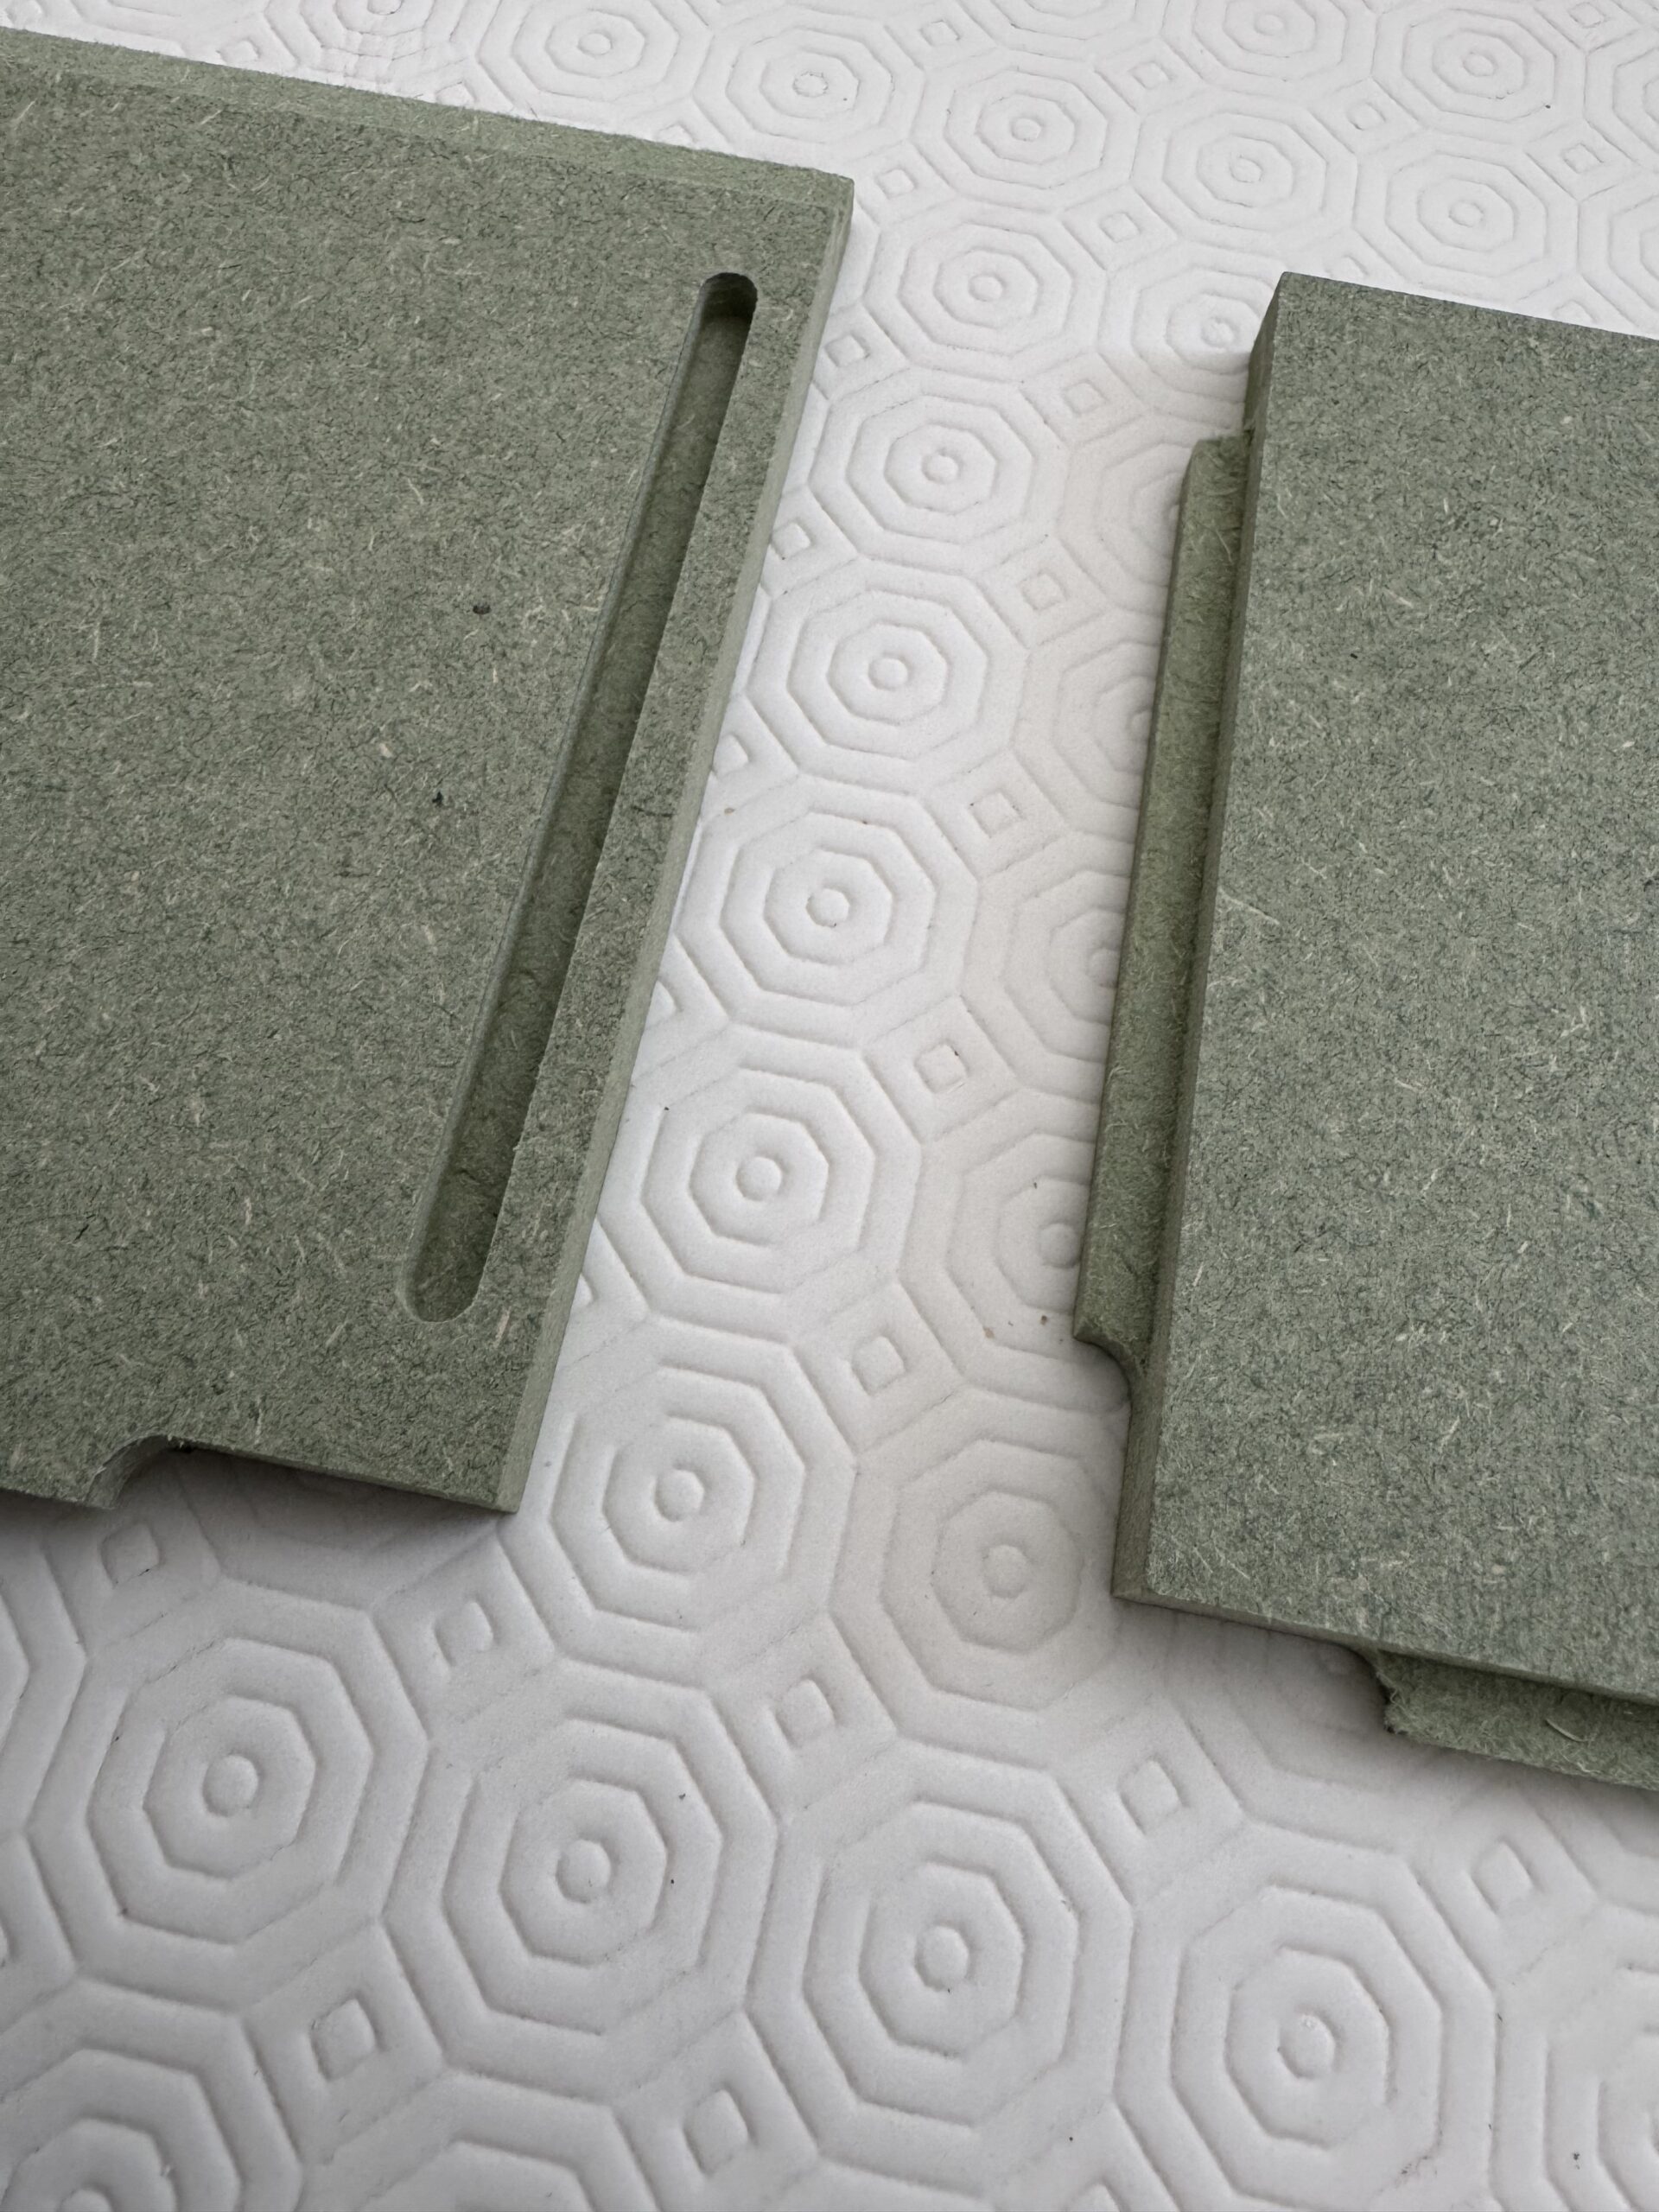
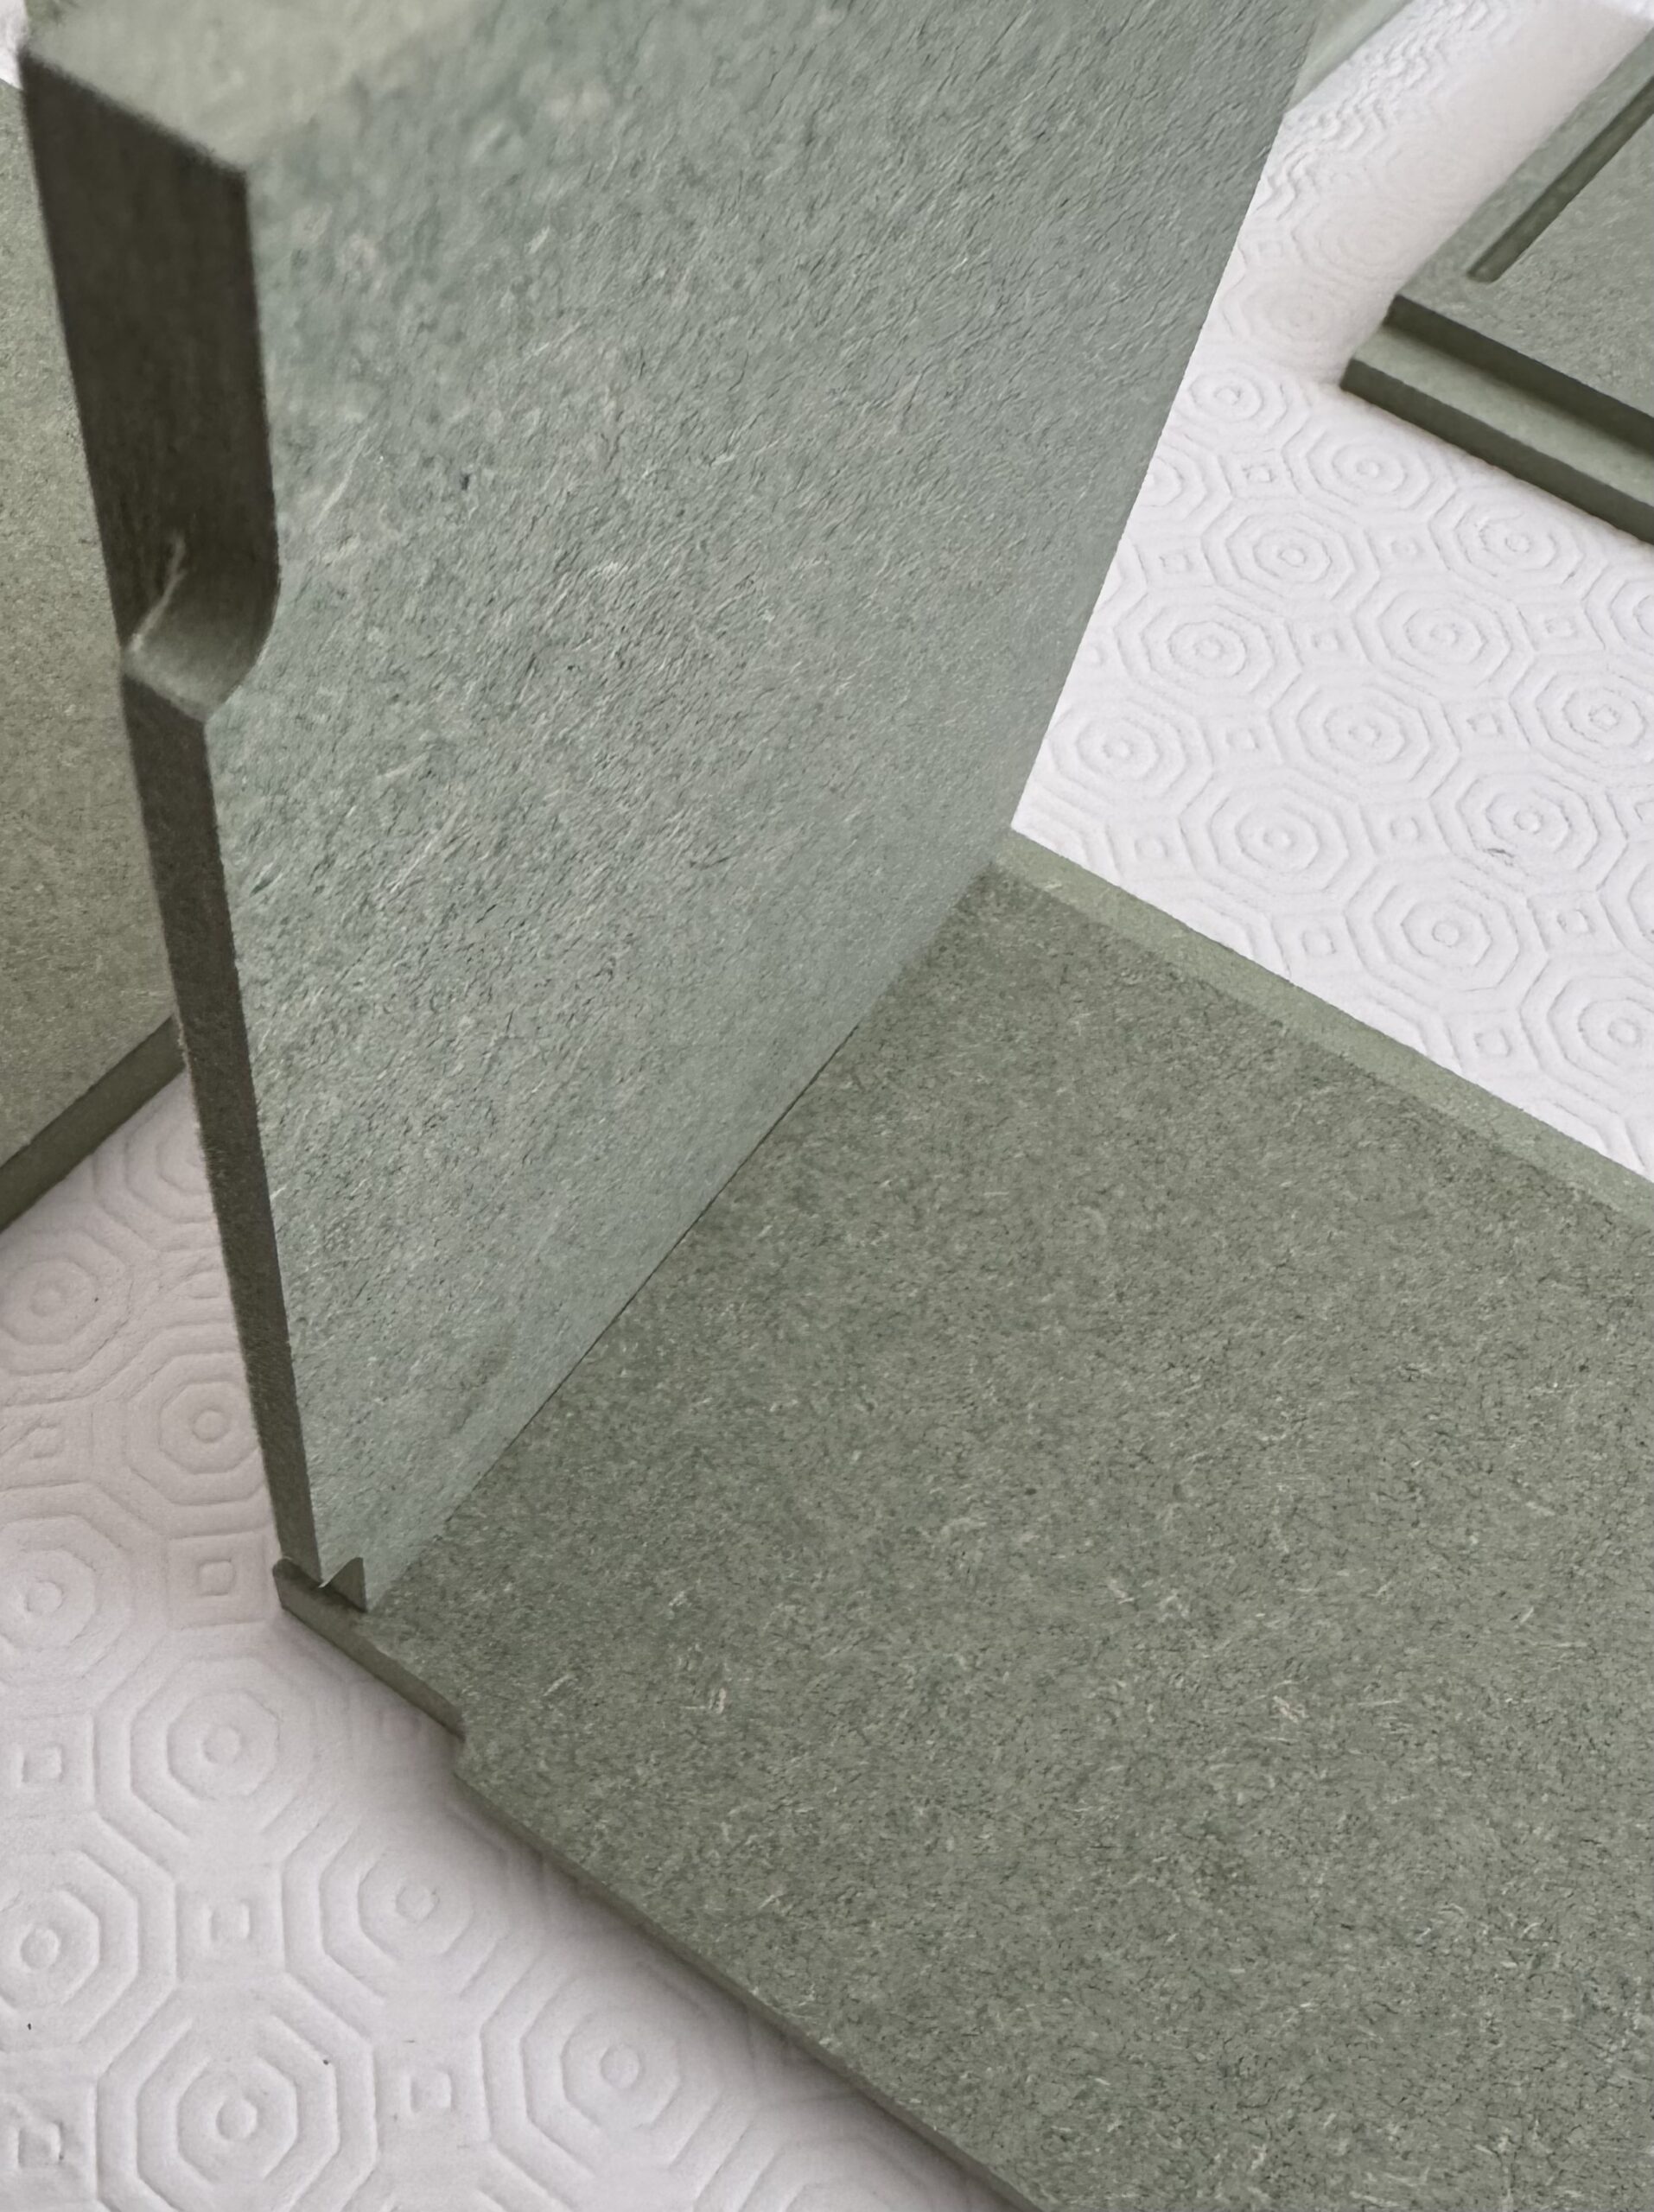
The cabinets are machined with a series of tongue and groove rebates, forming loose tendon joins at the front and sides. The back is glued into a rebate – more correctly a rabbet when it’s on the edge of a piece – on either side and a simple butt joint on the top and bottom.
I liberally applied Evo-Stik wood glue to the joints and assembled the cabinets, checking that everything was square and tight. I would stick to a PVA-based wood glue, but the brand of glue you use doesn’t really matter. Using enough, however, does.
It’s better to use too much (within reason) and have it squeeze from the joints to be wiped up later, than to use too little and end up with gaps in your joints and a box that isn’t airtight. I wasn’t worried about any dry glue on the visible cabinet faces, as I’m going to veneer them anyway.
The kit is constructed of moisture-resistant (MR) MDF, noted by its green core. This is an unnecessary expense where performance is concerned but it makes assembling the cabinets a lot easier. Standard MDF soaks up water-based glue like a sponge, so your assembly time is drastically shortened unless you prime it with an adhesive layer first. Likewise the face grain of MR MDF won’t soak up your adhesive before you get a chance to lay and clamp a veneer, so you’ve less chance of a final glue-up with patches of veneer that haven’t adhered.
The instructions recommend a band clamp be used to hold the cabinets while the glue dries, though you can achieve the same results with F clamps, masking / painters tape or even standard parcel tape. Plastic parcel tape makes a great clamp as it stretches enough to apply a surprising amount of pressure without breaking, and if you buy the clear stuff it won’t hide the joints so you can see if you have any gaps or misalignment before the glue sets.
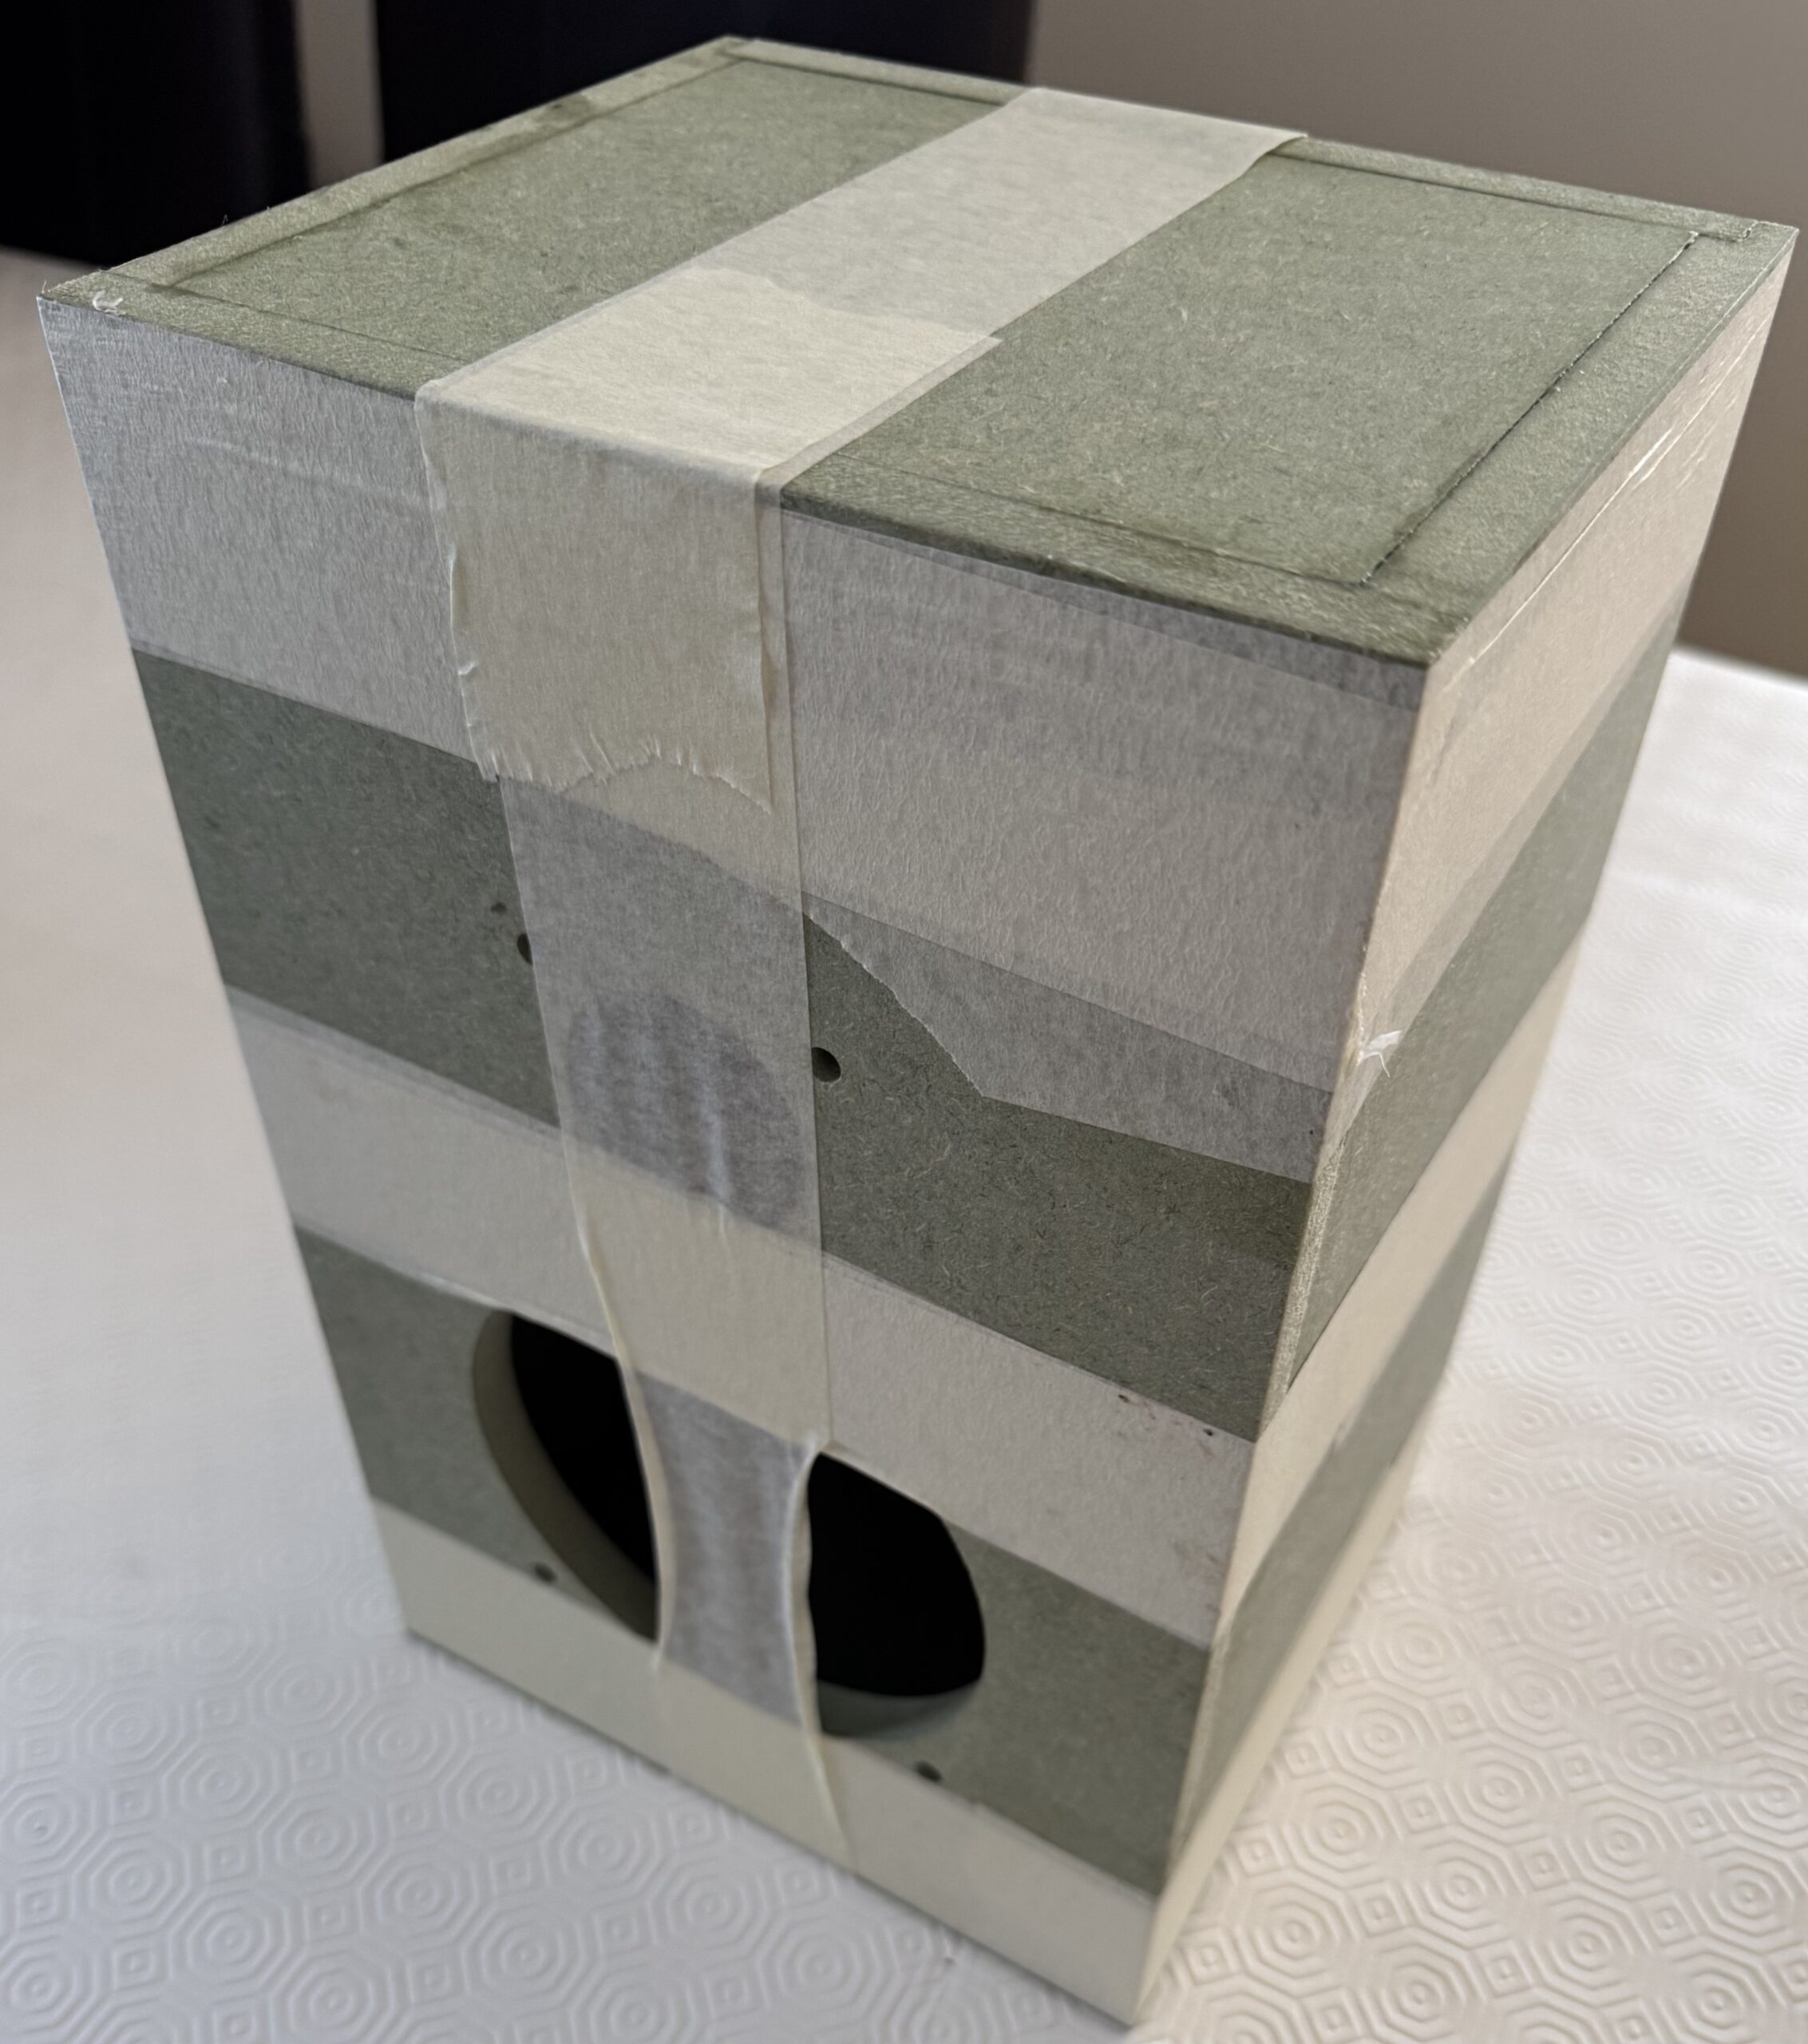
I’d usually turn to the brad nailer for this job but I chose to assemble the cabinets as might any DIYer without a fully equipped workshop. So I used 50 mm masking tape, stretched around the cabinets to apply clamping pressure until the glue dried. Three wraps around the centre and each end, and a centred wrap running vertically along the cabinet was perfectly sufficient.
Contrary to common belief you don’t need a lot of clamping pressure, just enough to hold the joints together while the glue sets. PVA does shrink as it dries, but the last thing you want is to apply so much pressure that you squeeze every drop of glue from the joint. This is just something you learn from experience, but as long as you don’t have gaps in your joints, and your panels are aligned and cabinets square you are good to go.
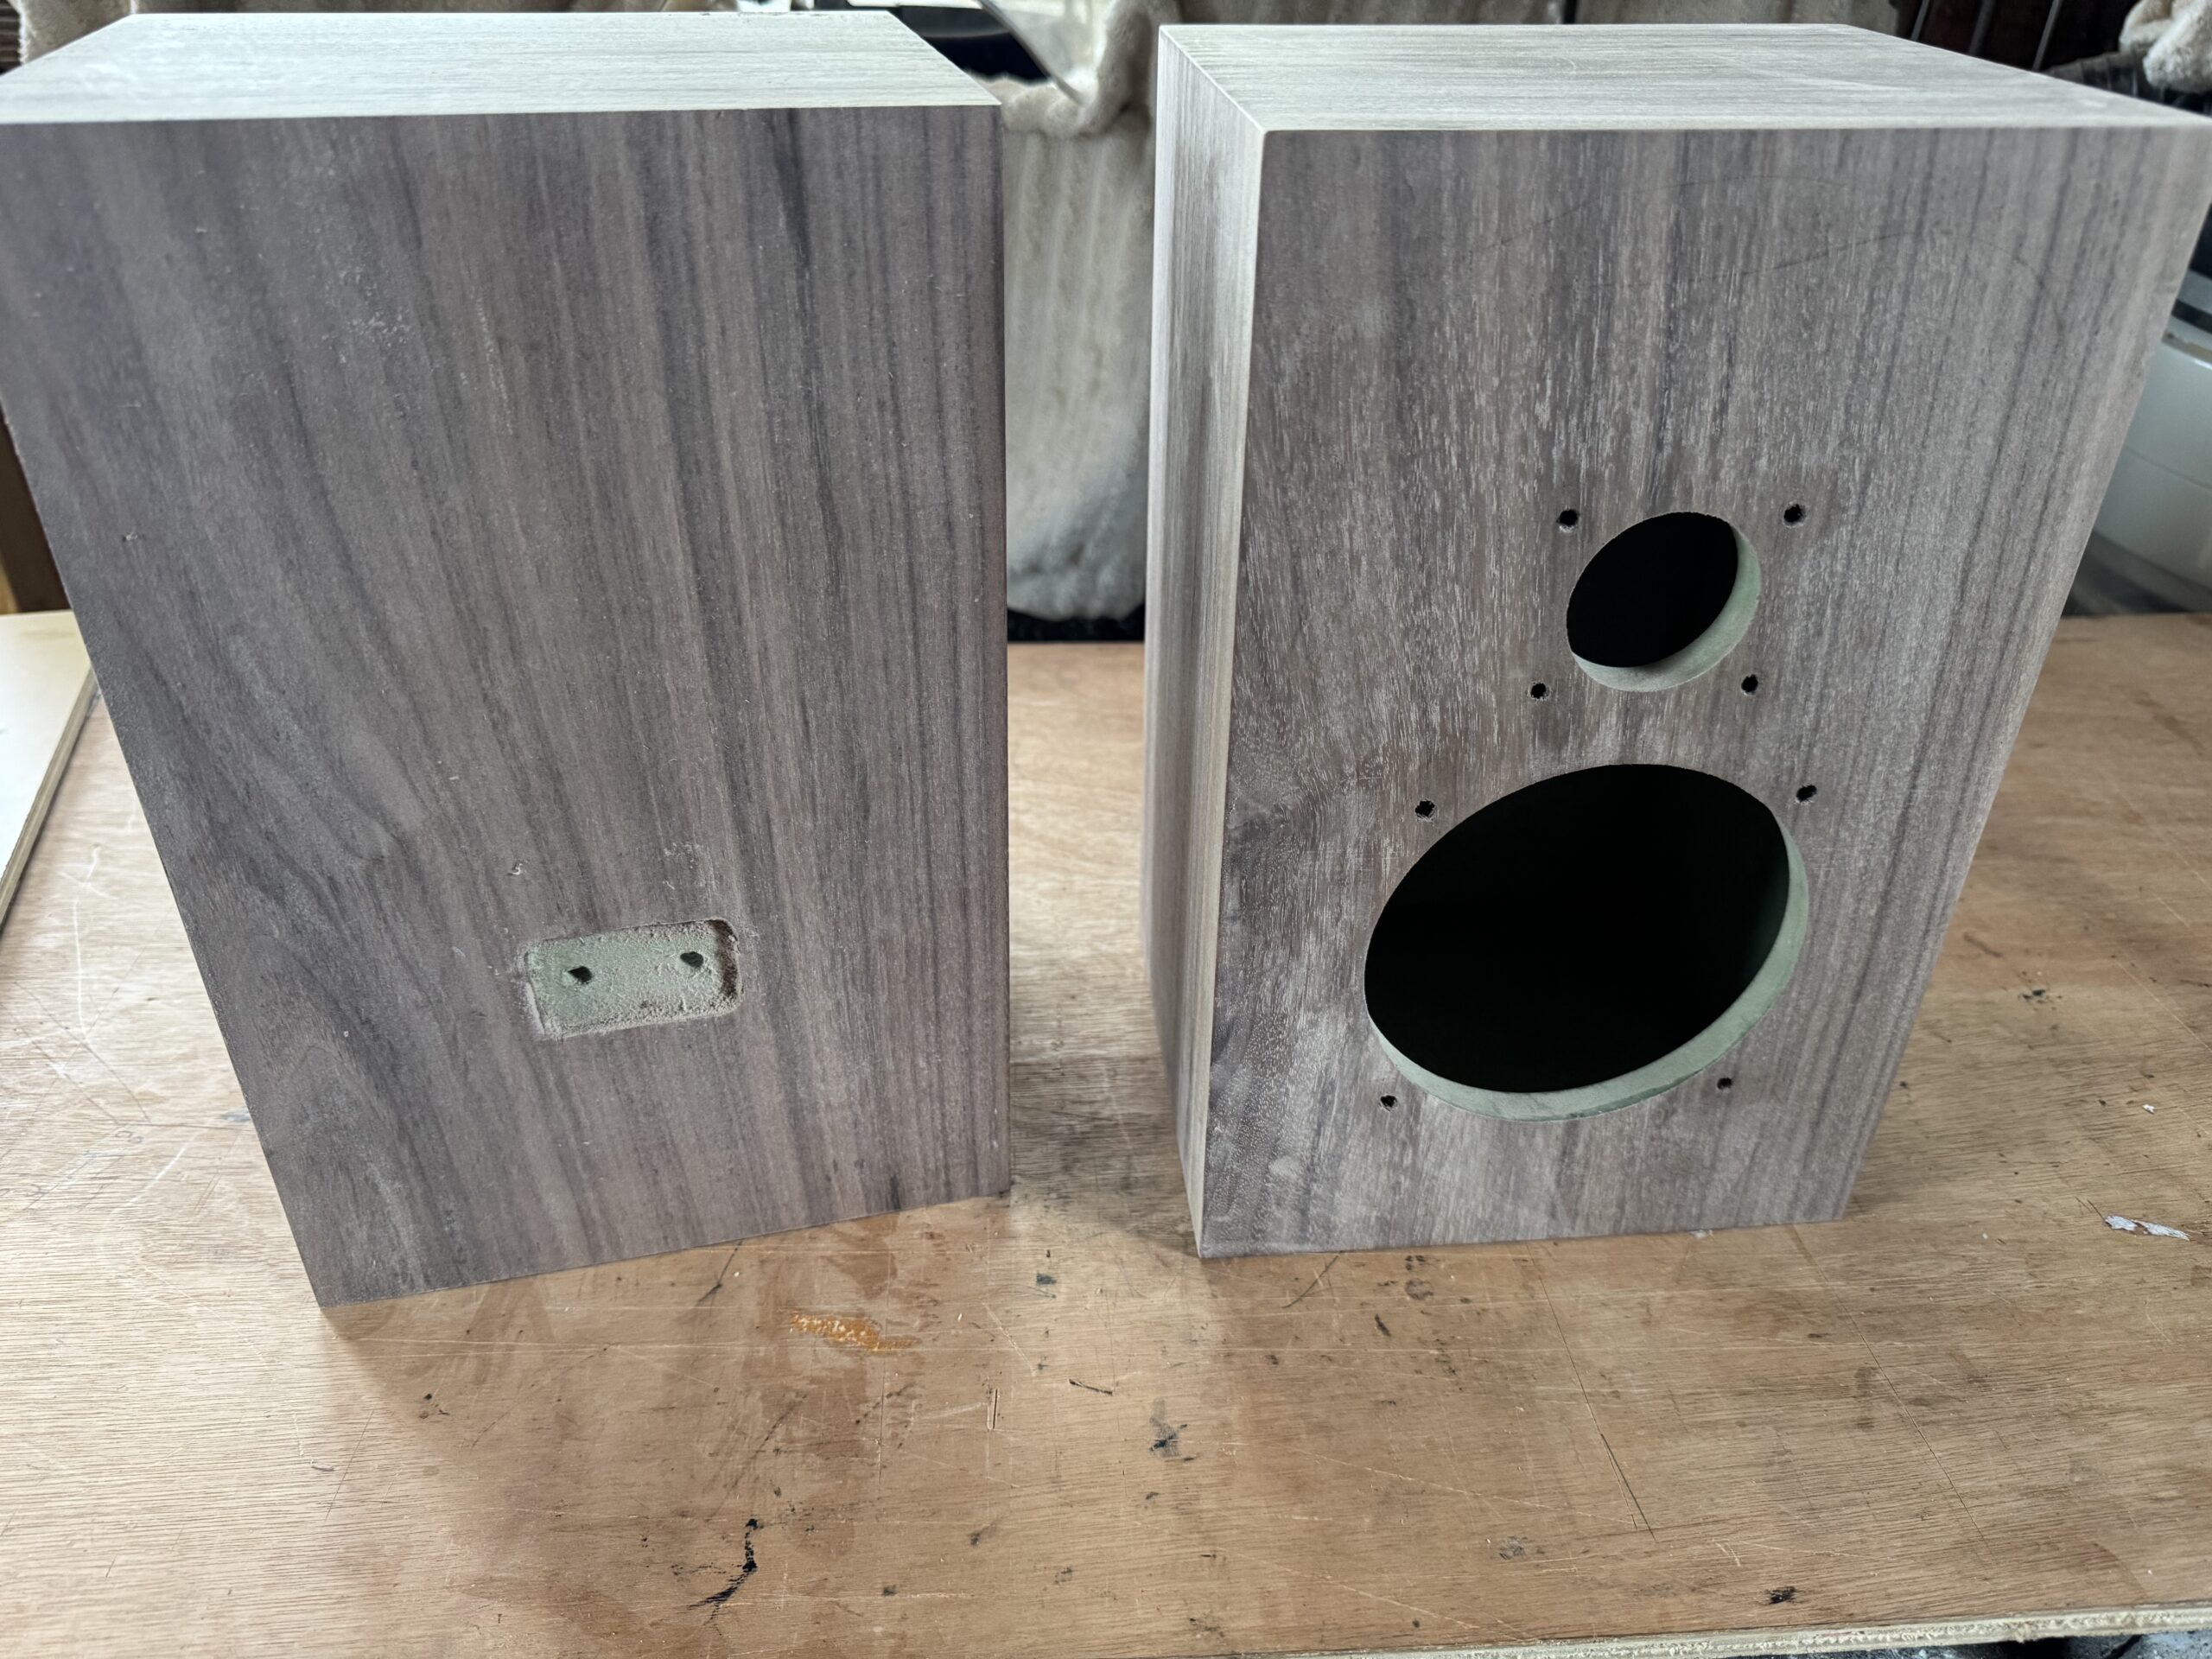
I tried to clean up as much of the glue from the inside as I could reach. I’ve always found “you can’t see it anyway” a poor excuse for shoddy workmanship.
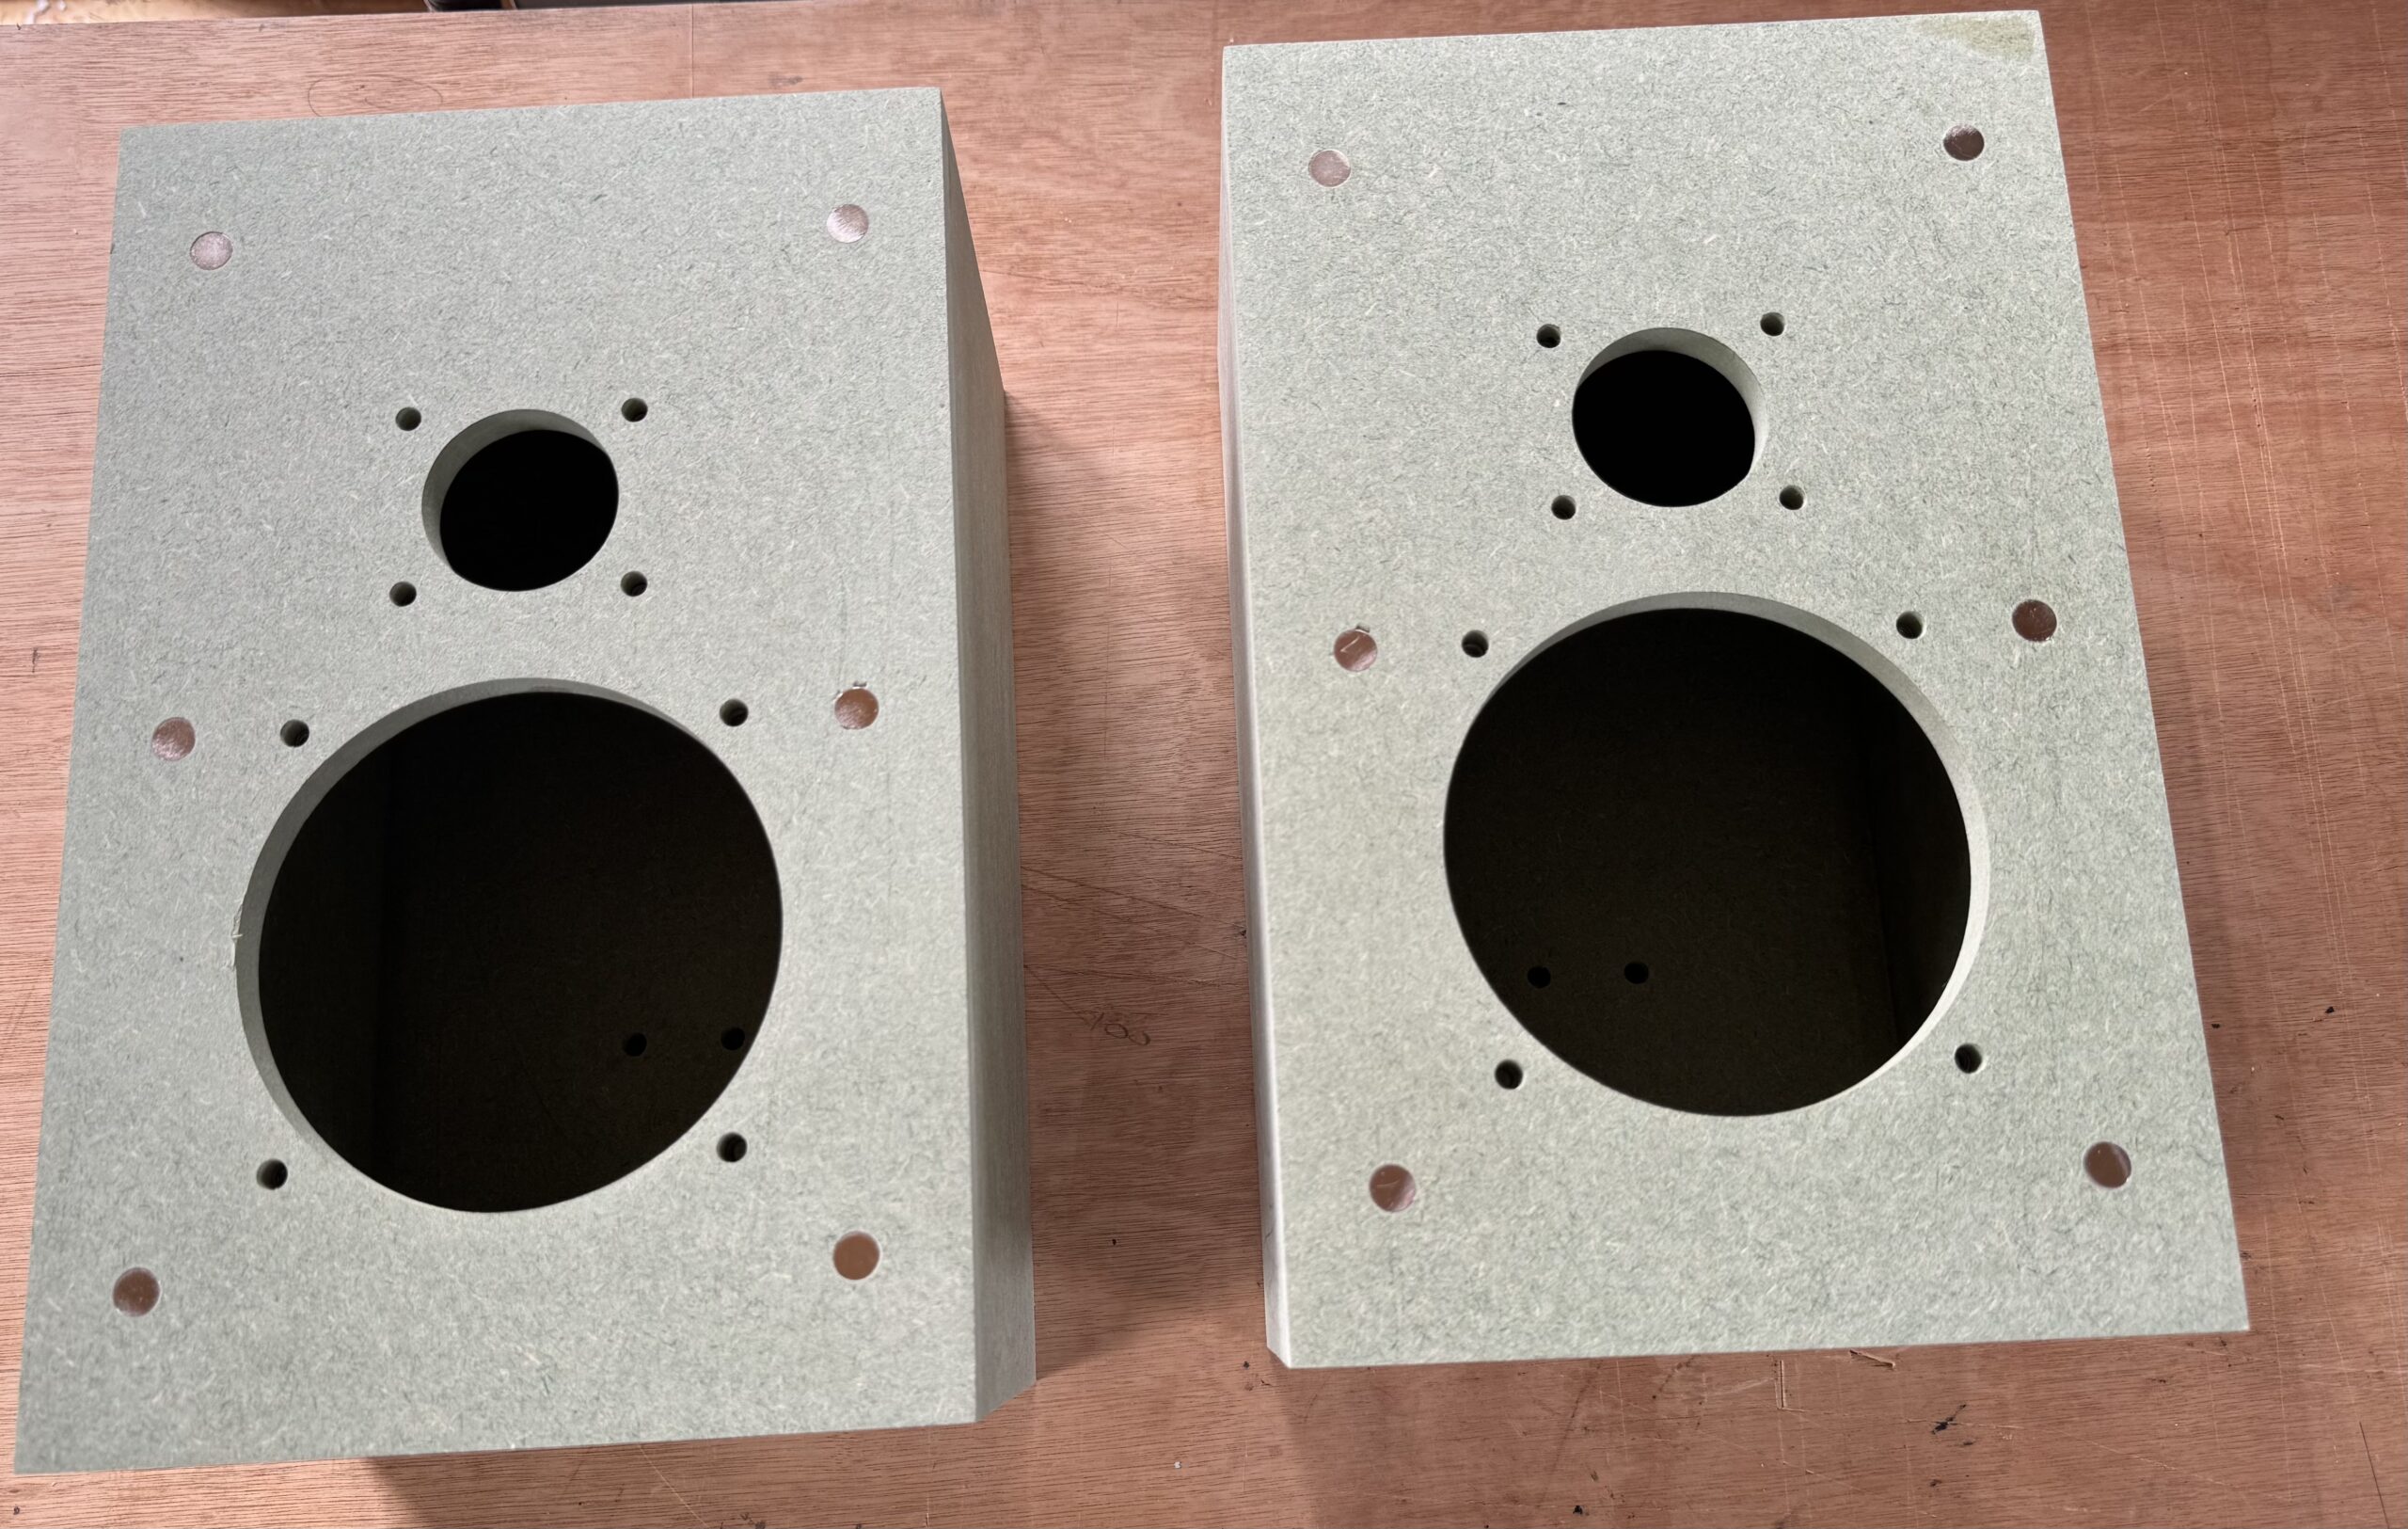
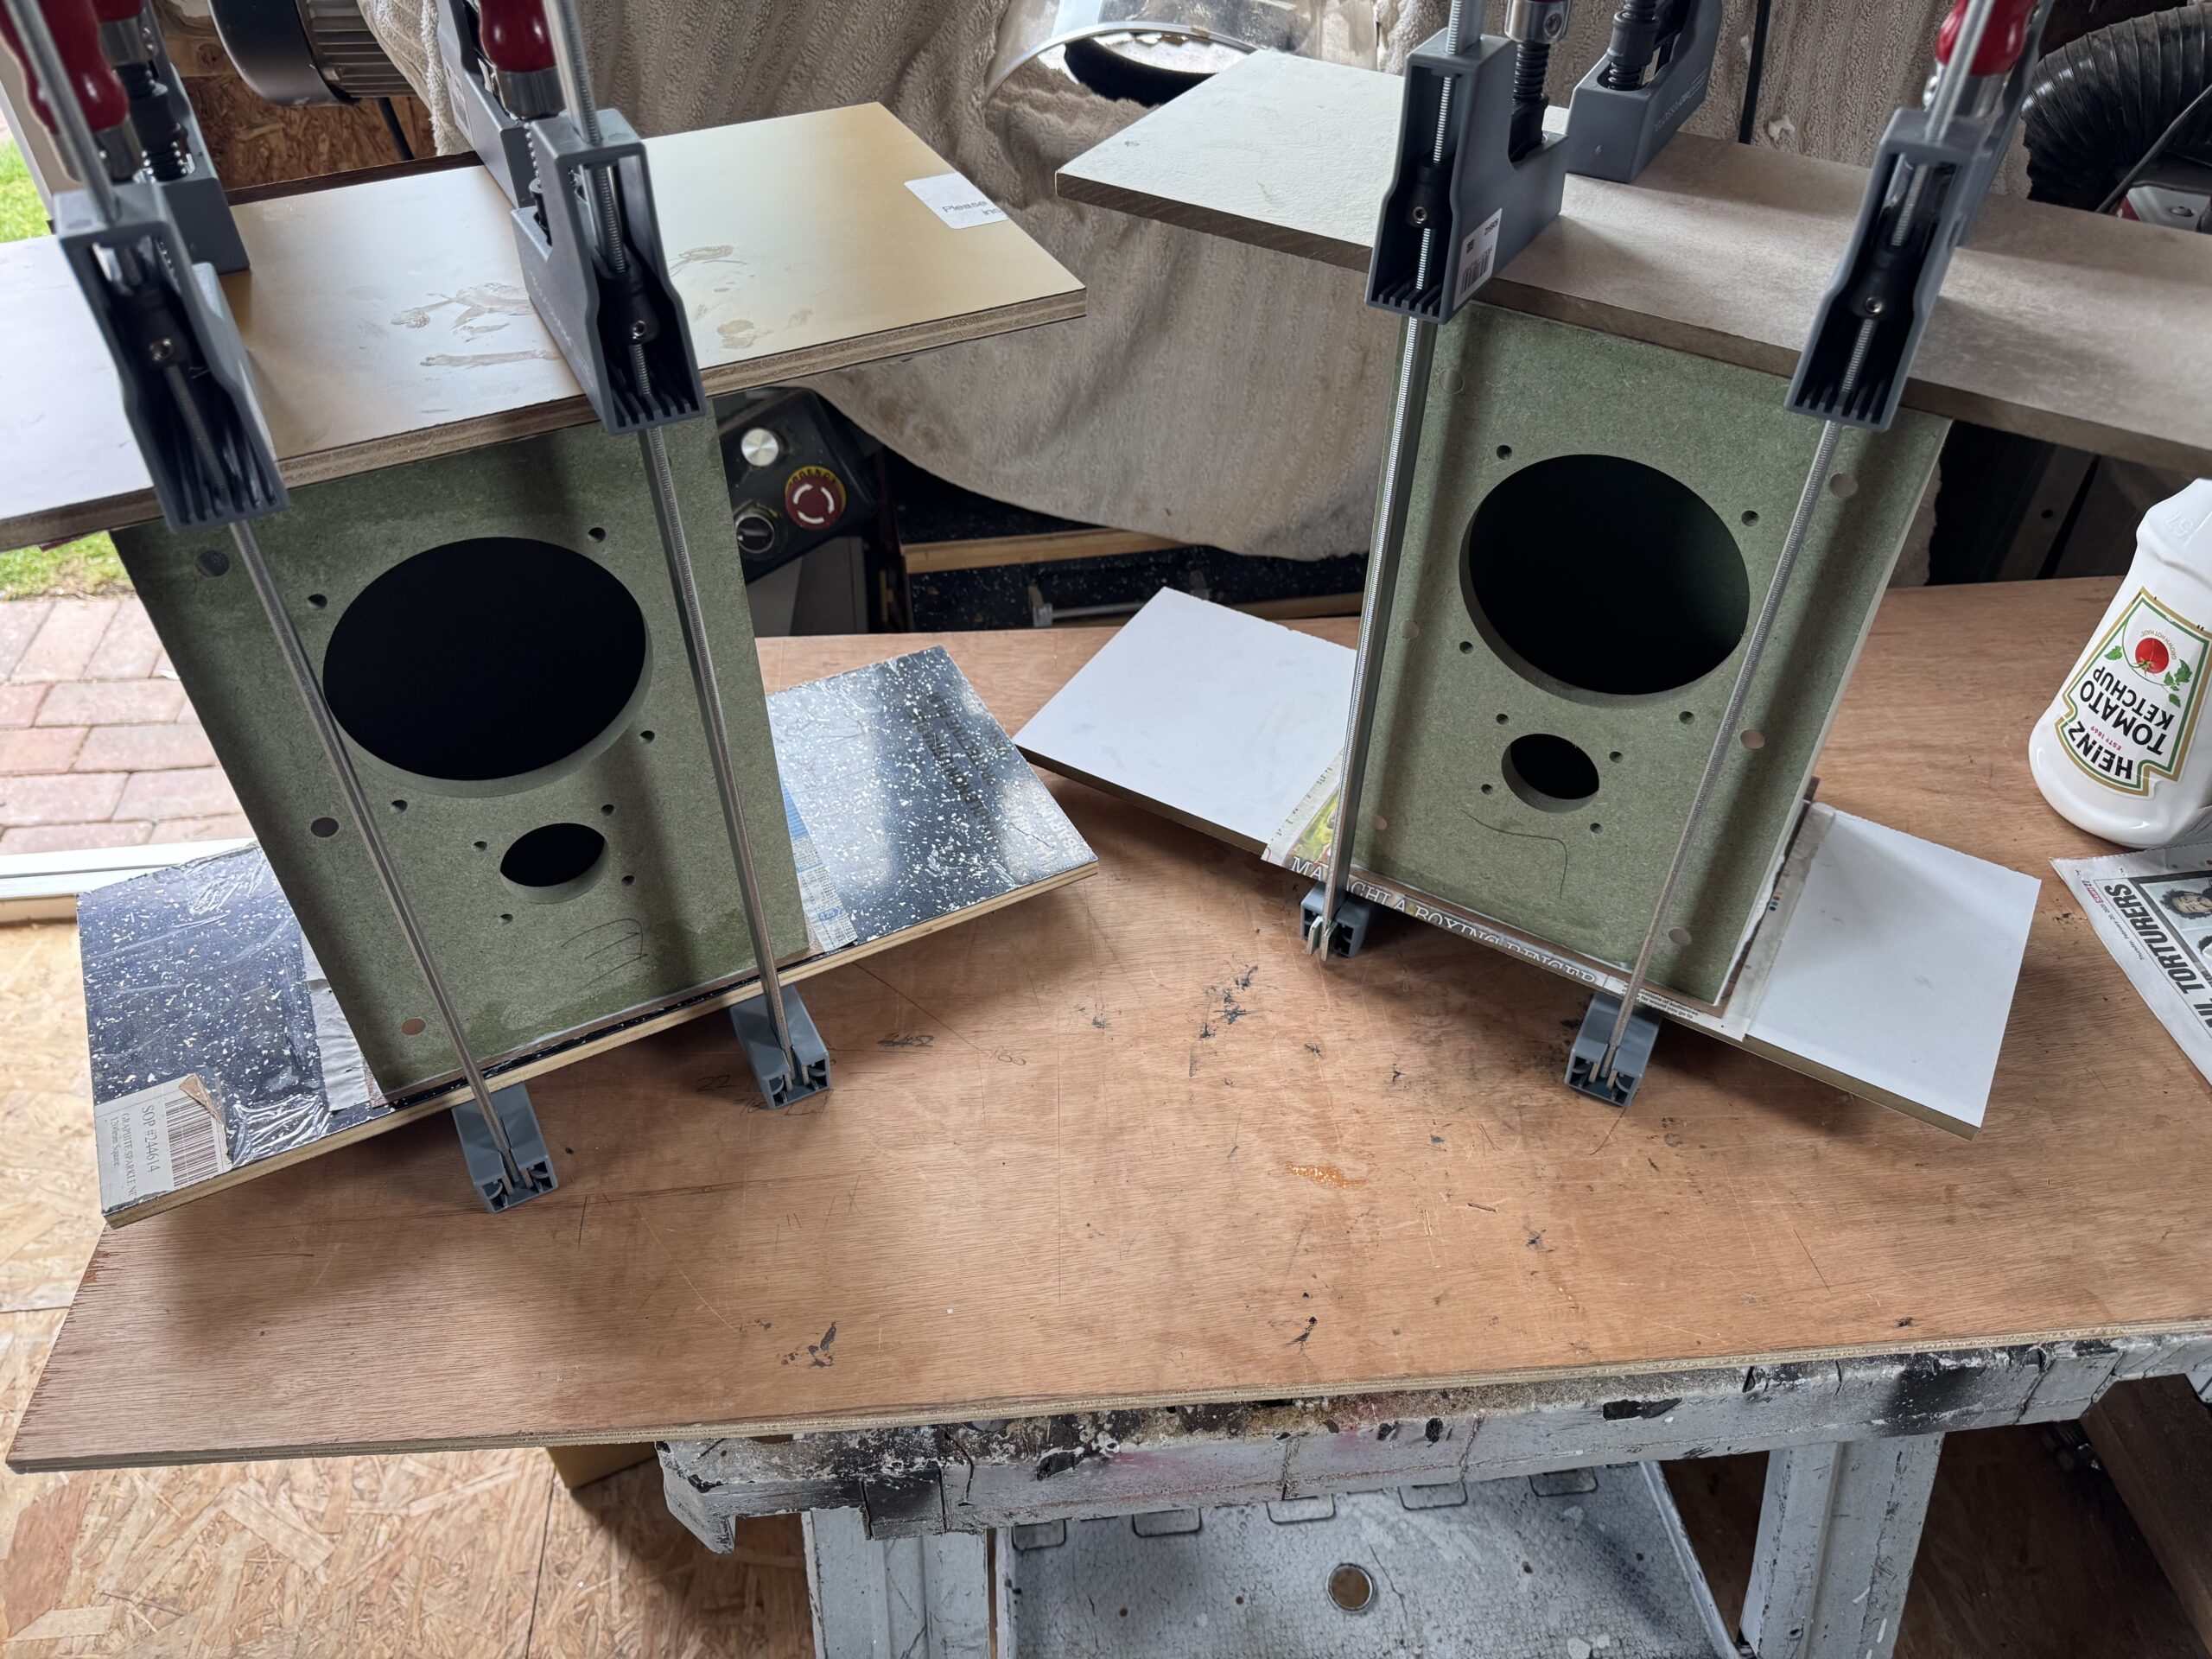
I then sanded the cabinets to 120-grit with an orbital sander to remove the few bumps on the joints between panels. If the tenons were a tighter fit these would be less likely, but there is some wiggle room in the assembly of the boxes. Take care during assembly to ensure the boxes are square and the panels flush, and minimal sanding will be required.
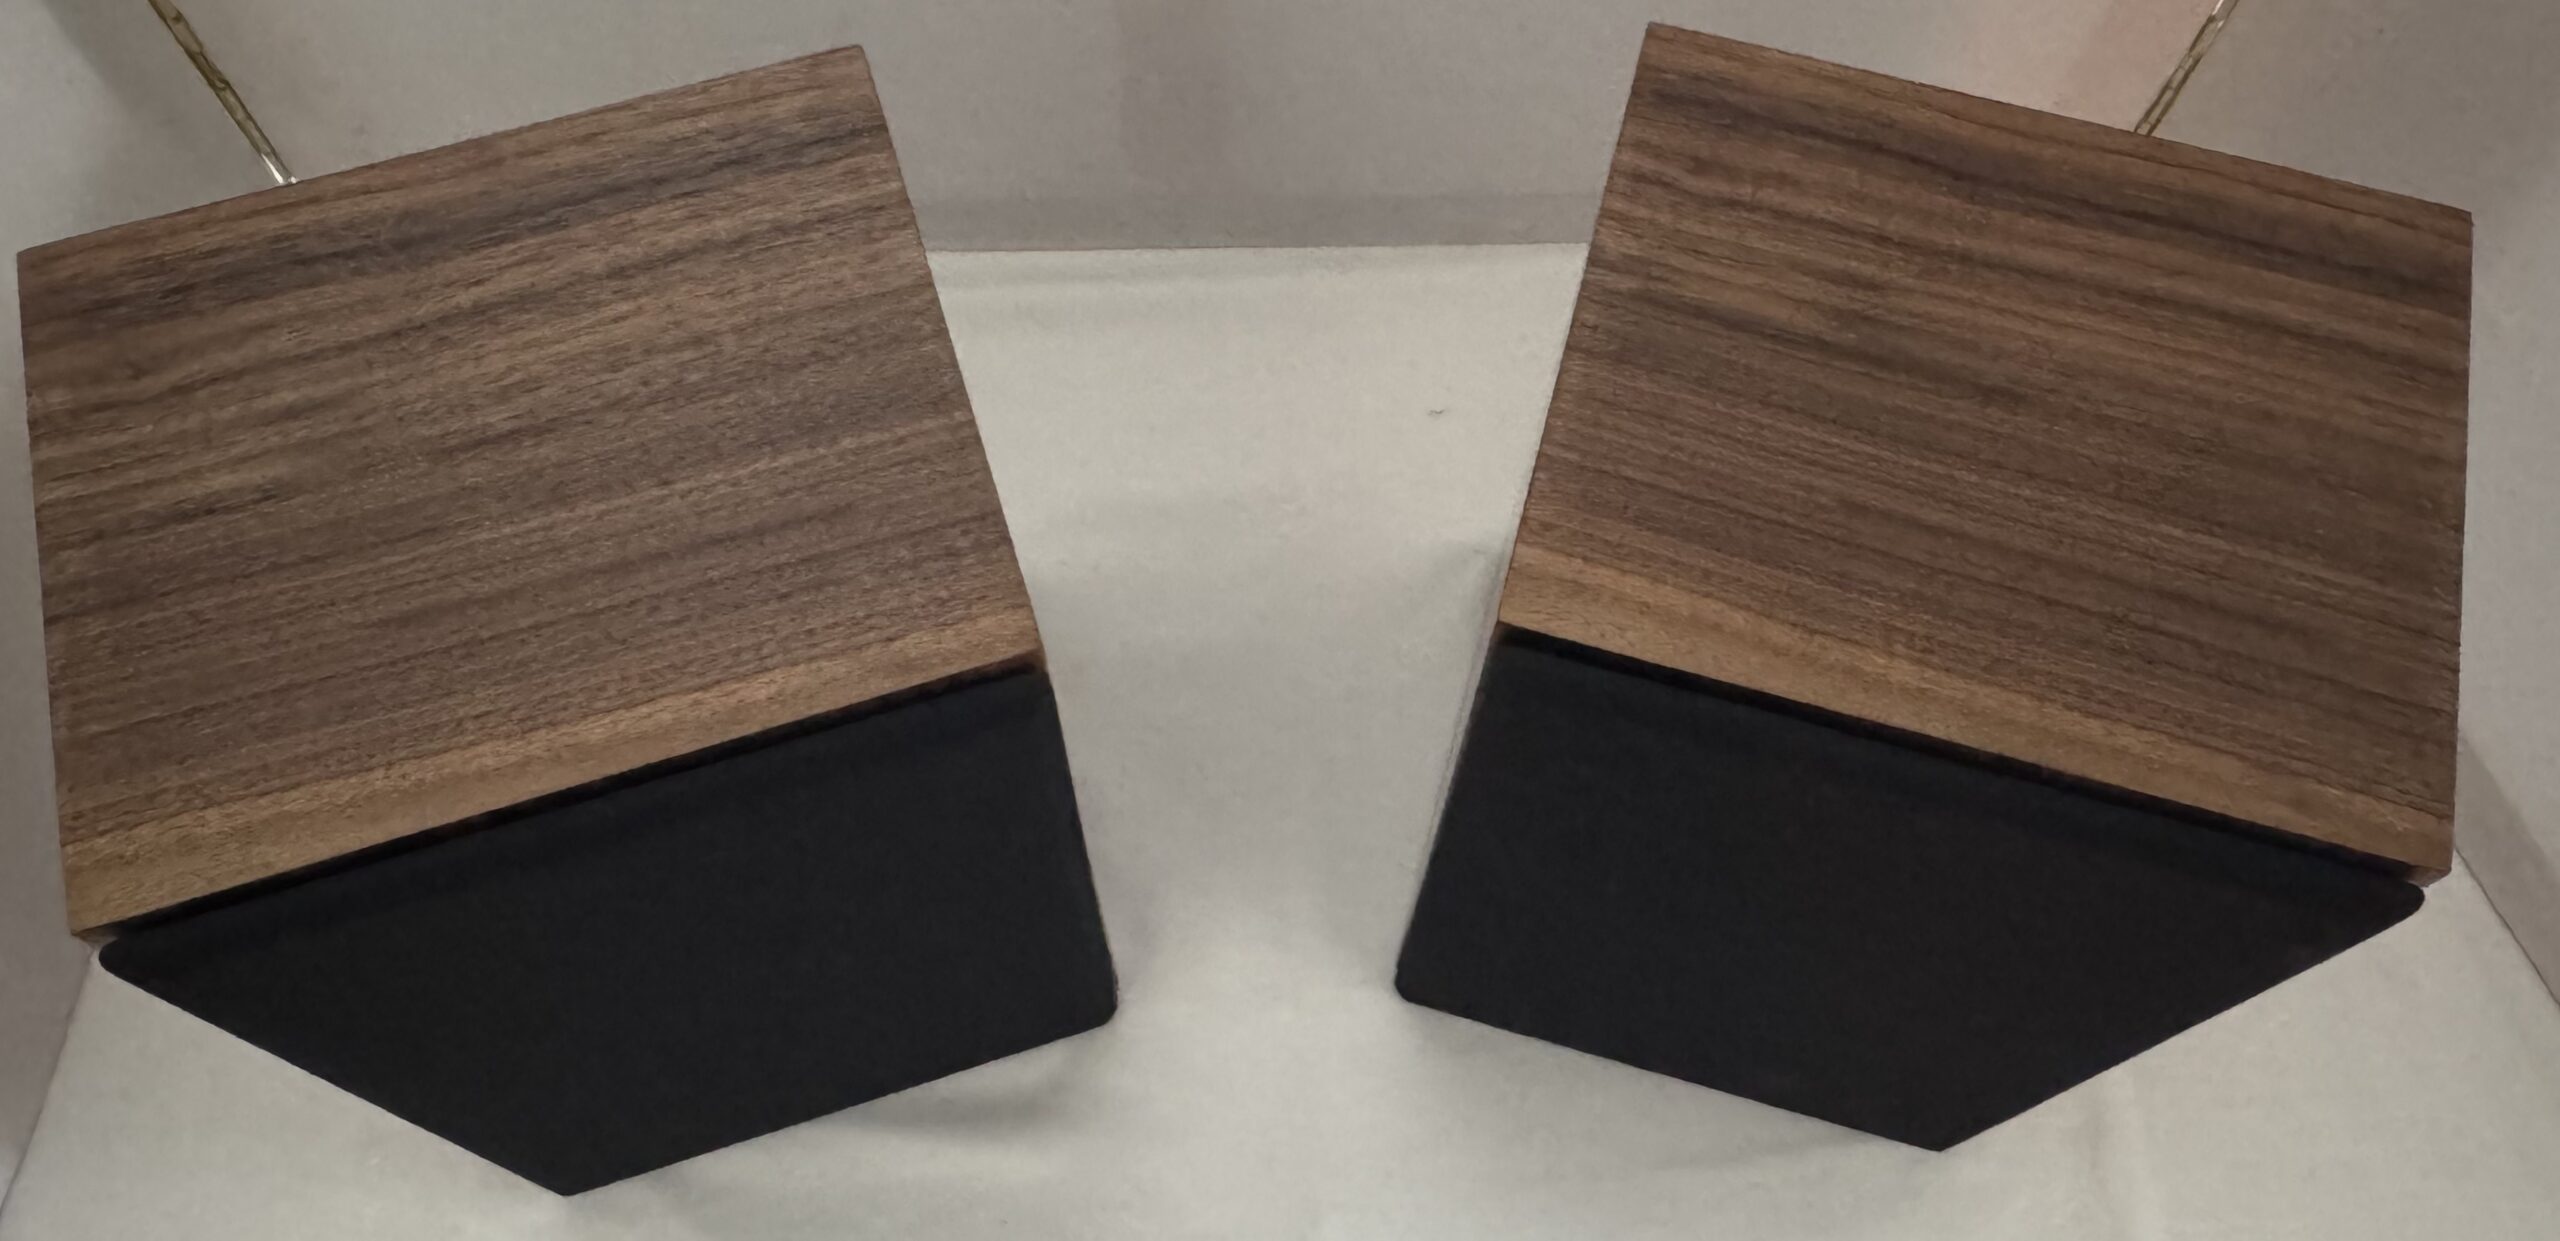
Adding Grilles
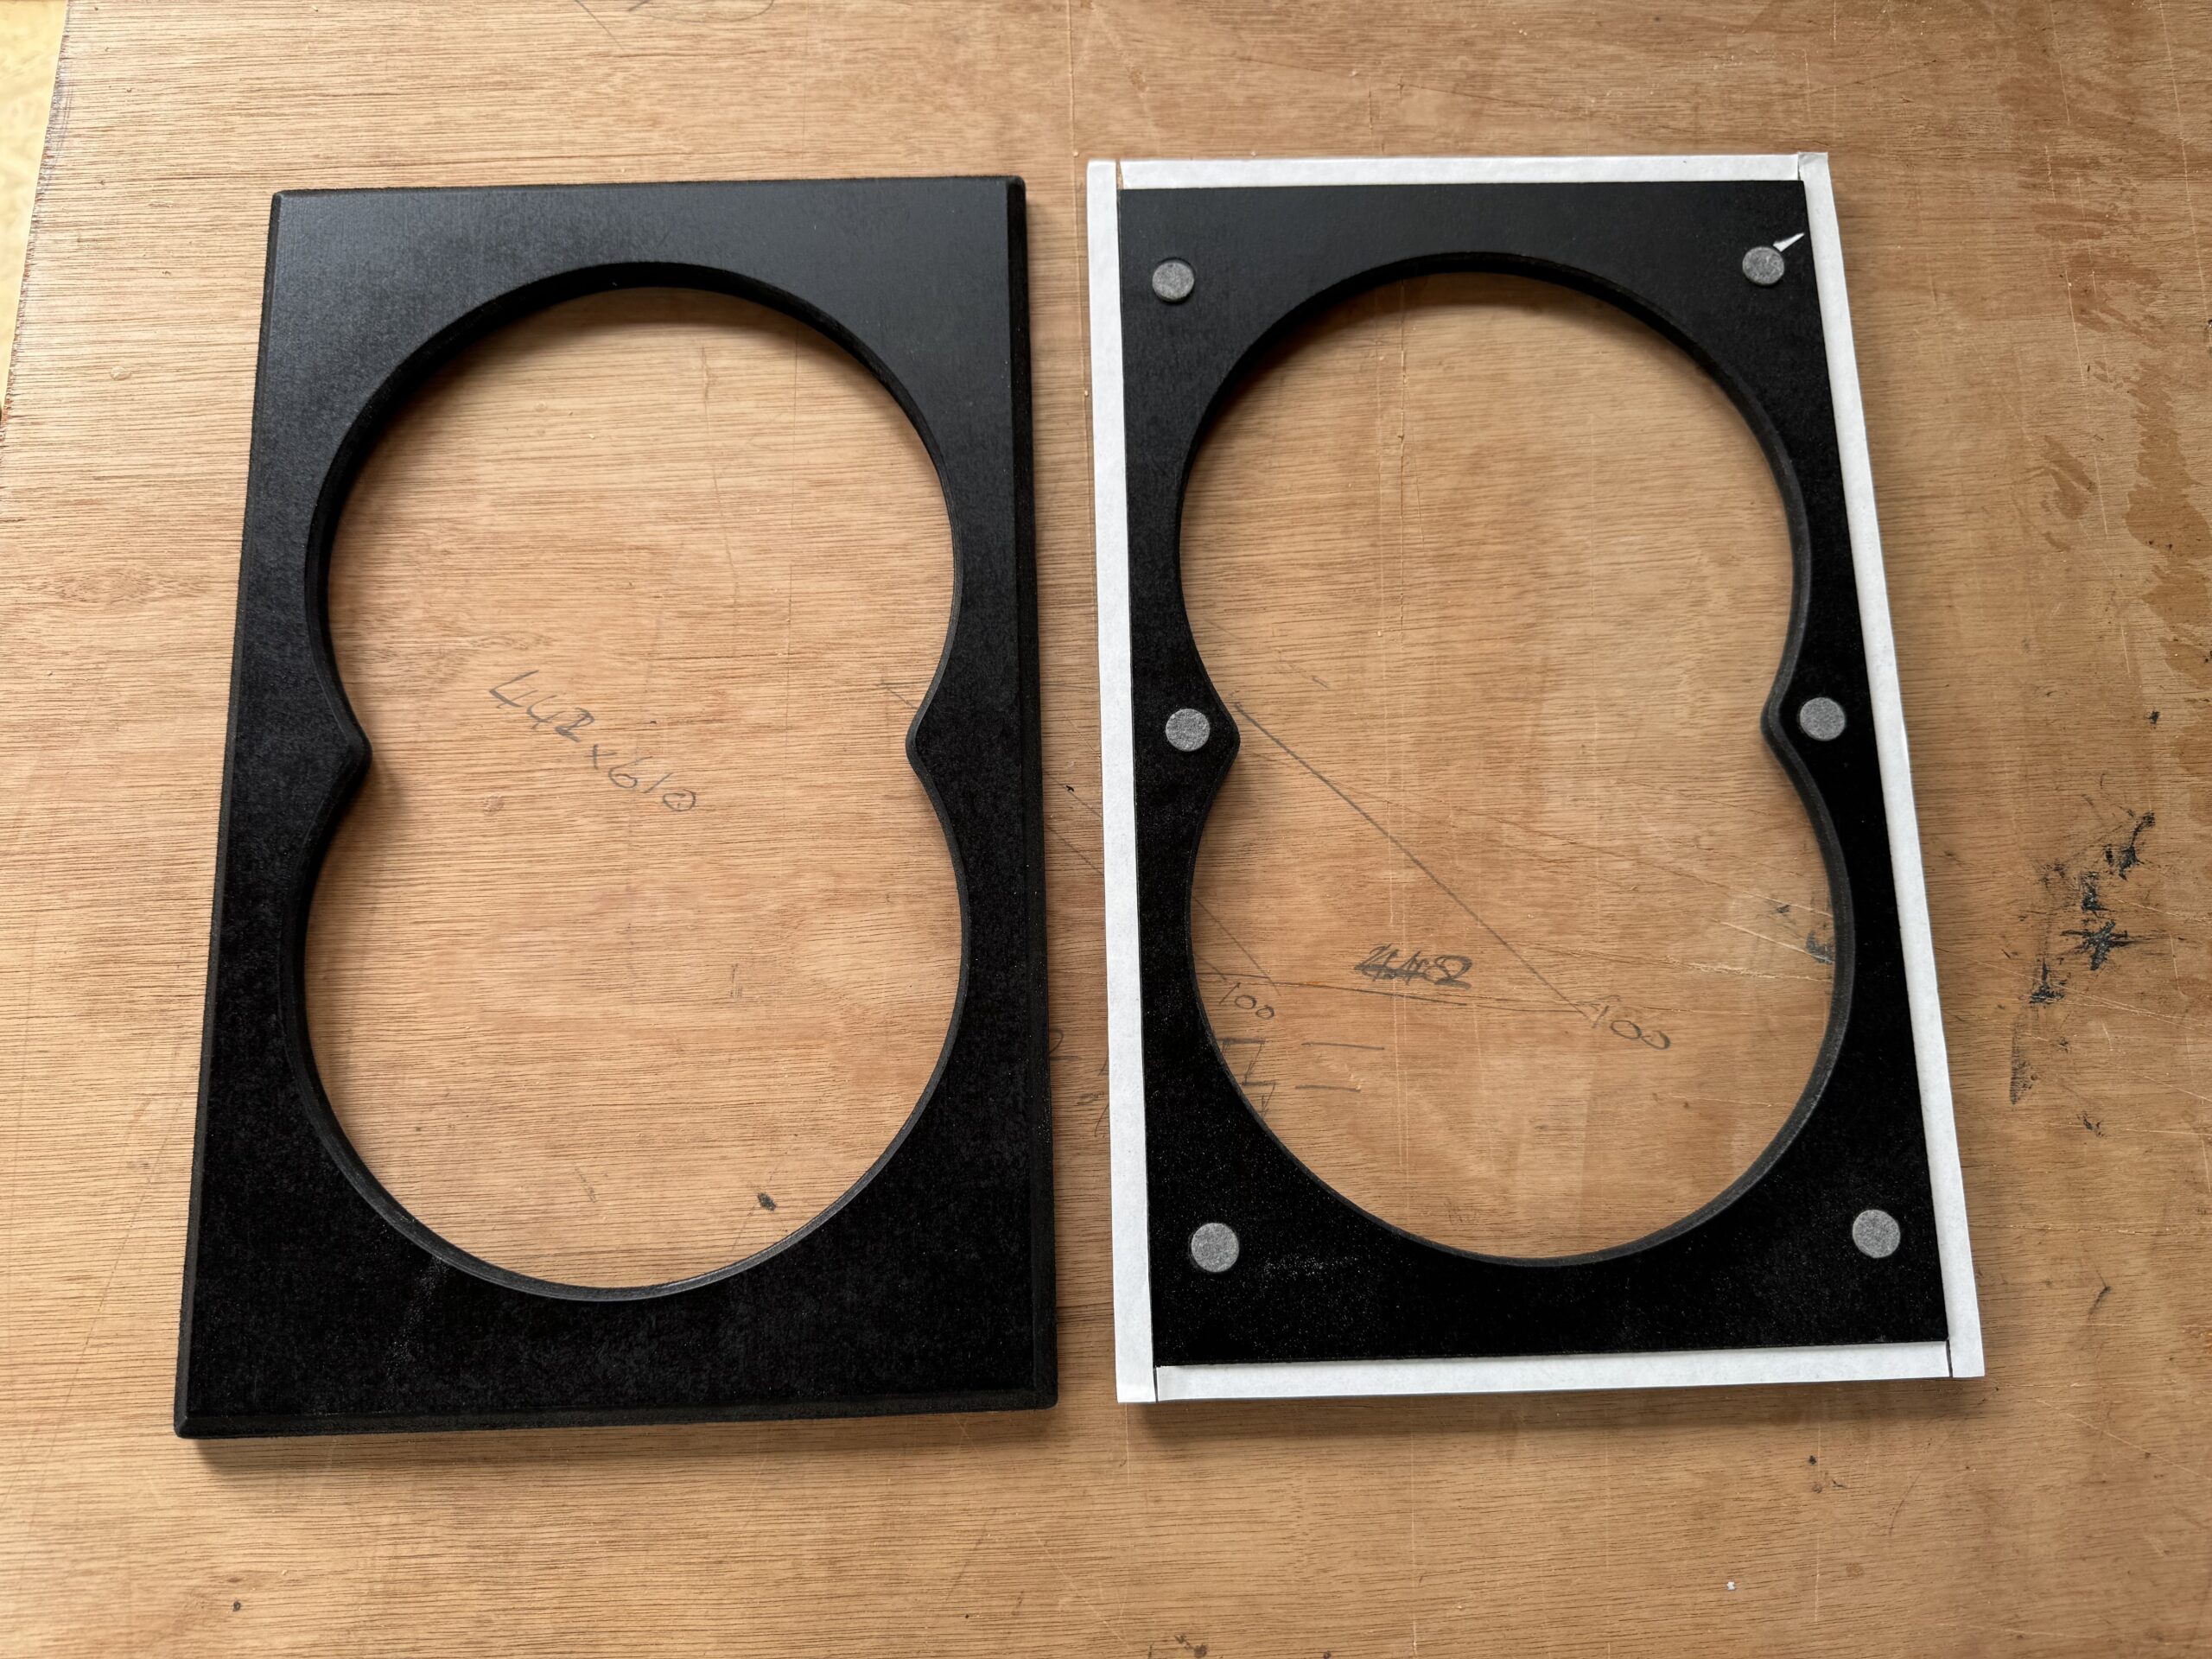
Deviating from the kit for a moment. I knew I wanted to add grilles, but I wanted to do so without visible fixings. I made a template for my grille by first cutting a piece of scrap MDF to the size of the front, minus 2 mm horizontally and vertically. I then traced a curved shape onto the template, roughly following the shape of the long side of the woofer basket. I replaced that shape on both ends,, sweeping slightly inward at the centre to give me some mounting points.

I cut the template with a router, but you could do the same with a jigsaw or even a coping saw and sandpaper. Having the template allowed me to use a flush trim bit, again in the router, to produce 2 identical grilles. I could also use the template to lay out the positions for the 6 magnets, and drill 3 mm pilot holes to transfer to the front panel.
I stuck the drilled template to the front of each cabinet with double-sided tape, used a centre punch to mark the positions of the magnets, and took the cabinets to the drill press to drill those holes to a precise depth of 3 mm into each cabinet.
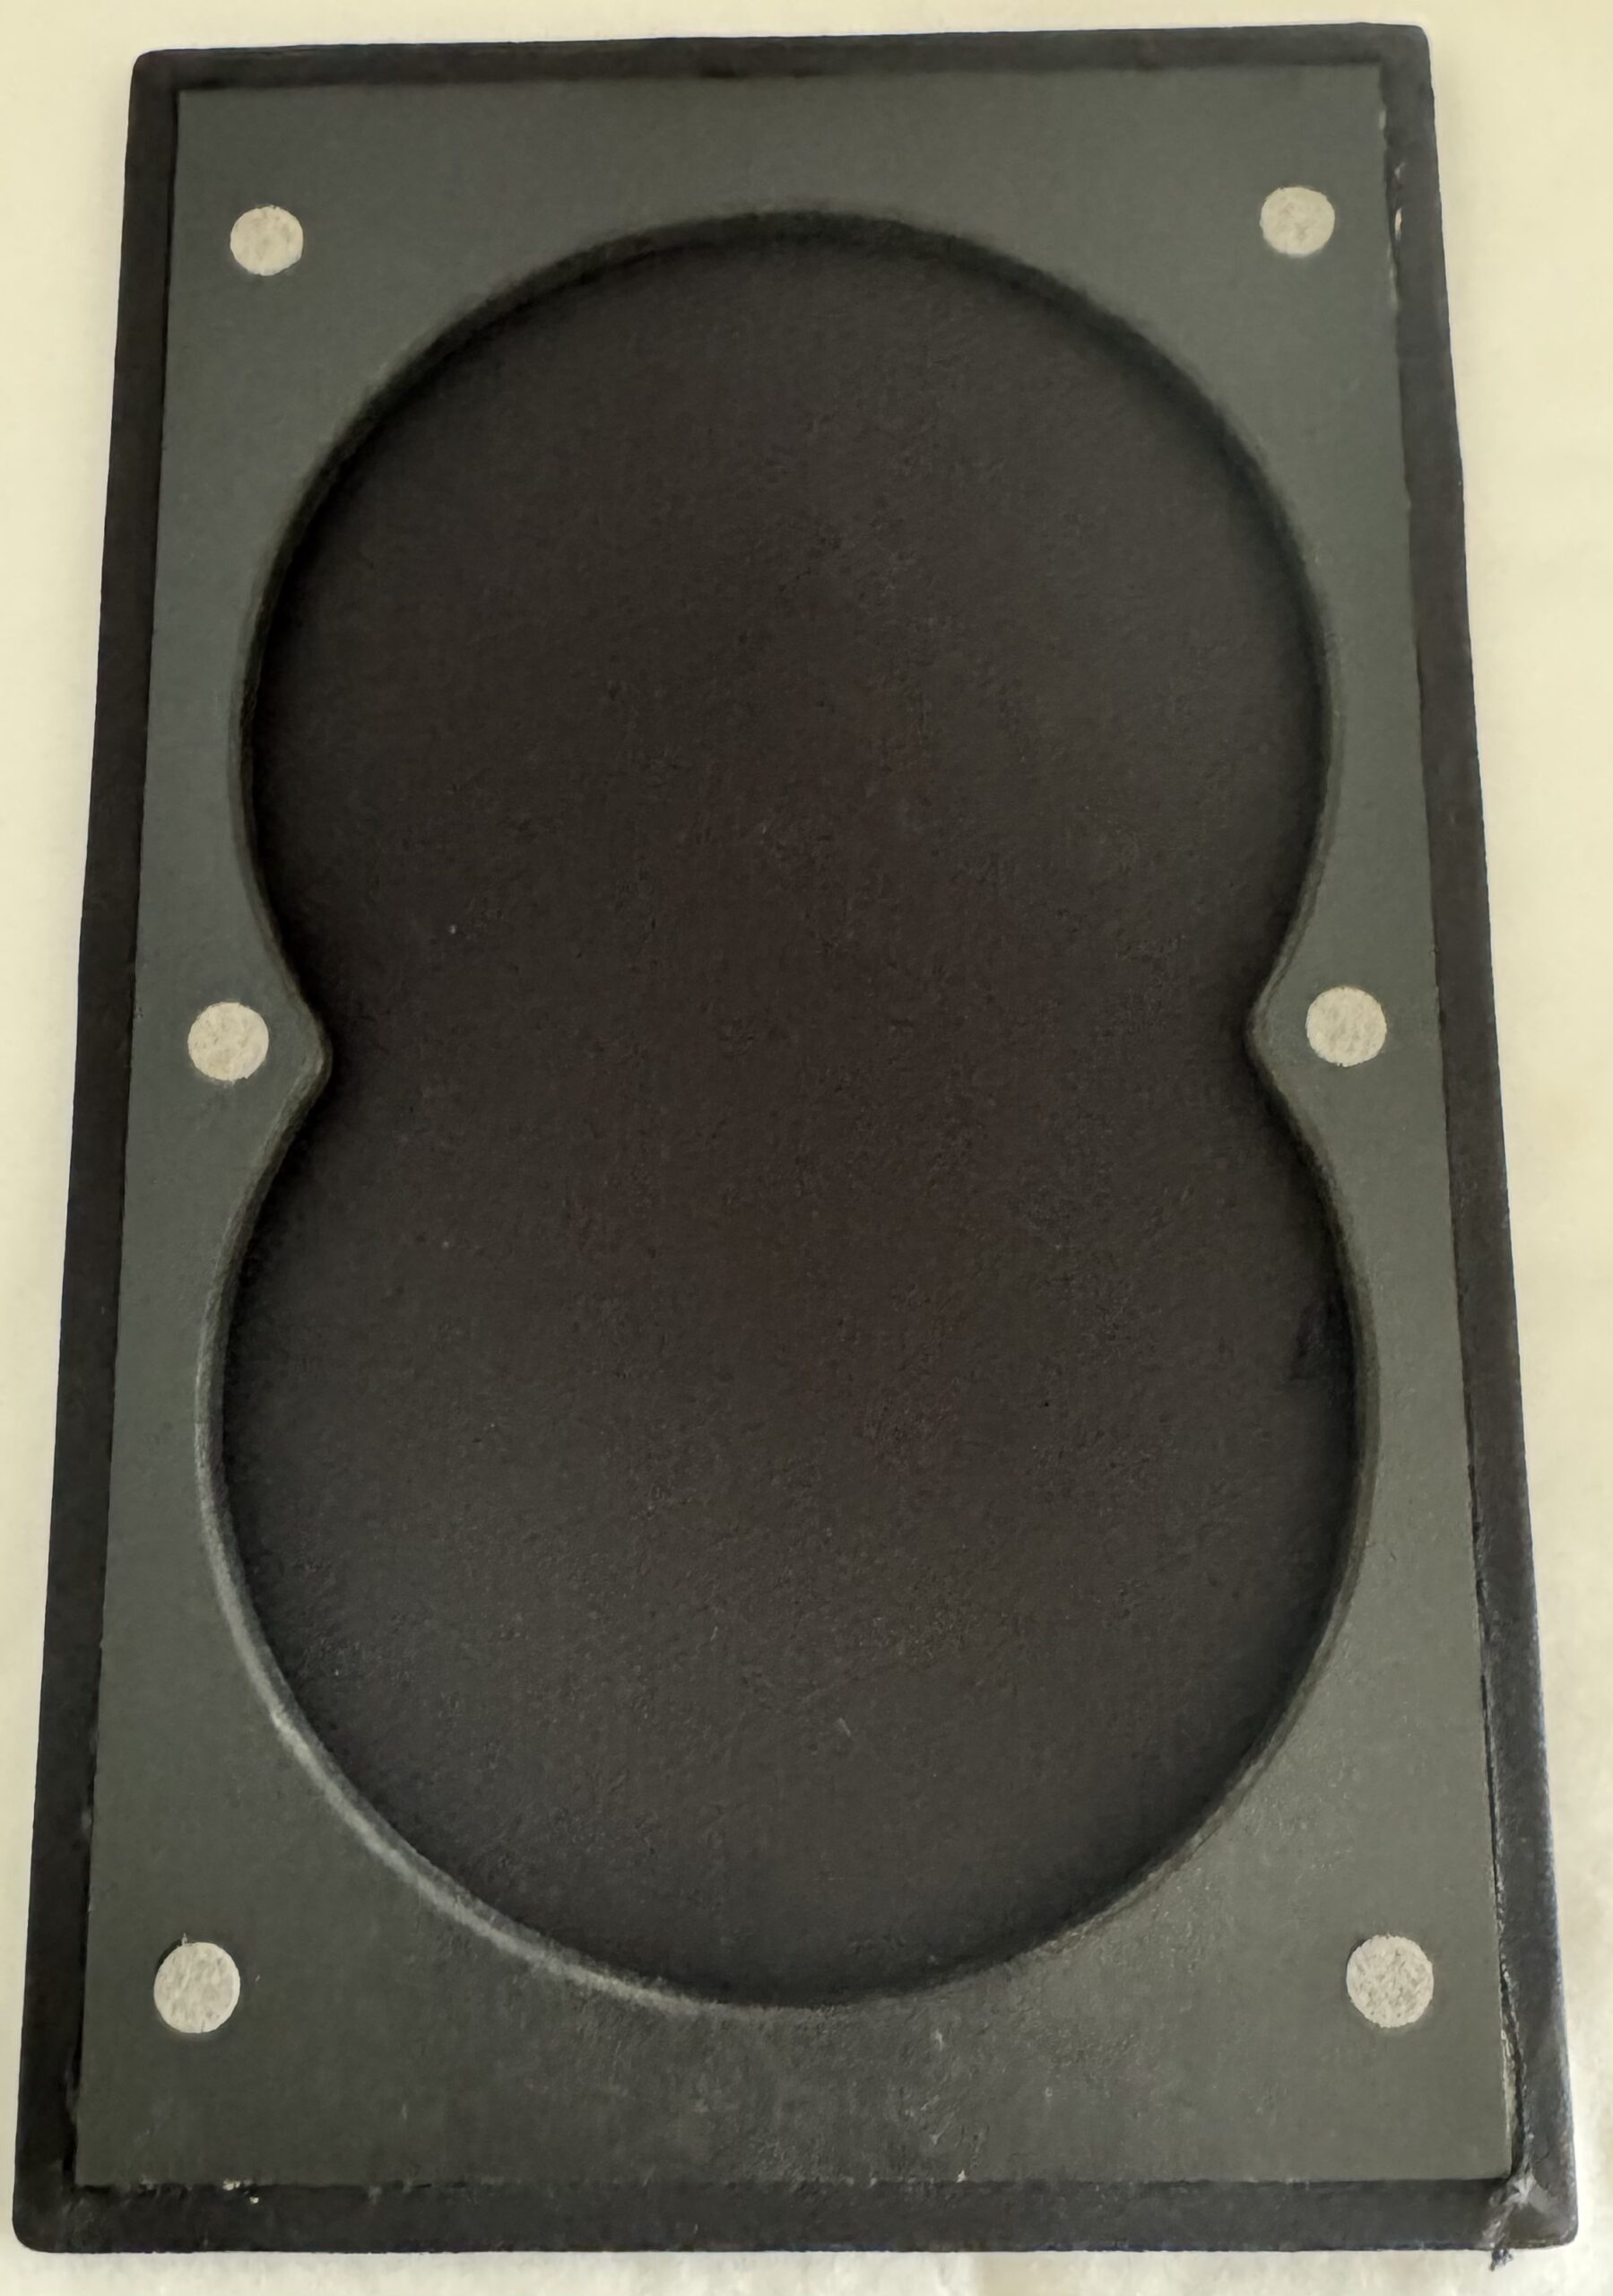
I replicated the magnet positions on the back of each grille. I didn’t have any 3 mm neodymium magnets, but I did have plenty of 2 mm and 1 mm thick x 10 mm round magnets that when stacked back to back achieve the same result. 6 of each were fitted to each cabinet, and a further 6 to each grille. They’re pressed in with a dab of epoxy.
If you don’t have a drill press, you can do this by hand using a drill bit fitted with a depth collar. You can also wrap tape around the bit to stop it, but your hole depth may be imprecise so you’ll have to fill the holes after installing the magnets and prior to veneering. You want your magnets to finish flush with the wood surface, or you will end up with hollow voids beneath your veneer that may trap air as you lay the veneer. You could also use traditional grille fixings.
I finished off the grilles by adding bevels to the top edges and a rebate to the underside where the cloth will be bonded. Neither are necessary but improve the final finish. You can achieve both with a block plane, a table saw or a circular saw if you don’t have a router.
I placed strips of double-sided tape along the rebate to secure the cloth. This has become my favourite way to cover grilles. If you use tape with a tissue substrate, you can apply a small bead of PVA glue along the tape before laying the cloth. The tape will keep the cloth in place while the glue dries. Allow the glue to become tacky before you lay the cloth, and heat it with a household iron to secure the bond.
If you don’t want to use glue, with most tapes you can simply apply the iron once the cloth is set in place and the bond will be strong enough. Factory grille cloth is rarely bonded with a glue that can’t be removed, hence why grille cloth tends to fall off after a few decades.
To get a nice finish to your bond line, start with the corners. Grab the cloth at each face of the corner and lay it flat on the frame. Repeat with diagonal corners, stretching the cloth slightly as you go. You can then adhere the shorter sides, and finally the longer sides, lifting, stretching and setting the cloth as necessary to form a flat, uniform bond line without messy folded corners. Trim the excess with sharp scissors or a rotary cutter for a neat finish.
Veneering
Now, the exciting subject of veneering. You could wrap the cabinets in a plastic vinyl like Fablon, though with most consumer wrapping products it is difficult to form edges that don’t peal and end up looking tacky. Commercial vinyl used for car wrapping and commercially-produced cabinetry has a two-stage adhesive and is best for this application but requires more skill to apply.
You could use a pre-glued veneer that is applied with a household iron, which would work well. You could also use a peal and stick veneer, which is a paper-backed product with a pre-applied pressure sensitive adhesive. It is applied by pealing away the backing, laying the veneer in place and using a scraper to firmly press it down.
I purchase all of my veneers from The Wood Veneer Hub. I had some spare Walnut veneer that I intended to use on a pair of AR18s that were shelved due to irreparably damaged drivers. It’s unglued, straight from the saw – as traditional as you can get. I’m not using a veneering hammer, scraper or hide glue, because I own none of those things and I am not a traditionalist if there is a better way.
I chose a thin contractor’s PVA, specifically This from Screwfix. It’s the thin stuff used to cover walls before plastering among other things. You can buy it from most builder’s merchants, Toolstation and Screwfix in the UK. Branded PVA glues like Titebond or Evo-Stik will work, but they typically have added components to speed up their drying time and are thicker to begin with. Everbuild 502 is also quite thin and should be suitable.
The cheap stuff is barely thicker than water, takes several hours to dry and bonds perfectly. As it is watery it will help to flatten curled veneer, and soaks into the substrate for the best possible bond. I don’t like to thin PVA glue with water, as adding too much can severely weaken the bond.
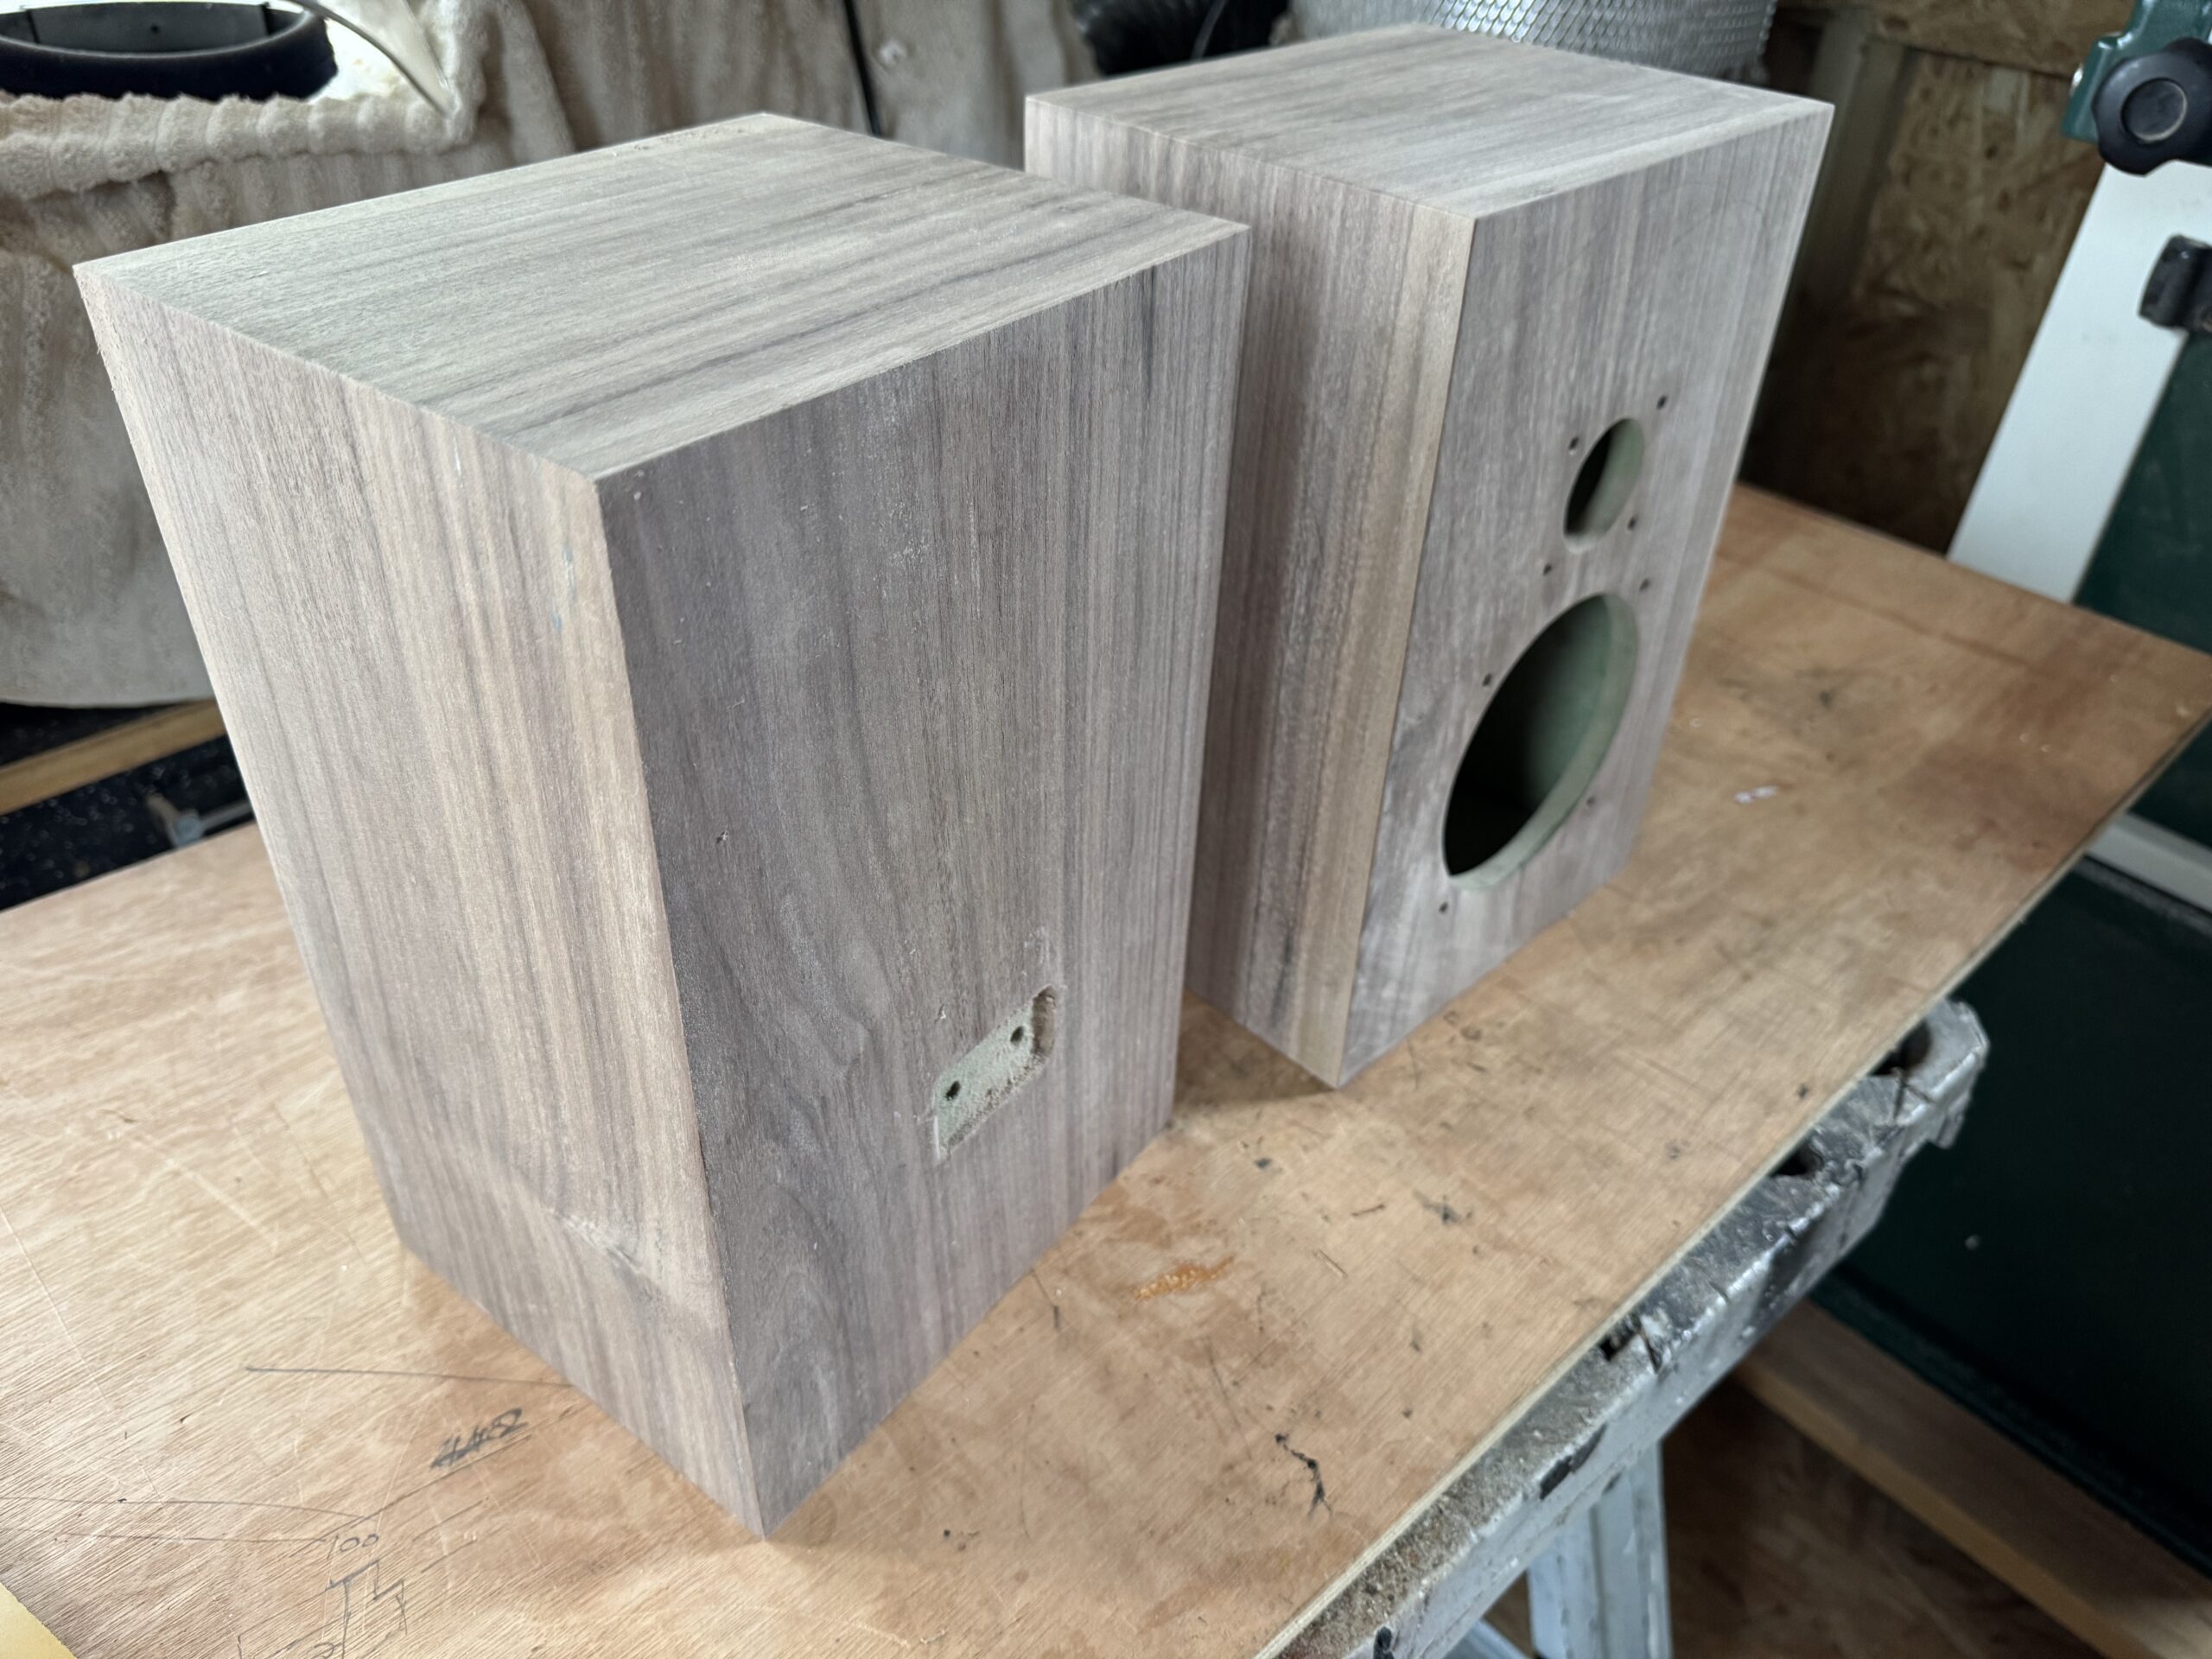
The veneers were cut to size in matching sets ensuring that the top, bottom and sides were consecutive to align the grain. This doesn’t matter for the front and back, so the best of the remaining veneer was chosen.
The veneers were glued in sequence. This isn’t critical, but it does give you the best finish due to the overlaps. The top and bottom are glued first, then the sides, then the front and back. I used scrap sheet material and parallel jaw clamps to apply maximum even clamping pressure across the entire surfaces.
Newspaper sits between the clamping sheets and the veneer surfaces, so the speakers don’t stick to the clamping sheets if any glue soaks through gaps in the veneer. Wax paper would work better for this, but I didn’t have any to hand.
First the top and bottom of each cabinet.
You’ll need to trim the excess between each veneer application. I used a trim bit in the router. You could do the same with a block plane or a sanding block, though be careful to avoid rounding over the edges and don’t inadvertently cause a bevel at this point. If you are trimming by hand, use a sharp knife to cut the veneer close to the cabinet first.
When you veneer the front and back, be mindful that this is a sealed cabinet. Veneering them both at the same time can cause air to become trapped between the veneer and the MDF. The result is a lumpy surface covered in curled veneer that hasn’t bonded. I forgot about this, and made the same mistake.
I got lucky, and one of my cabinets came out perfectly. The other just needed the back redoing. I was able to peal off the veneer by first heating it with an iron, and carefully pealing it away in strips. I sanded off the glue residue, clamped on a replacement piece of veneer, and we’ll pretend it never happened.
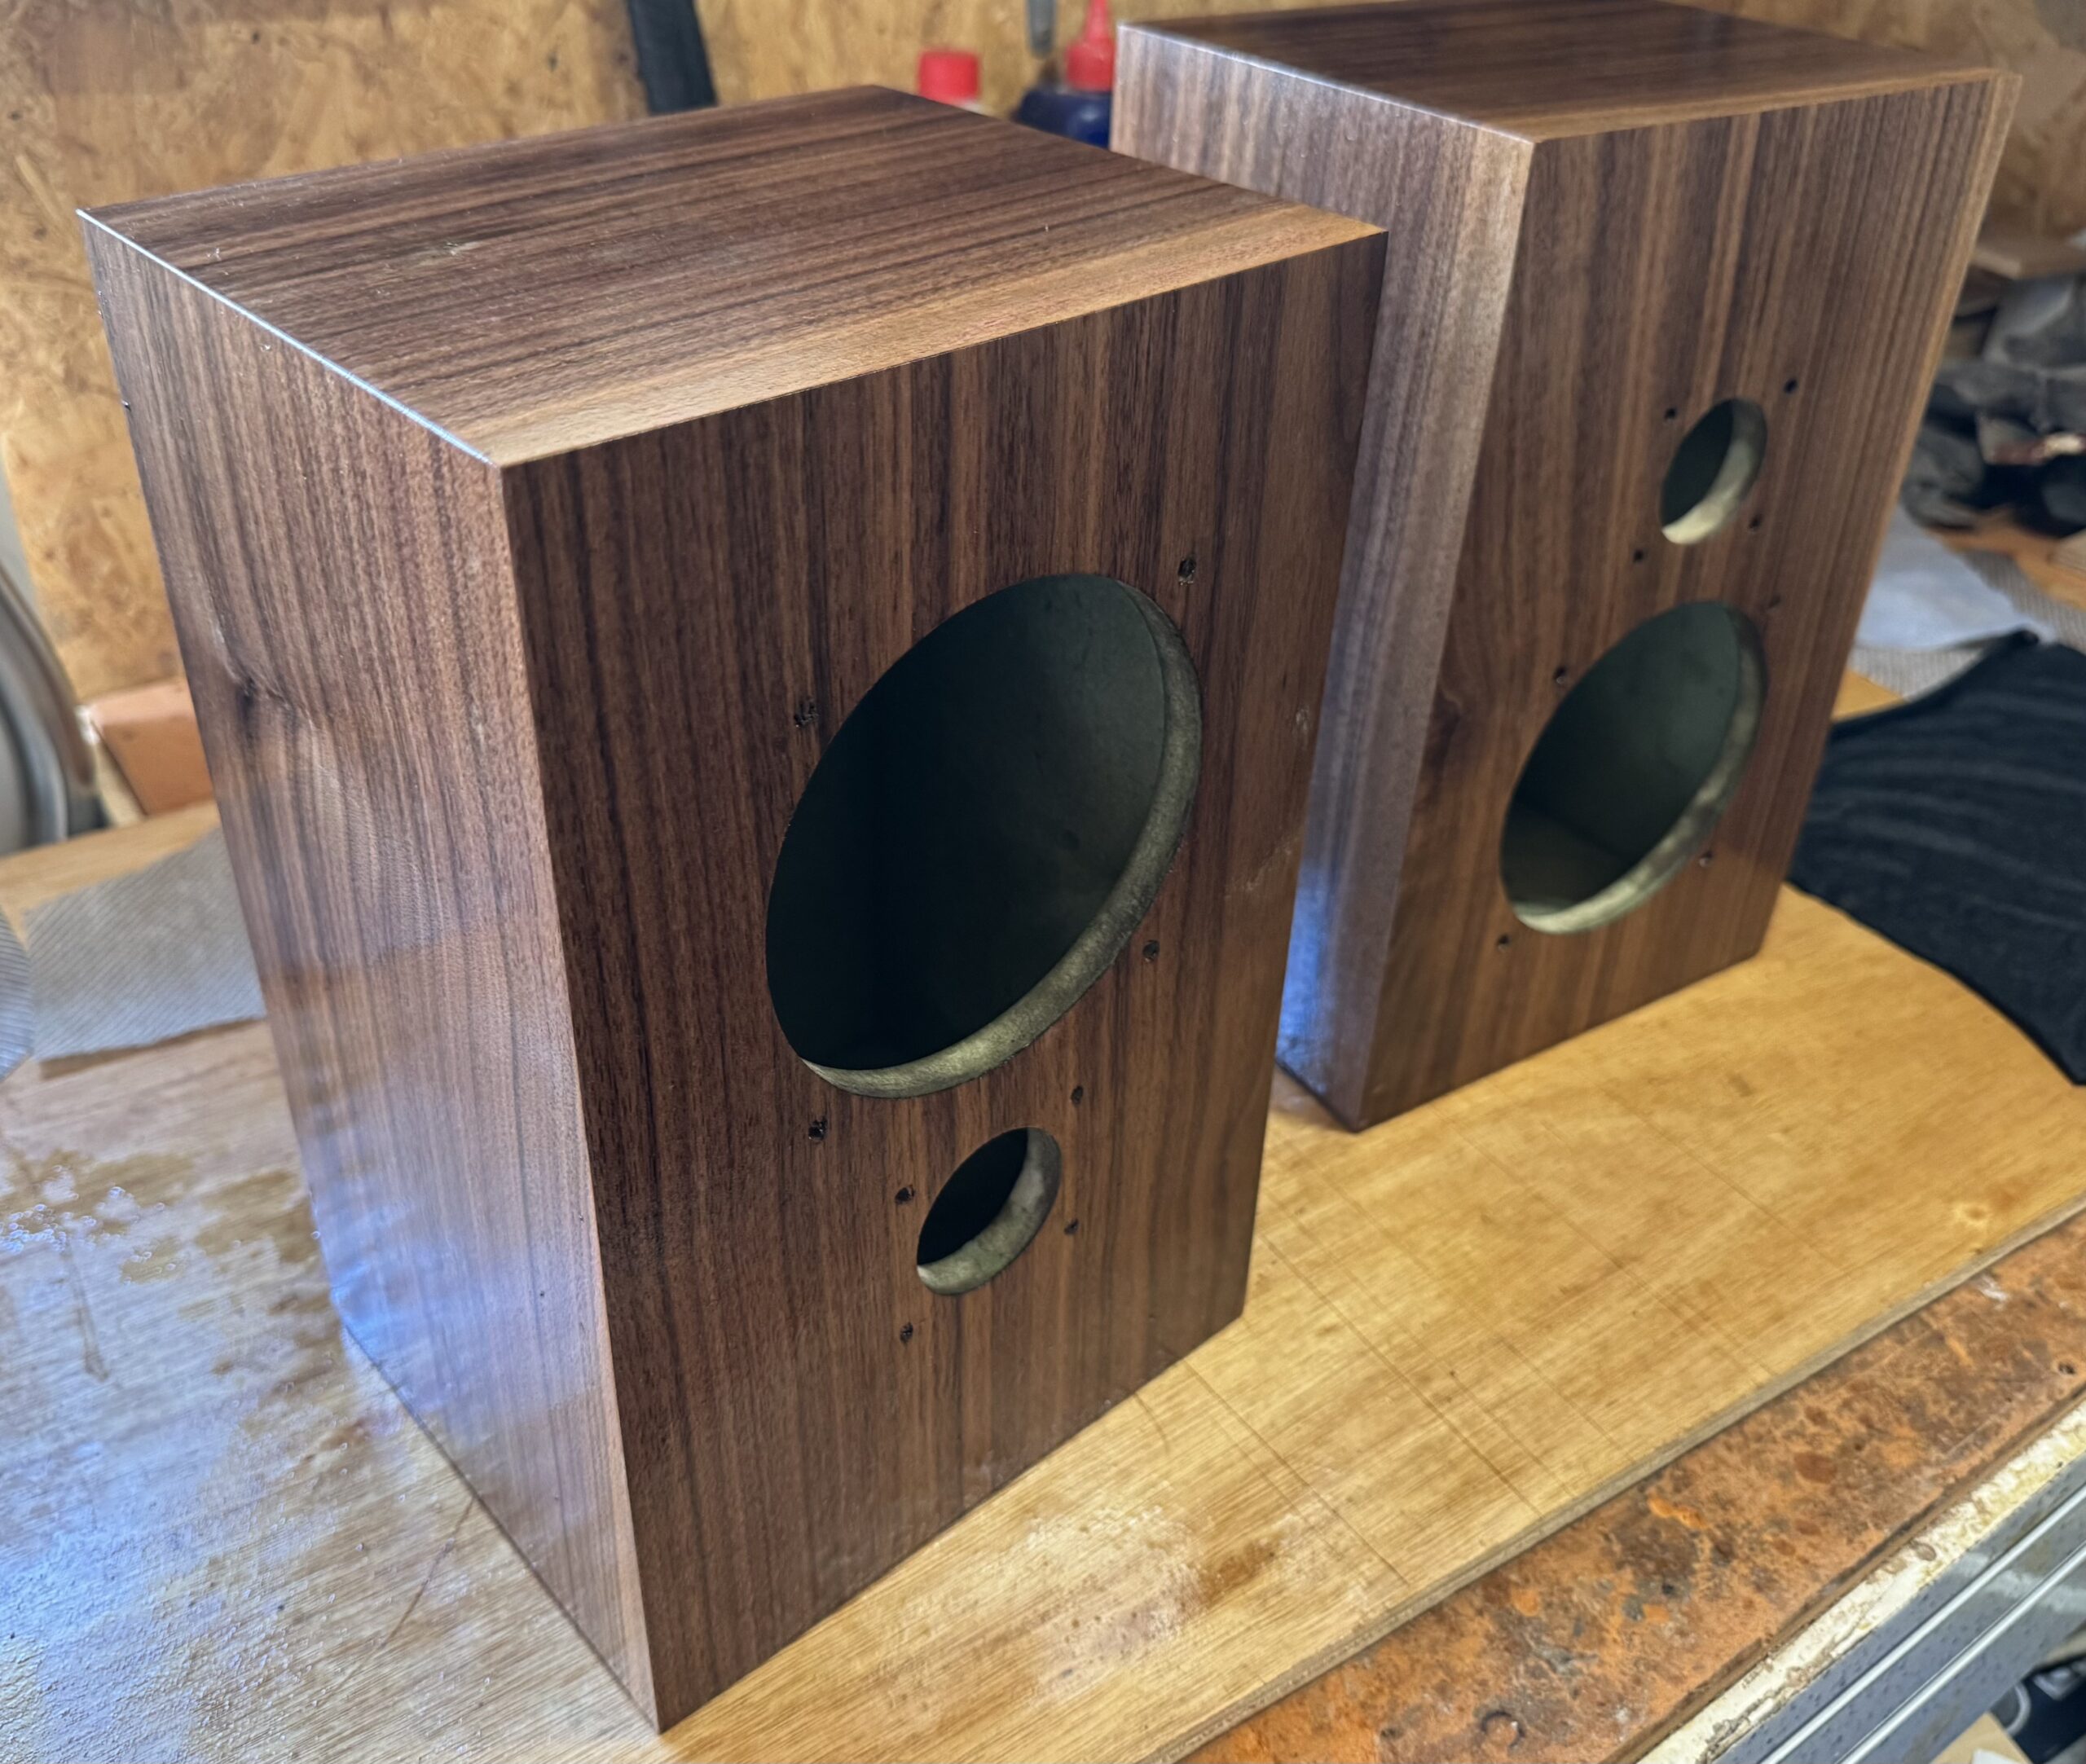
With the veneer bonded and trimmed, any remaining bits of newspaper can be soaked off with a wet cloth. I then sanded the cabinets with 120, 180, 240, 320 and 400 grit paper, working progressively through the grits to prepare the surface for an oil finish. You could go higher if your veneer is thick enough and you want a glass-like smoothness, but I like a bit of grain texture.
When sanding, be mindful of the dust from both the MDF and the veneer. Some wood species are more harmful than others, but you don’t want to be breathing it in. At a minimum wear a dust mask, and work in a well ventilated area. Ideally you’ll have some form of dust extraction, even a household vacuum, to hand.
Finishing
I chose Liberon ‘Superior’ danish oil. I like this oil as it makes the grain pop and dries relatively quickly. If you ignore the instructions on the tin you won’t end up with a tacky finish and though it theoretically takes months to fully cure you can handle the finished product within 24 to 48 hours.
If you prefer a faster, less involved finish, try microcrystalline wax, like this one from Axminster or this from Chestnut Finishes. It can be applied to sanded wood and a few coats will give you a nice sheen with protection from every-day handling, furniture polishes and light moisture and can be applied and dried in a few hours.
You could also use a polyurethane varnish or a spray lacquer, though achieving a high quality finish with either of those does require a bit of practice. French polishing is another option, but to do it right is a skill that requires a lot of time and patience. A French polish finish can be lacquer smooth but take months.
The secret to a great finish with danish oil is not to let excess oil dry on the surface. It can form a tacky film that takes months to harden if it ever hardens at all, and it’s difficult to remove. Little and often is the key to success, and buff vigorously between coats.
The fresh veneer will soak up oil at first as the oil is designed to penetrate into the wood. I apply a liberal coat to the entire cabinet and continue applying oil until the surface is wet and the oil no-longer soaks into the veneer. I then leave it to stand for 15 to 20 minutes, or until the oil feels slightly ‘gloopy’ – not dry and tacky, but not thin like the fresh oil from the can.
At this point I take dry tissue or a dry cloth and wipe off the excess, lightly buffing the surface dry. I repeat the process several times in succession, or within a few hours of each application, until the oil no-longer soaks into the veneer on first contact. Once you reach that point, subsequent applications are building a surface film which will give you the final finish.
If you do end up with a tacky surface, either because you left it too long between coats or didn’t thoroughly wipe up teh excess, don’t panic. Simply apply more oil, which will rejuvenate the semi-dry layer. You can then wipe it off and buff with a clean cotton cloth to remove any dried oil.
I wiped the cabinets dry and left them for 24 hours, before applying two final oil coats. I left the cabinets to stand for a couple of days to cure. The final cure will take months, but initial cure begins as soon as you begin to apply the oil and the cabinets are fine for day-to-day handling after a couple of days.

For the finishing touch, I applied some small rubber feet and a natural beeswax furniture polish, specifically This One from Furniture Clinic. You can also use microcrystalline wax over a danish oil finish, though you should wait a few weeks to allow additional curing time. The polish wax is thinner and while it does form a slight surface film, it isn’t a barrier to the oxygen required to polymerise and cure the oil. It lets the wood breathe, but enhances the oil to form a lovely satin finish with a wonderful tactile texture to the grain.
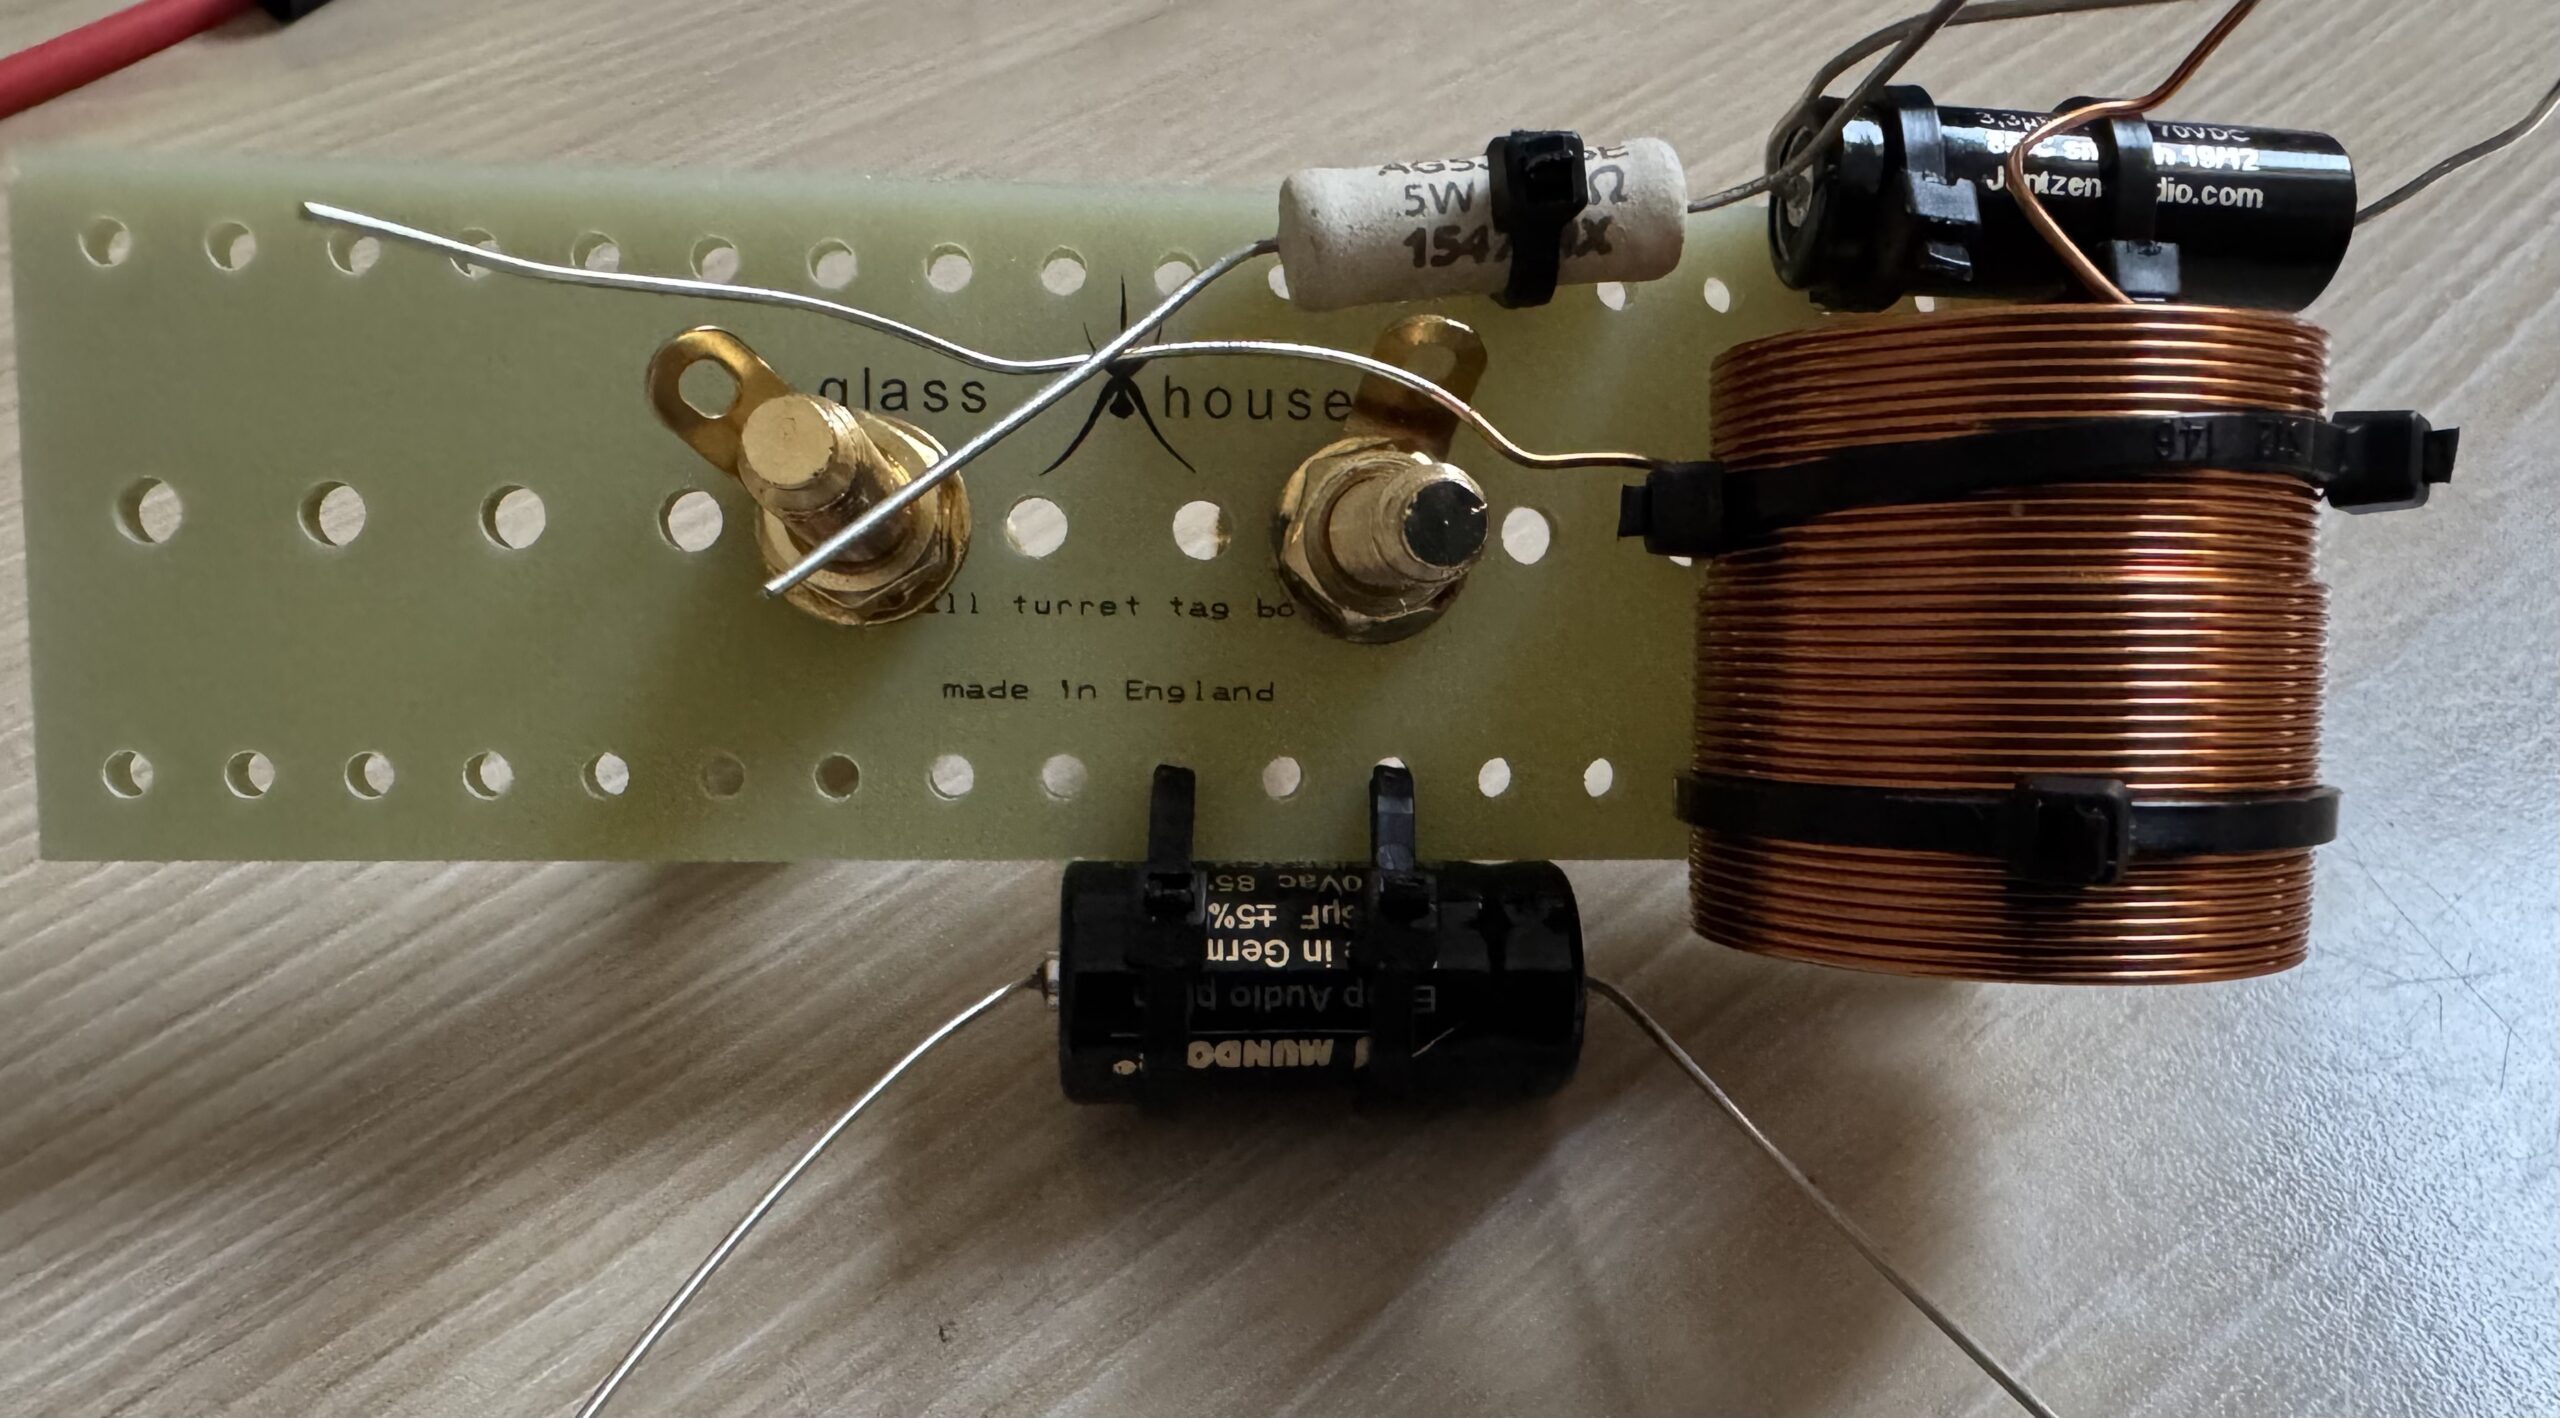
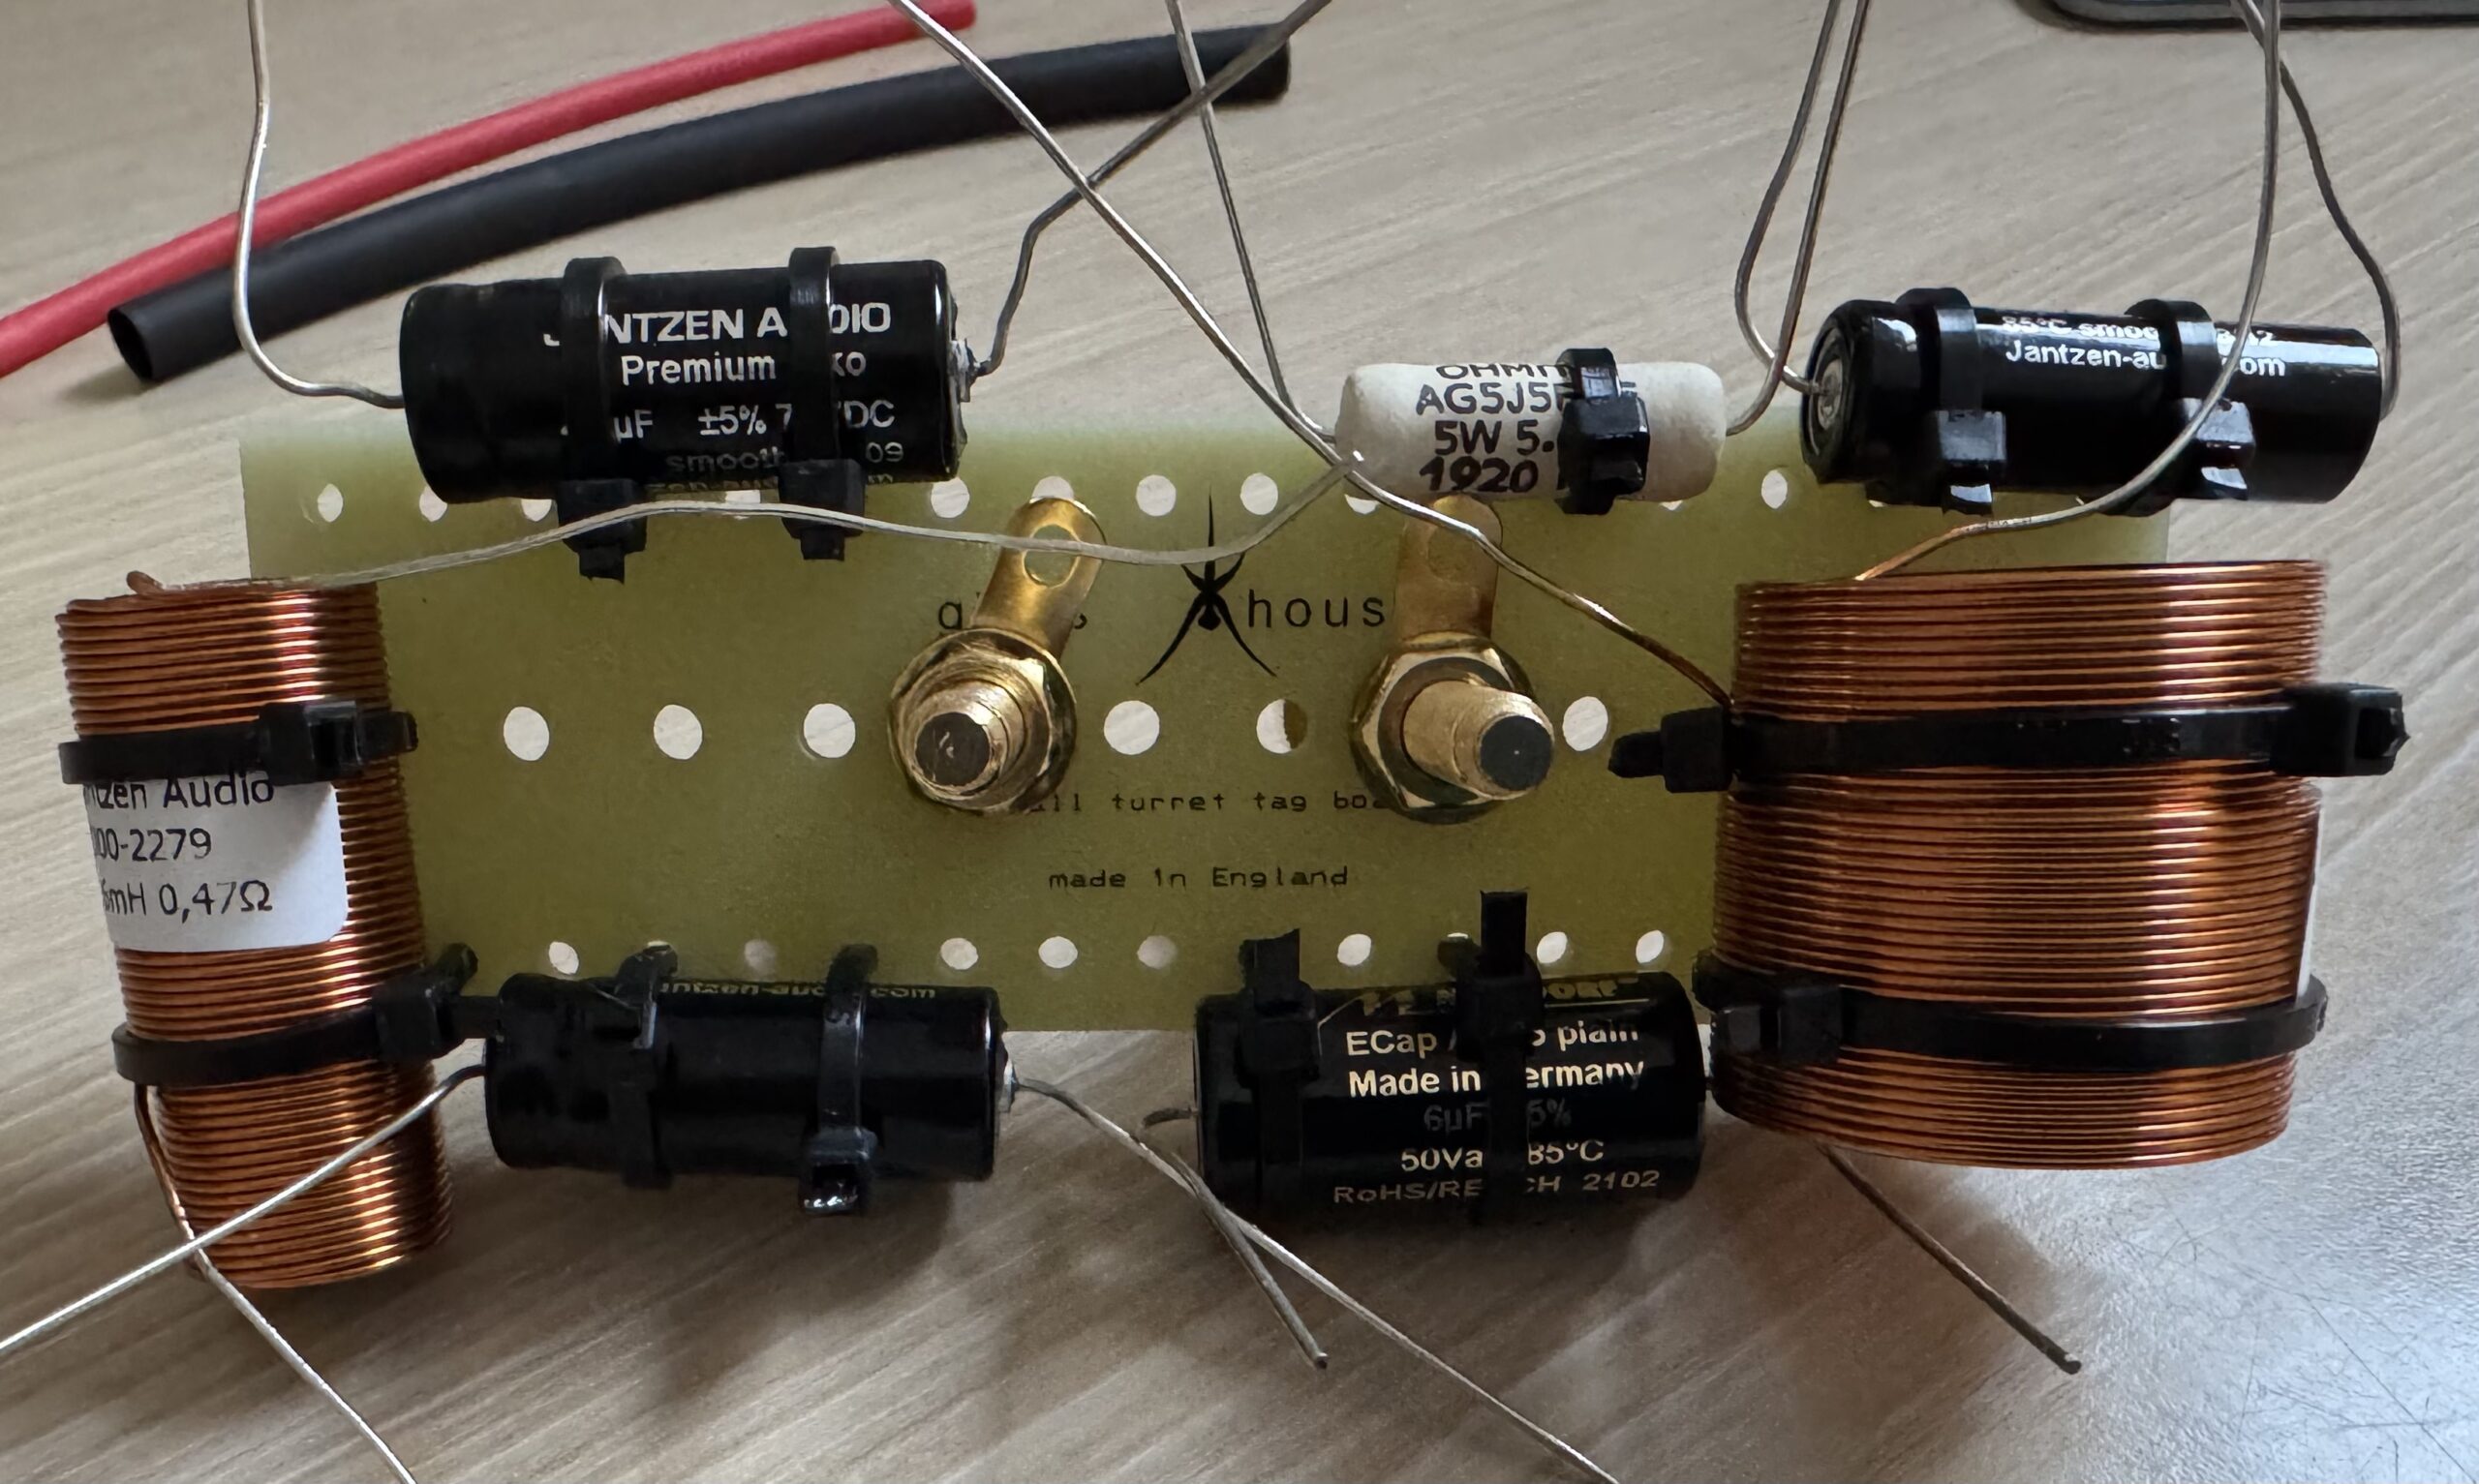
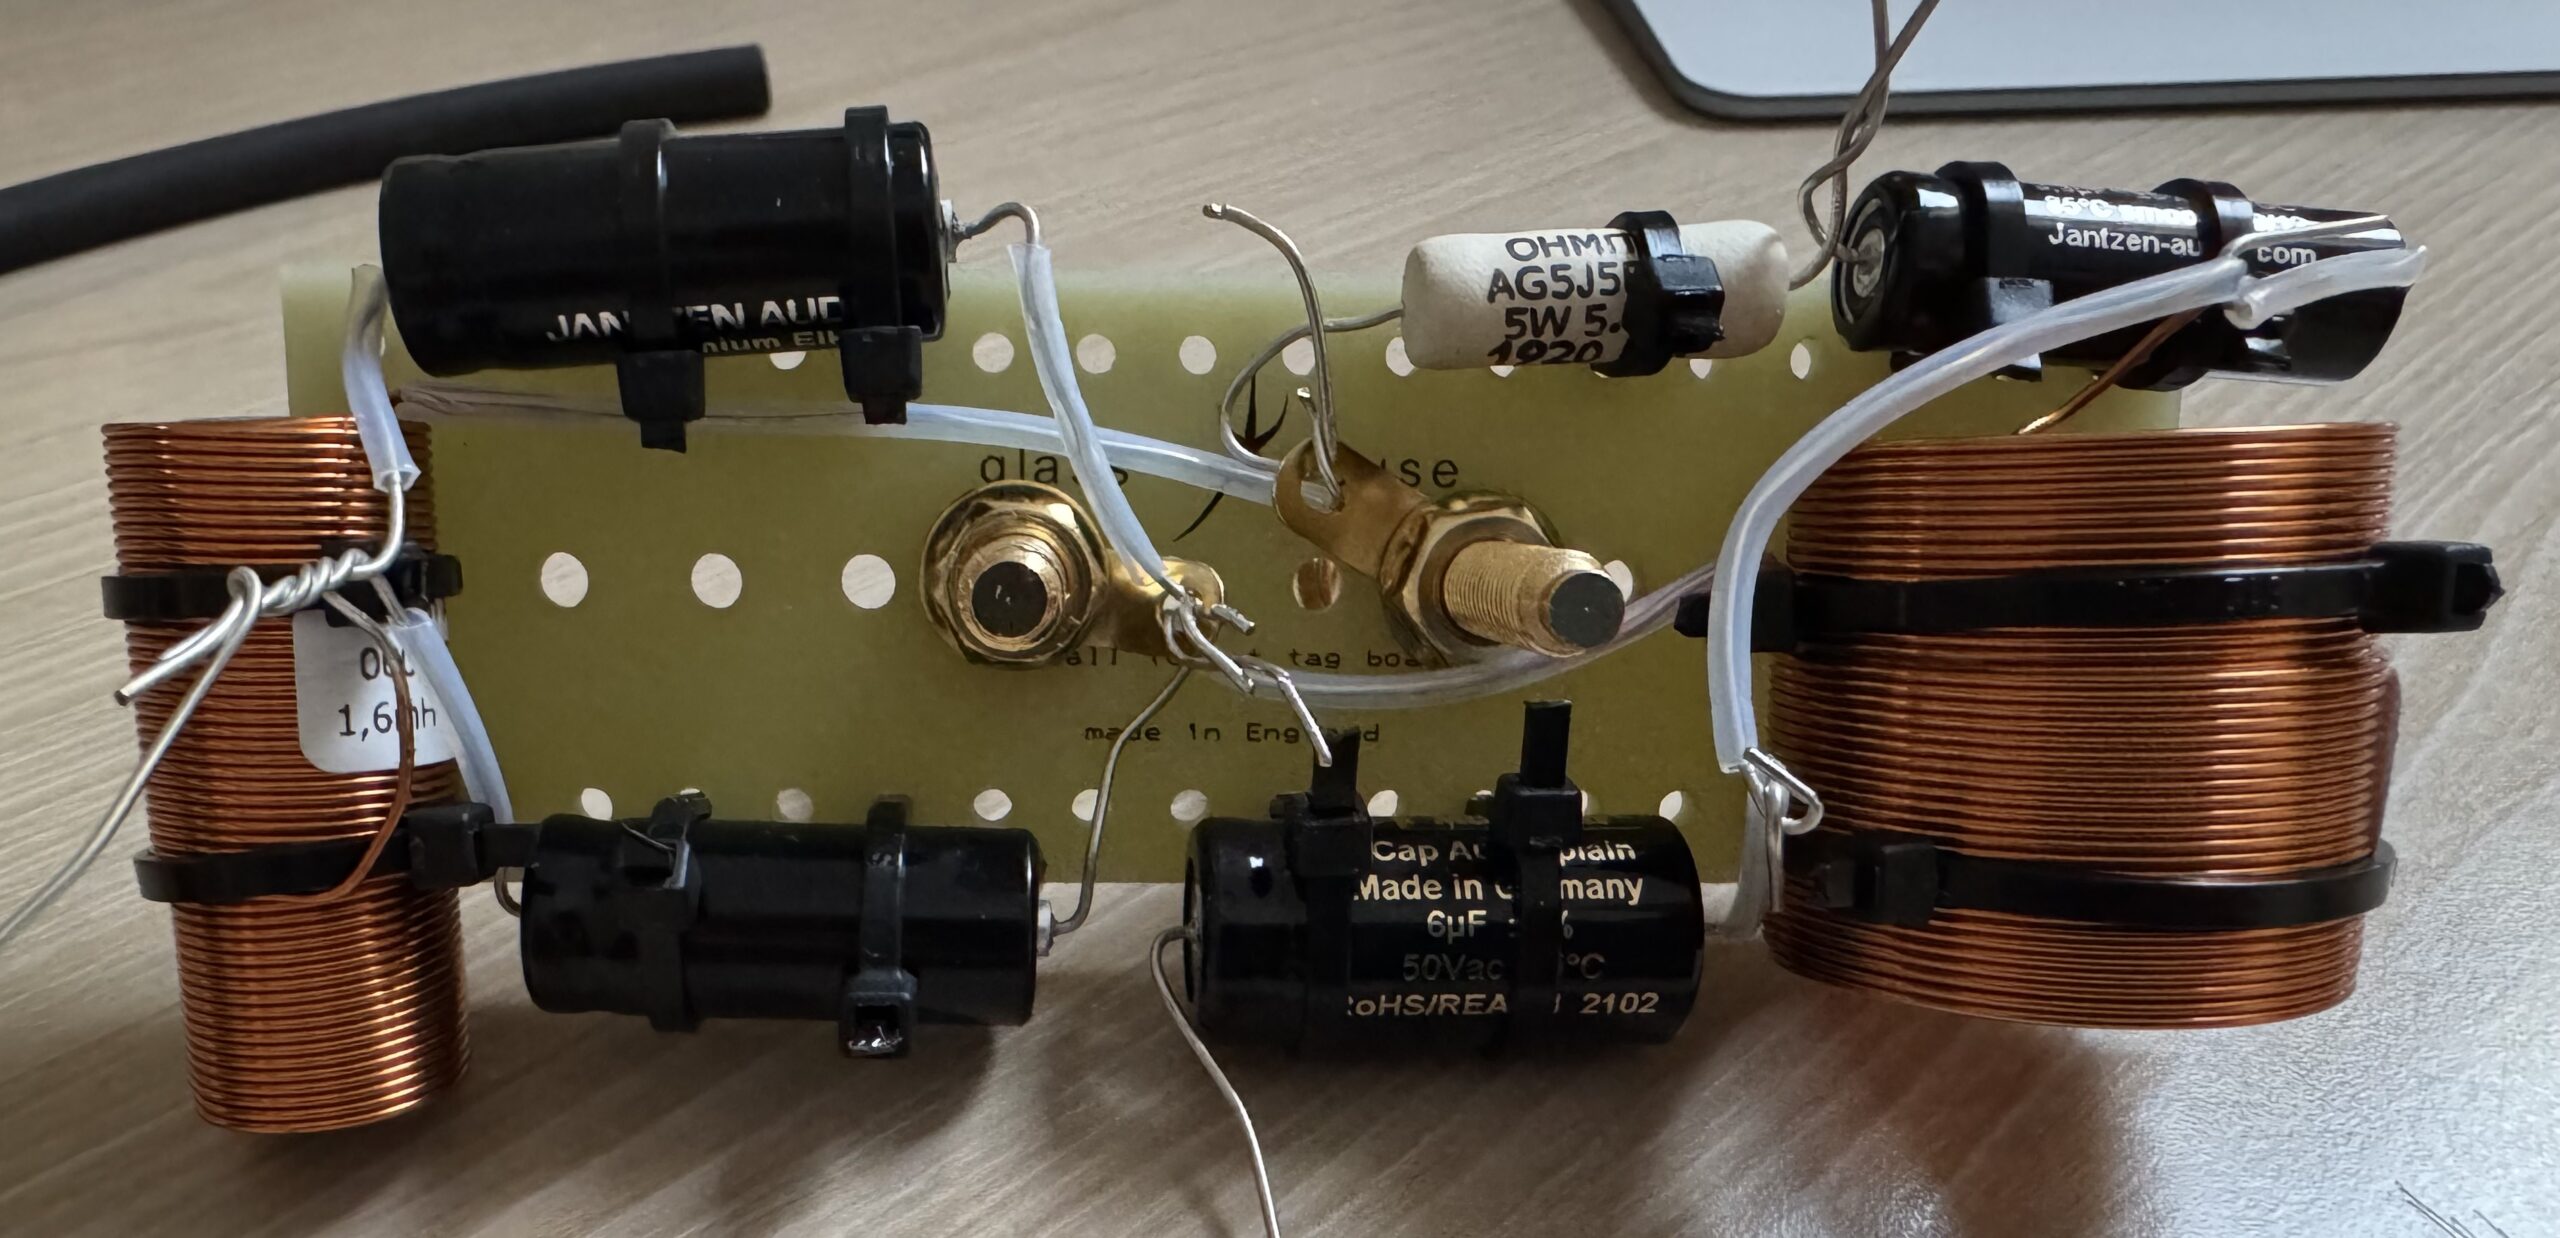
Building The Crossover
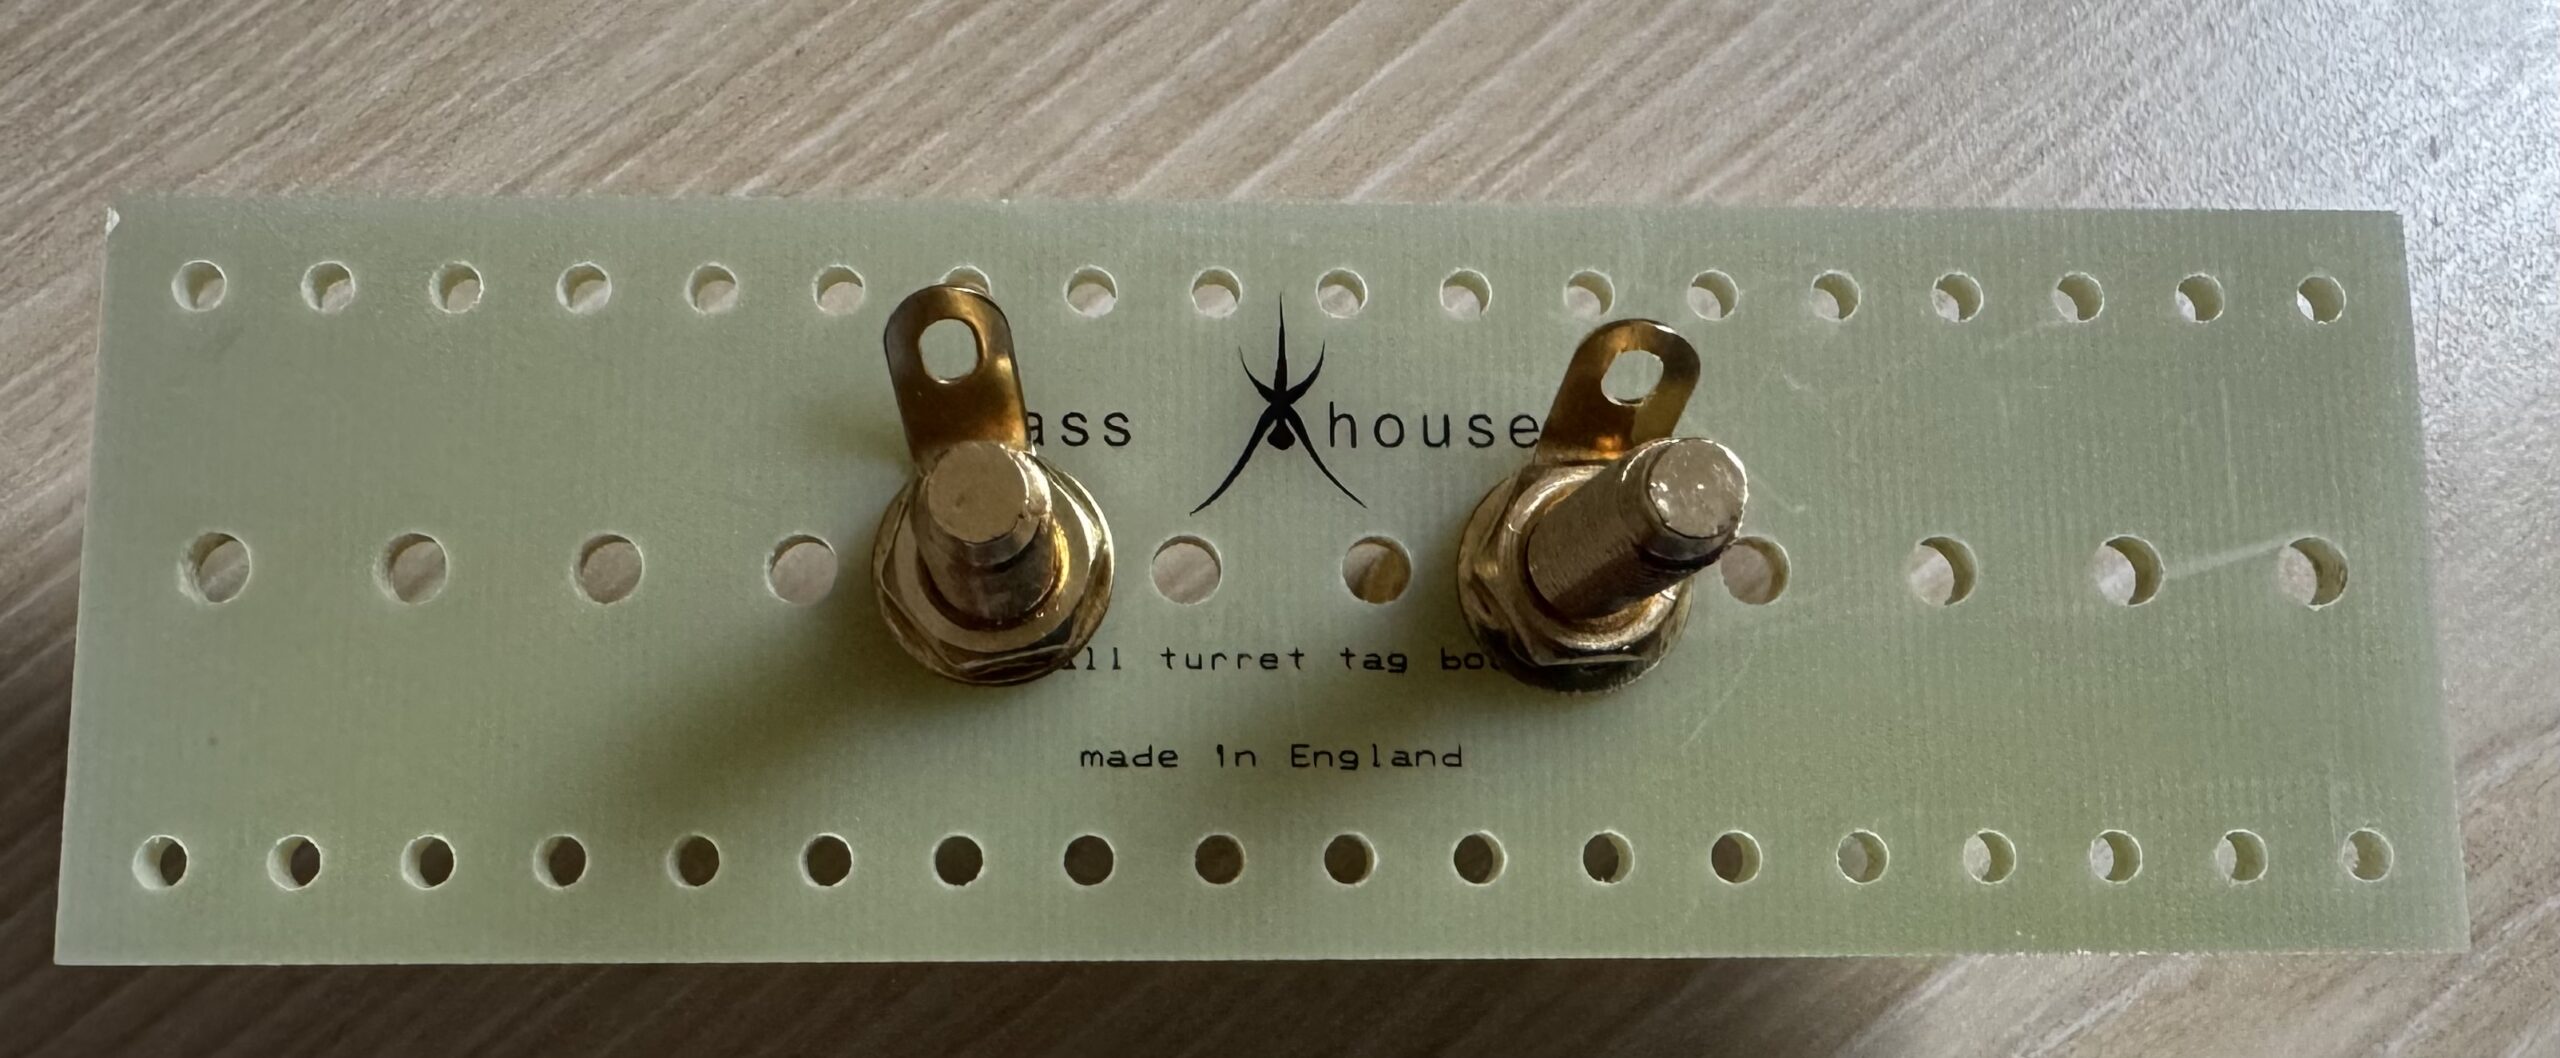
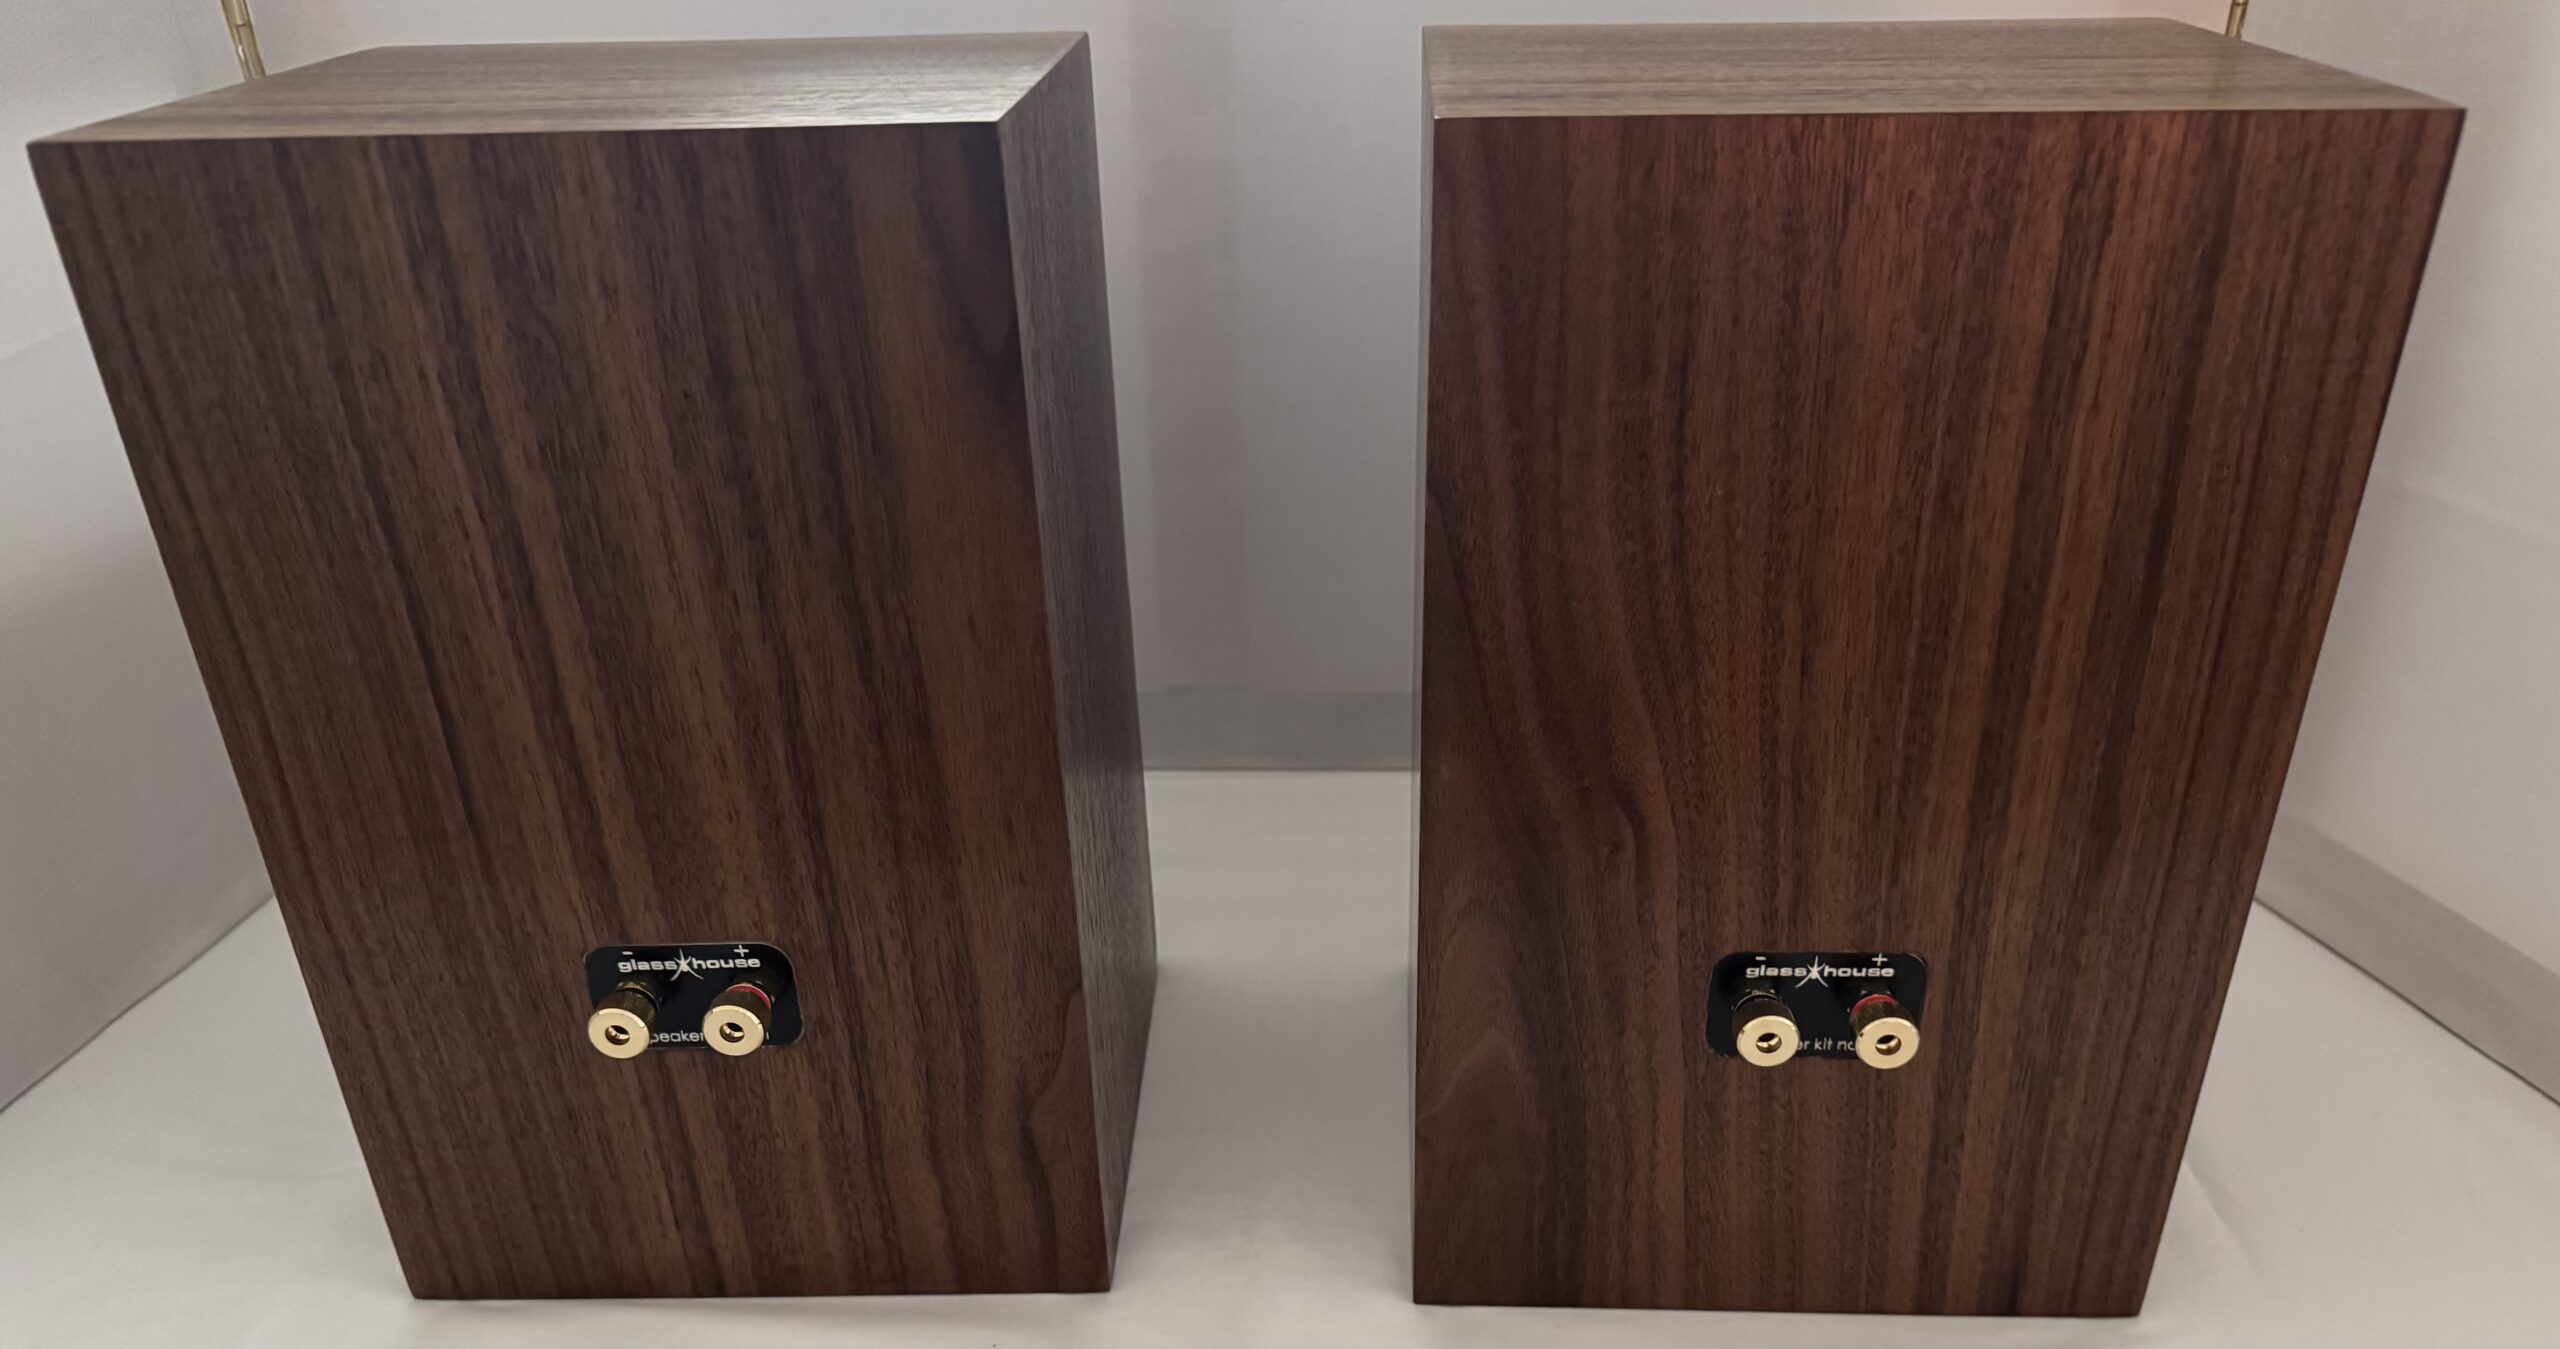
The crossovers are built on a Glasshouse tag board, mounted to the speaker terminals. Components are held in place with provided nylon zip ties, and the kit includes plenty of solder, sleeving and wire.
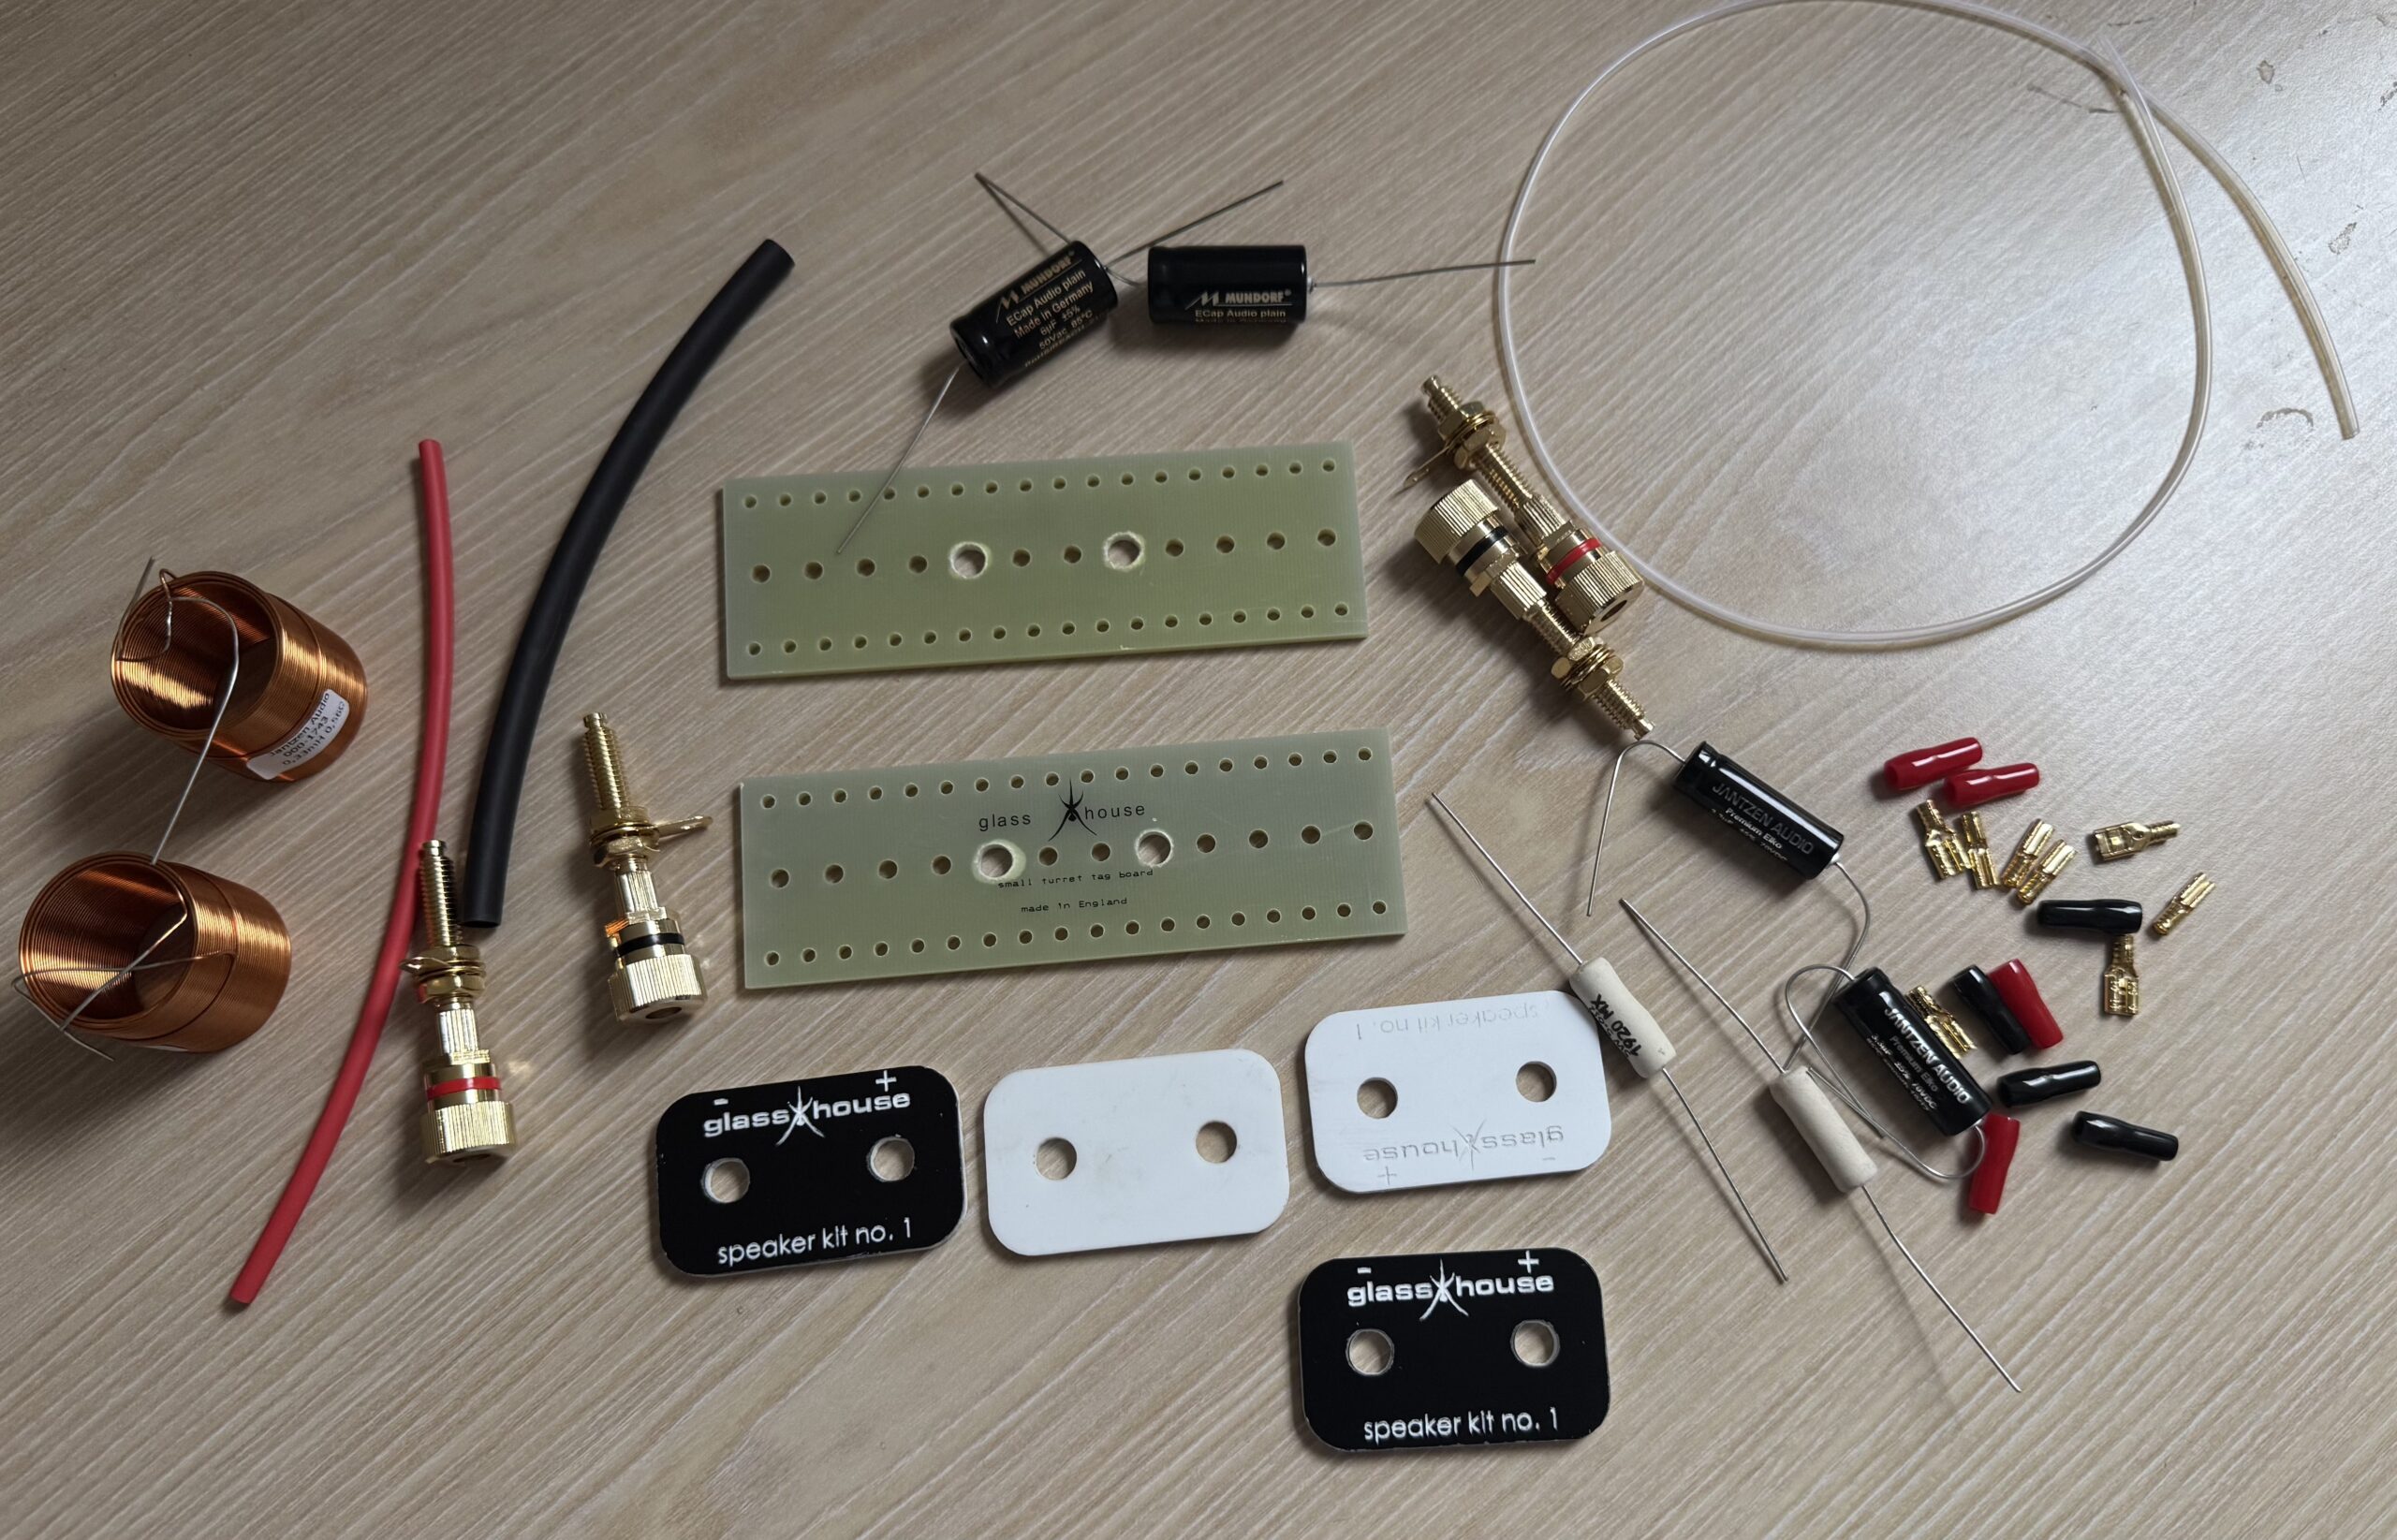
The wire is the Duelund DCA16GA (bass) and DCA20GA (tweeter) – A wire “born of the desire to improve upon legendary vintage Western Electric WE16GA cable, but using Duelund’s philosophy of uncompromising craftsmanship and construction, sonic splendour, palpability and transparency.” It is a Tinned copper multistrand wire in a black cotton and oil dielectric and apparently is recognised among enthusiasts as the “go-to wire for “REAL” sound.”
I consider myself enthusiastic in matters of engineering, audio design and sound, but I am not a subscriber to the audiophile cable conspiracy. It’s wire, it’s an appropriate gauge for the application, and it was included, so I used it. It smells awful and it’s a pig to strip, but it works.
I’d have preferred a PCB for the crossover, or at least a wider tag board. The components fit and the point-to-point wiring is straightforward and undoubtedly the best method of connecting everything up, but it’s hardly aesthetically pleasing. I suppose I could have deviated from the kit instructions, gluing the components to the tag board and laying out the wiring on the underside of the board, but I opted to build it as intended. It works, and once it’s sealed behind the bass driver it should remain invisible for the next few decades.
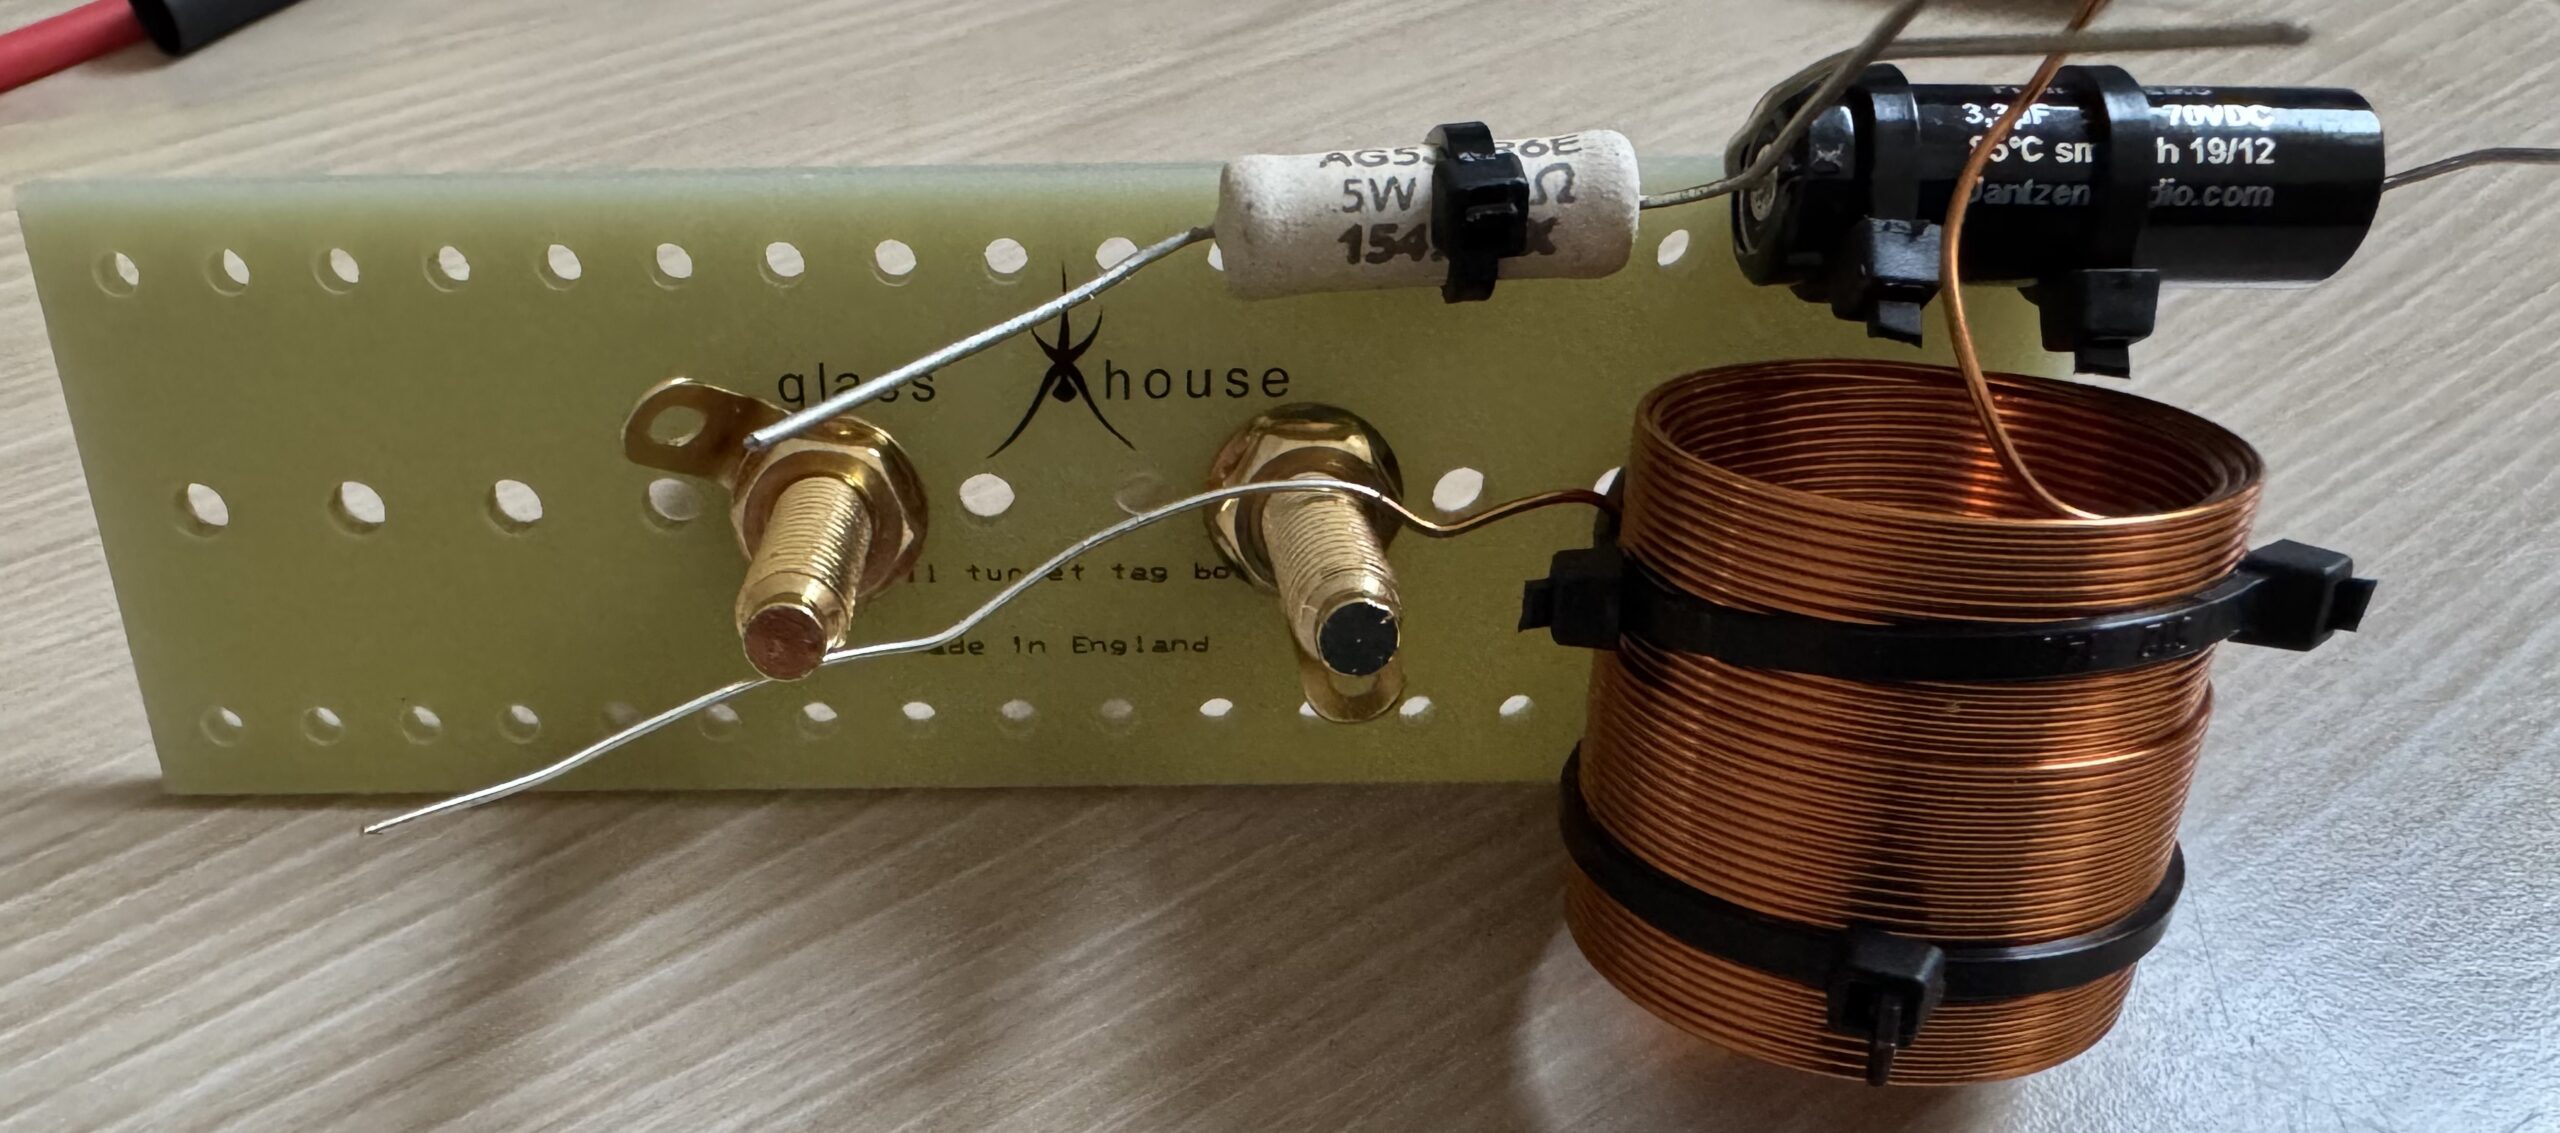
I won’t go over the crossover wiring and assembly as it is detailed in the instruction booklet for the kit, which is available from the Hi-Fi Collective website. If you can operate a drill to ream a couple of holes, wield a soldering iron and operate a pair of wire cutters you can build it using the circuit diagram and pictures to guide you.
You’ll need a relatively powerful soldering iron and a chunky tip for some of the joints, as there’s a lot of thermal mass where multiple connections meet. Plenty of Good quality solder is provided in the kit, as is wire sleeving (though not enough to sleeve every wire for neatness), heat shrink, nylon zip ties and the two required sizes of spade connector.
There are some key things to remember. The thinner (20AWG) gauge cable is used for the tweeter, the thicker (16AWG) for the woofer. They are not coloured internally, so use the red heat shrink to mark 1 wire as the positive (+) side at both ends using the flat cable as a reference. You can verify this by using a multimeter in continuity mode.
Try to avoid repeated flexing of the solid component leads. They are designed to flex, but like any solid piece of metal each flex weakens them and they will reach a breaking point. Keep in mind that you will need access to the terminal nuts with a box spanner, so try to keep the wiring out of the weigh. When you do fit the crossover to the cabinet you’ll do so with anti-shake washers, which has a tendency to grab the solder tags as you tighten. Ensure those solder tags don’t spin and break your connections.
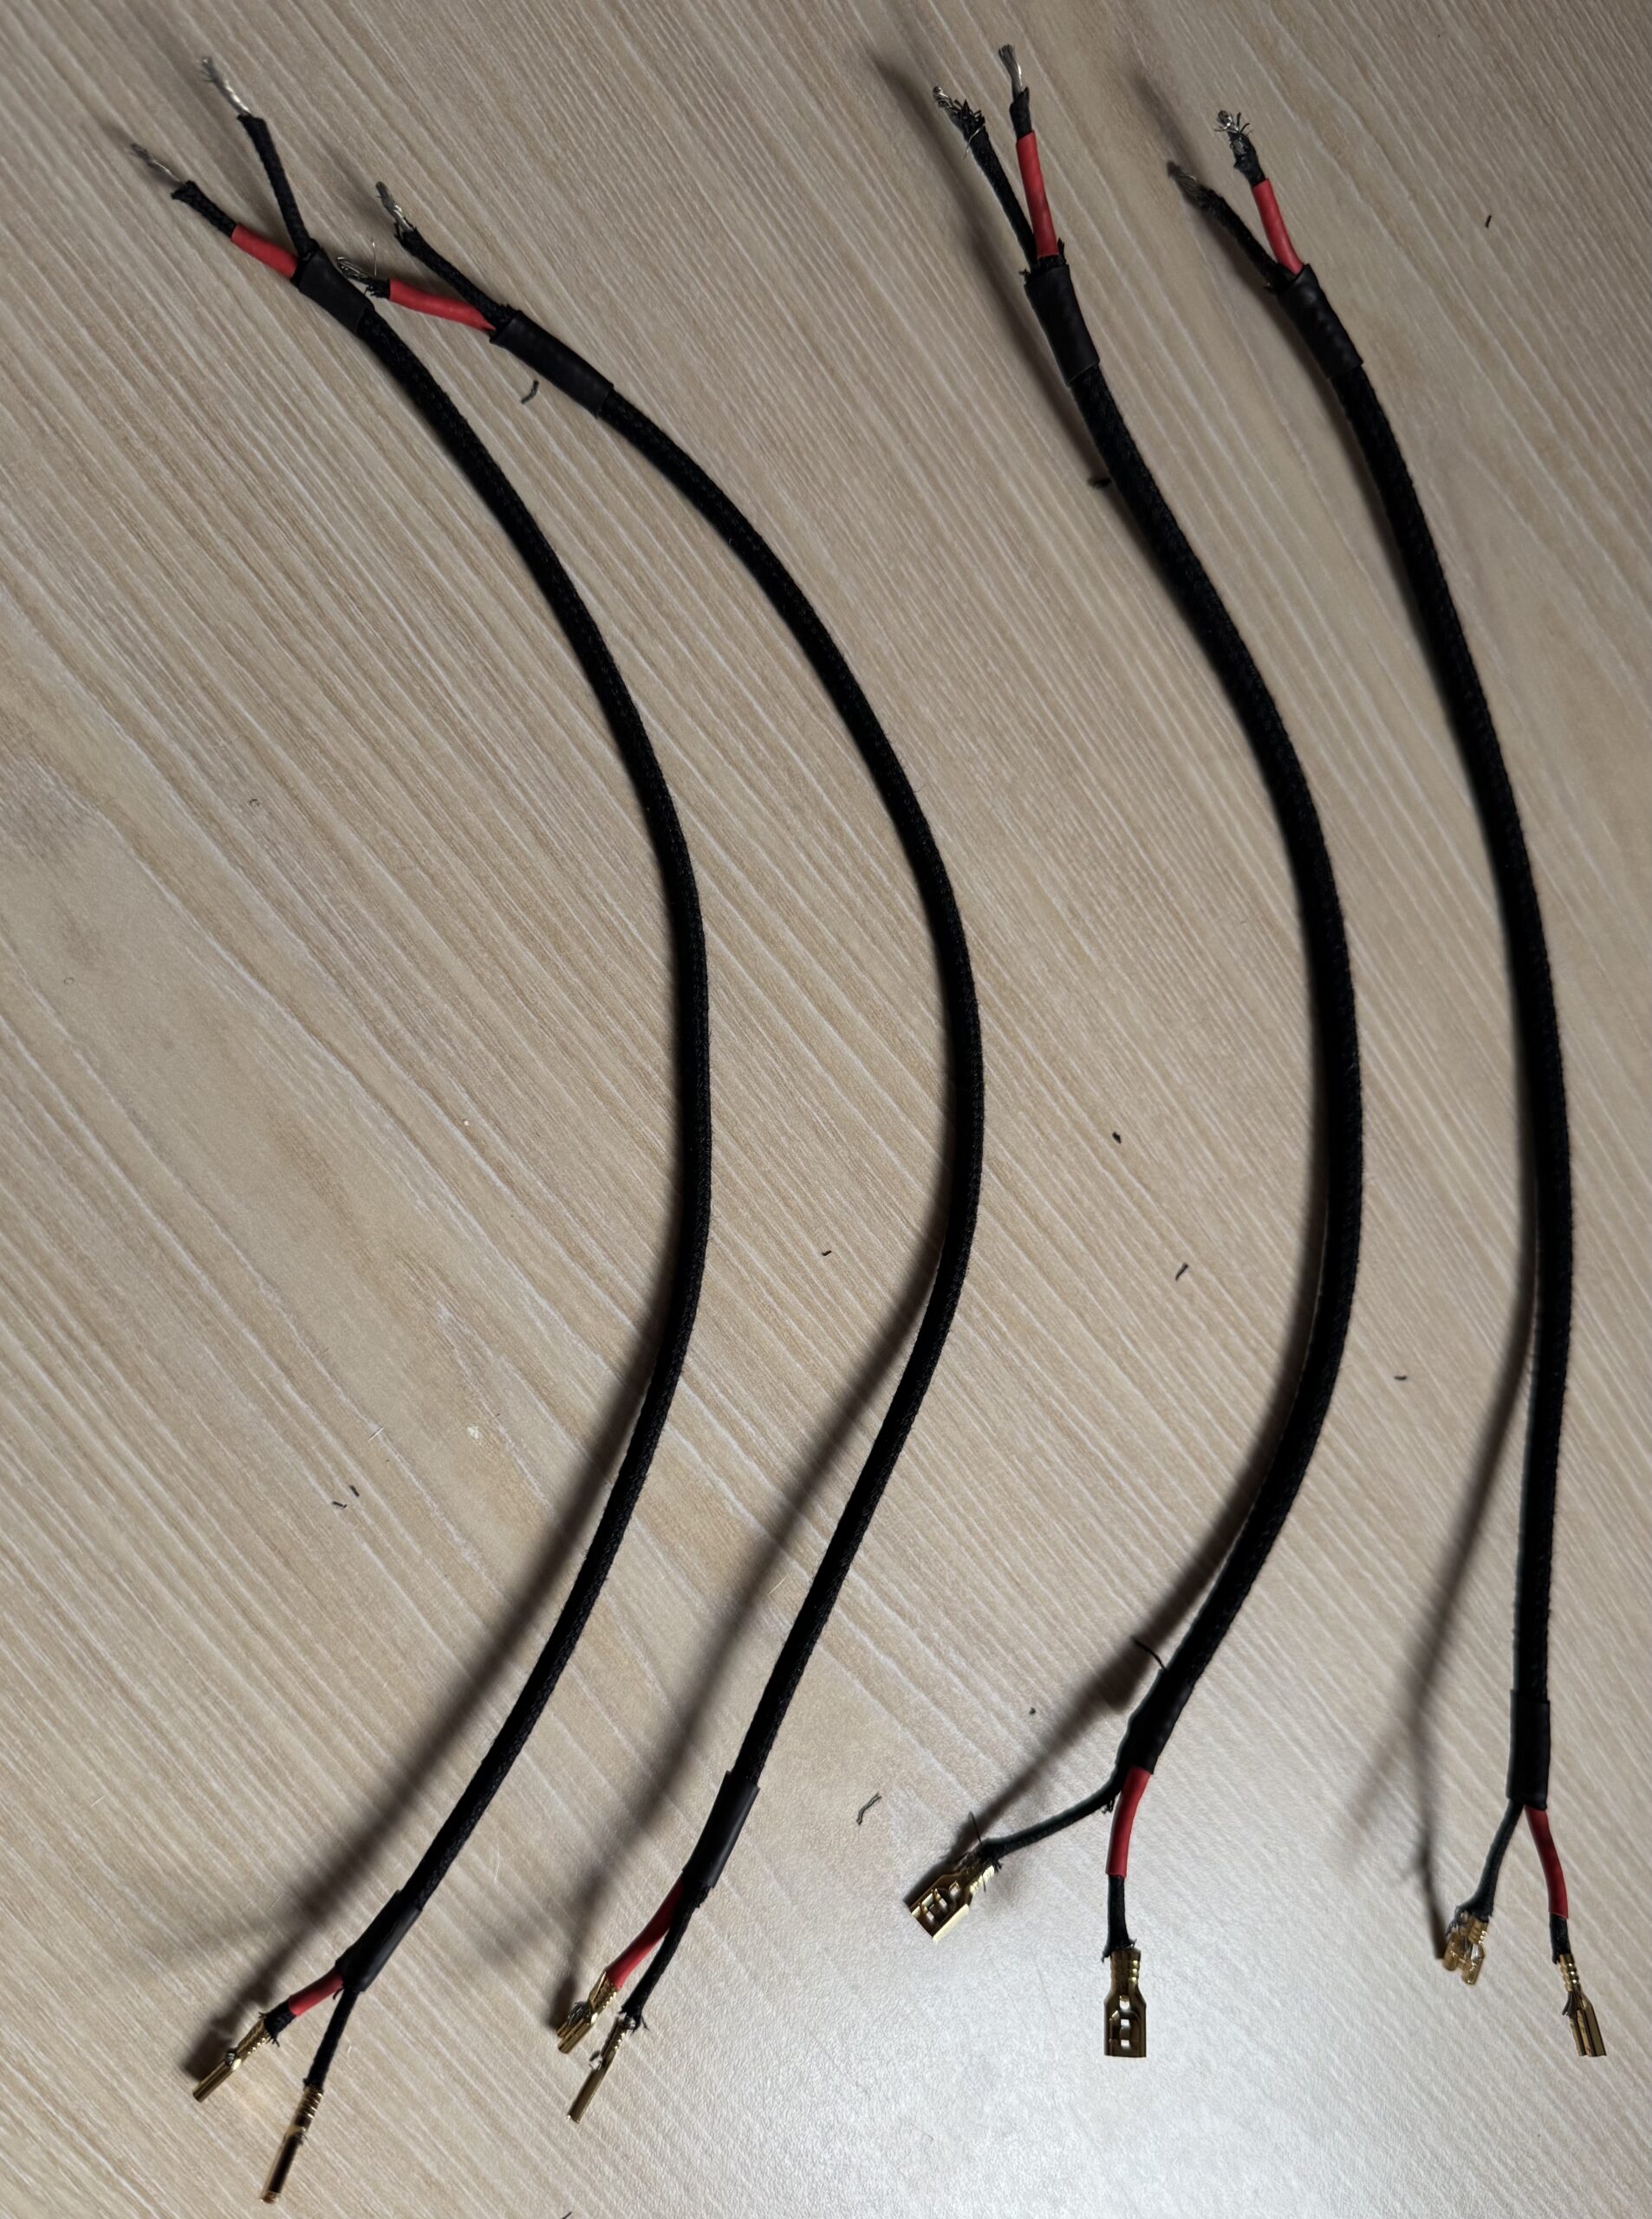
The smaller of the spade connectors fit the tweeter, the larger the woofer. They can be crimped to the ends of the stripped and tinned cable using pliers, and then soldered in place. Don’t forget to put the coloured boots on the cables before you install the spades – I did, and you can’t fit them later. For some reason a couple of the spades didn’t solder very well, and their enclosed crimp ends make them difficult to remove and reuse. I ended up cutting them off and the wires were soldered directly to the drivers, which is a more reliable connection anyway.
You can test your crossover by lightly pressing the spade connectors onto the drivers, but don’t seat them all the way as they can be a pain to remove. Then using a multimeter in its lowest resistance measurement mode, test between the input terminals. You should get a reading somewhere around 6Ω ±1Ω. If you do, you’re good to go. If you don’t, check the static resistance of each driver in the same way, check the security of your wire connections into the spade connectors, and double-check your crossover wiring for missed connections, incorrect connections or component leads touching each other.
Final Assembly
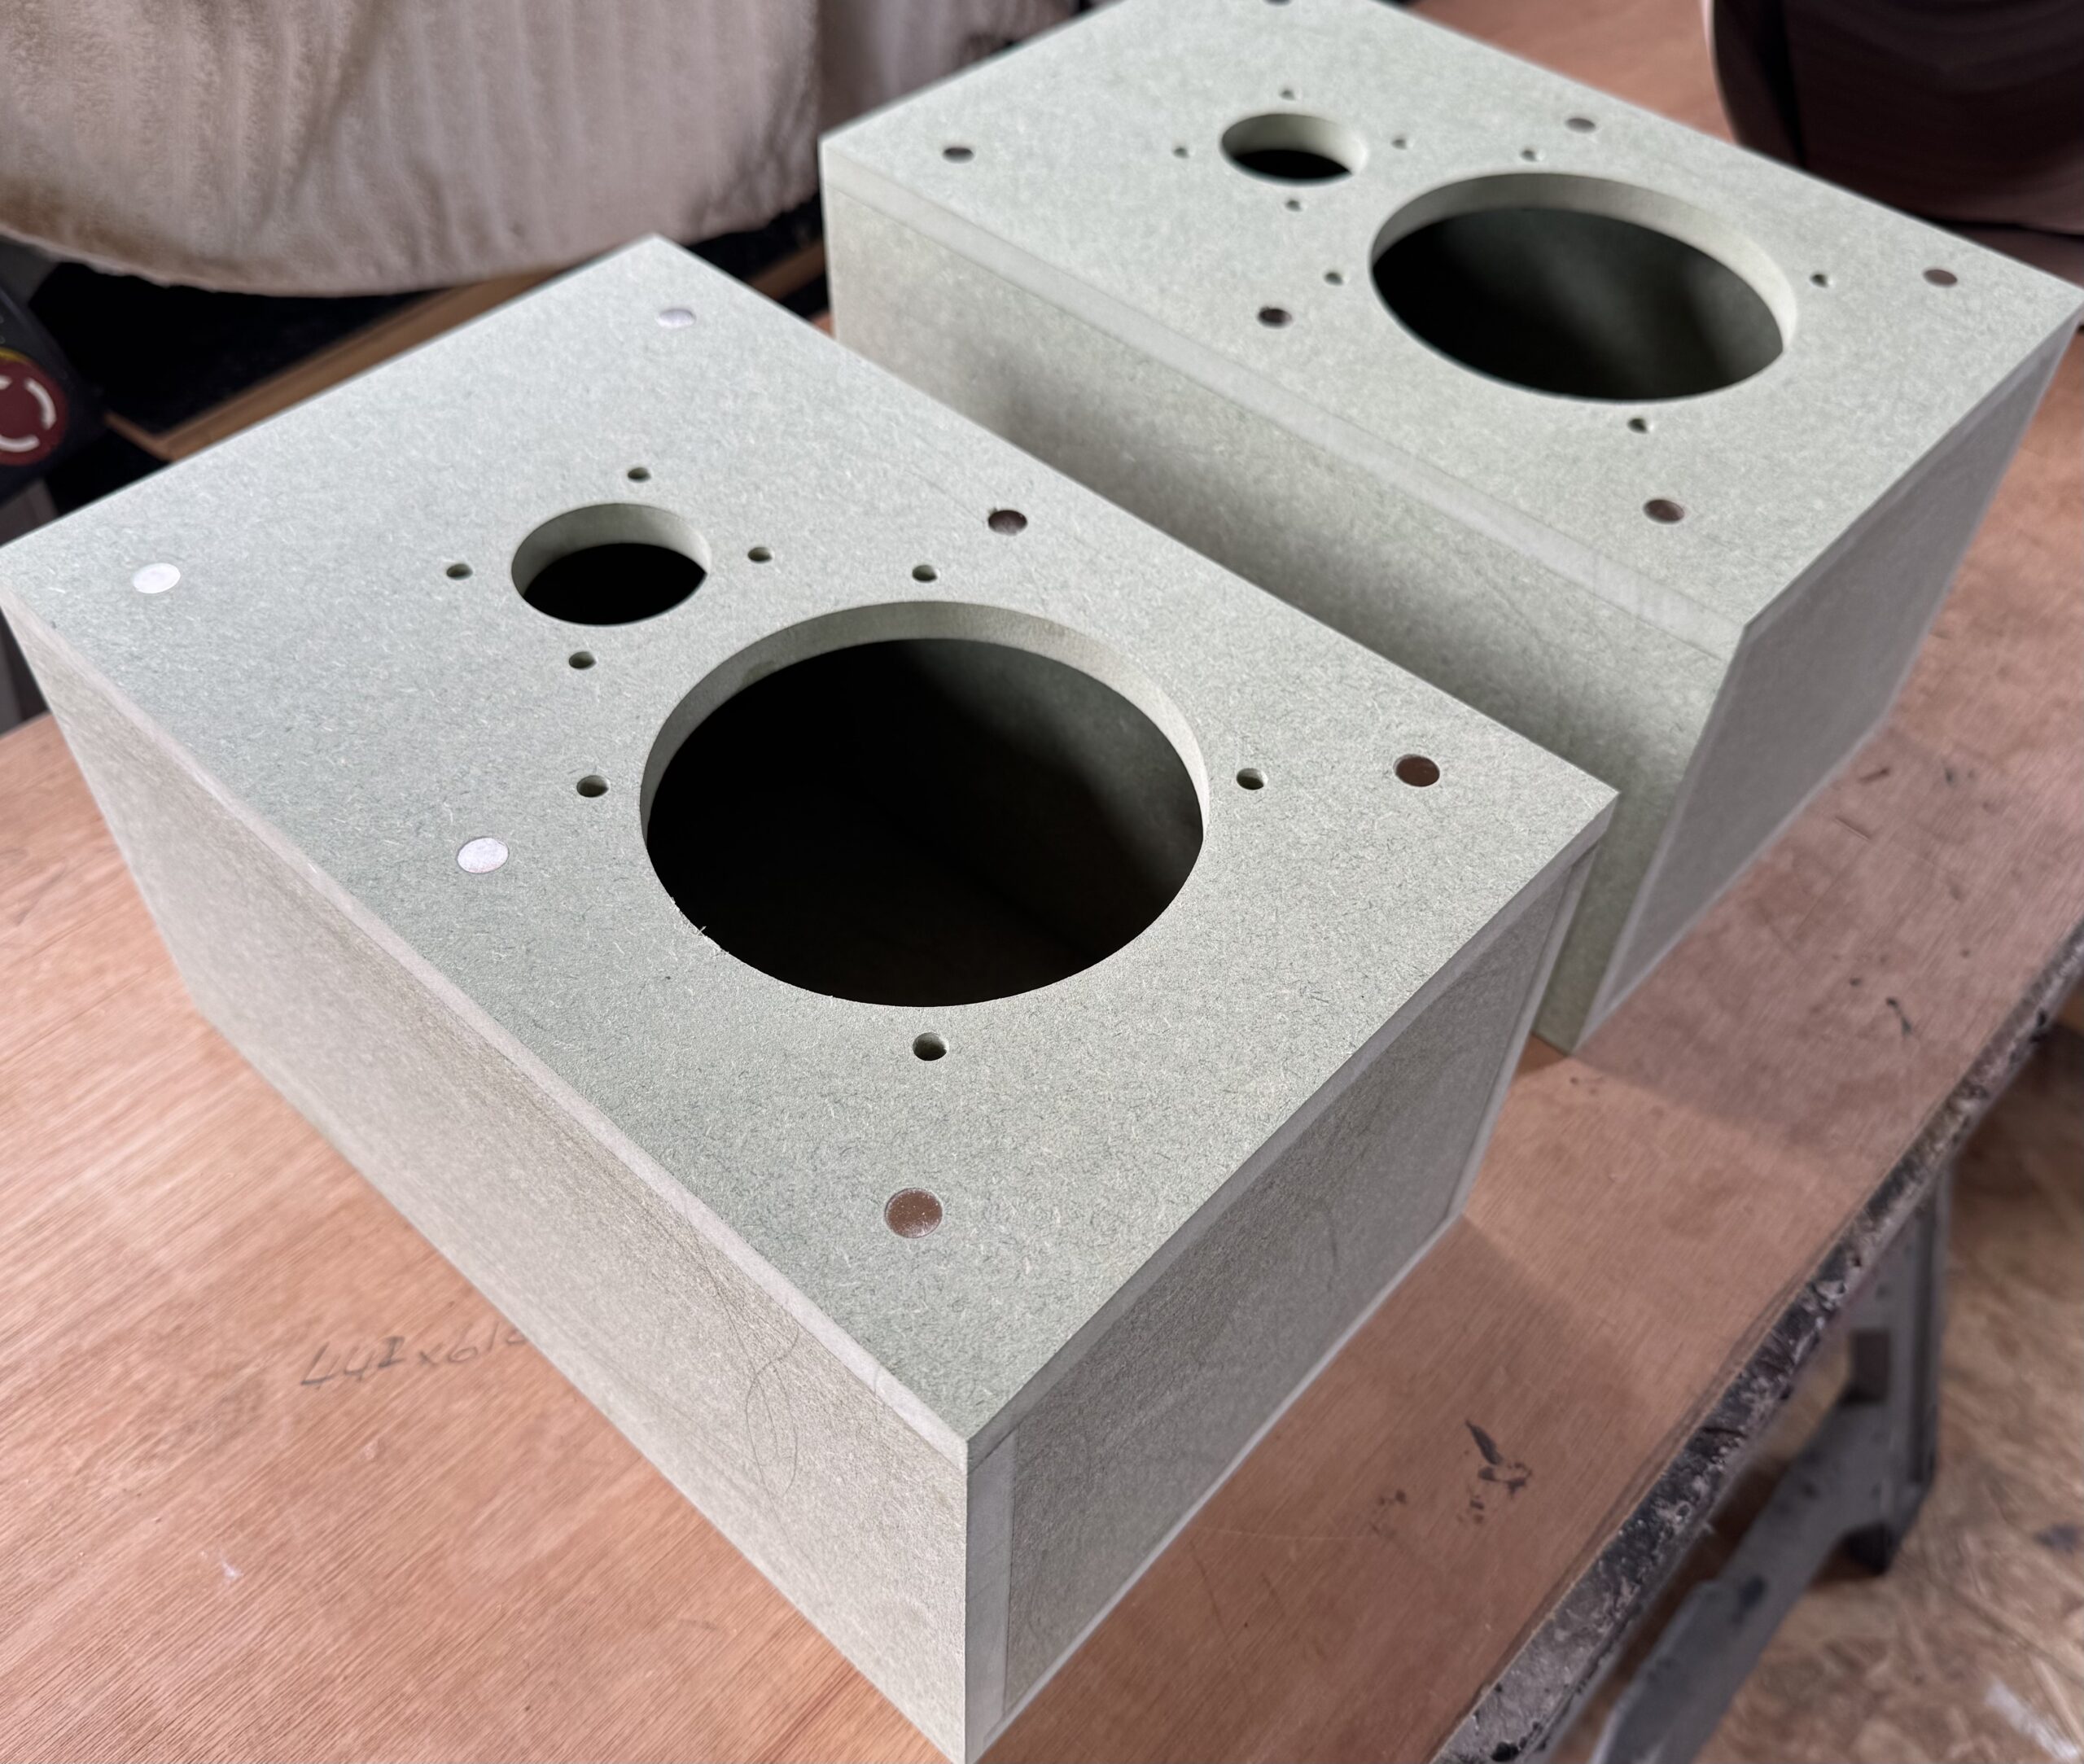
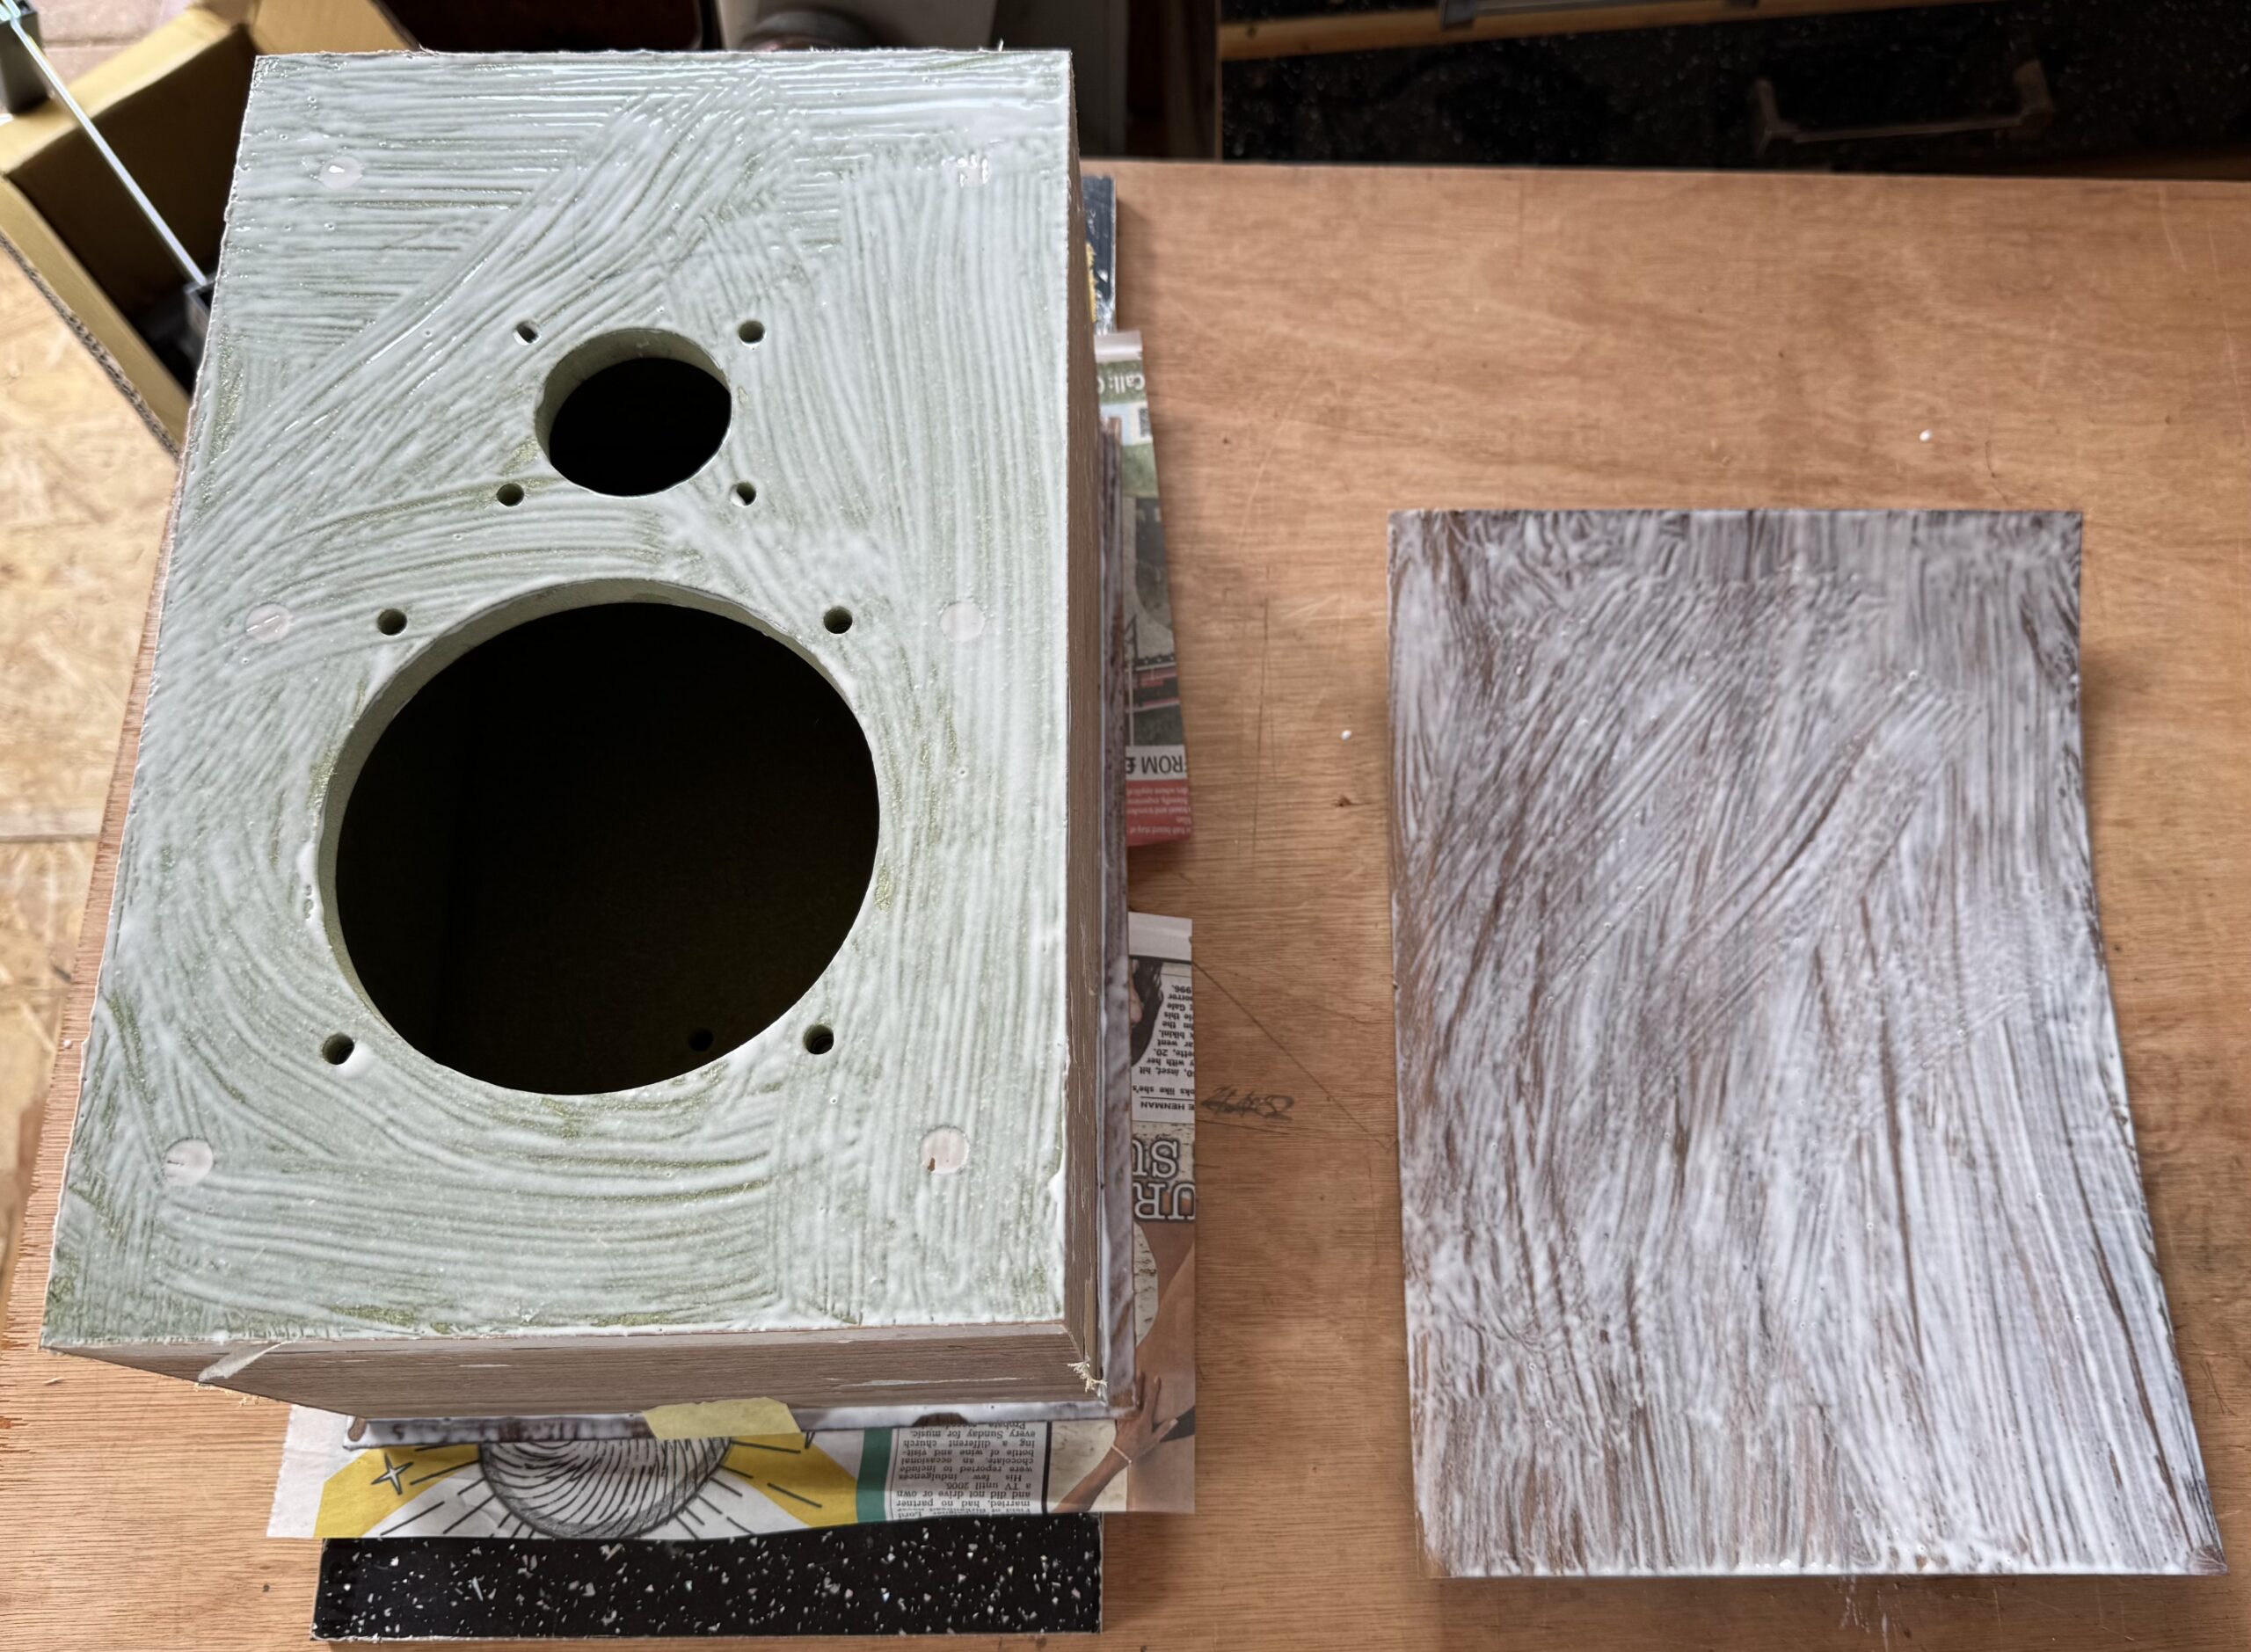
Now to bring everything together. In the process of veneering we covered the bolt holes for the drivers so those need to be located. I poked 3 and 4 mm brad point drill bits through the M4 and M5 t nuts respectively, pushing them carefully from the inside of the cabinet until the point of the bit came through the veneer.
Use a wood screw, an awl or a cone-point grub screw if you don’t have a brad point drill bit. Just make sure the screw or tool you use is thick enough to fit the t nut without too much slop so you get an accurate centre mark. The result should be a perfect pin hole right at the centre of the hole. You can then take 4 and 5 mm bits and carefully drill out the holes, which will remove not only the veneer but any excess glue or oil that filled the holes during the veneering process.
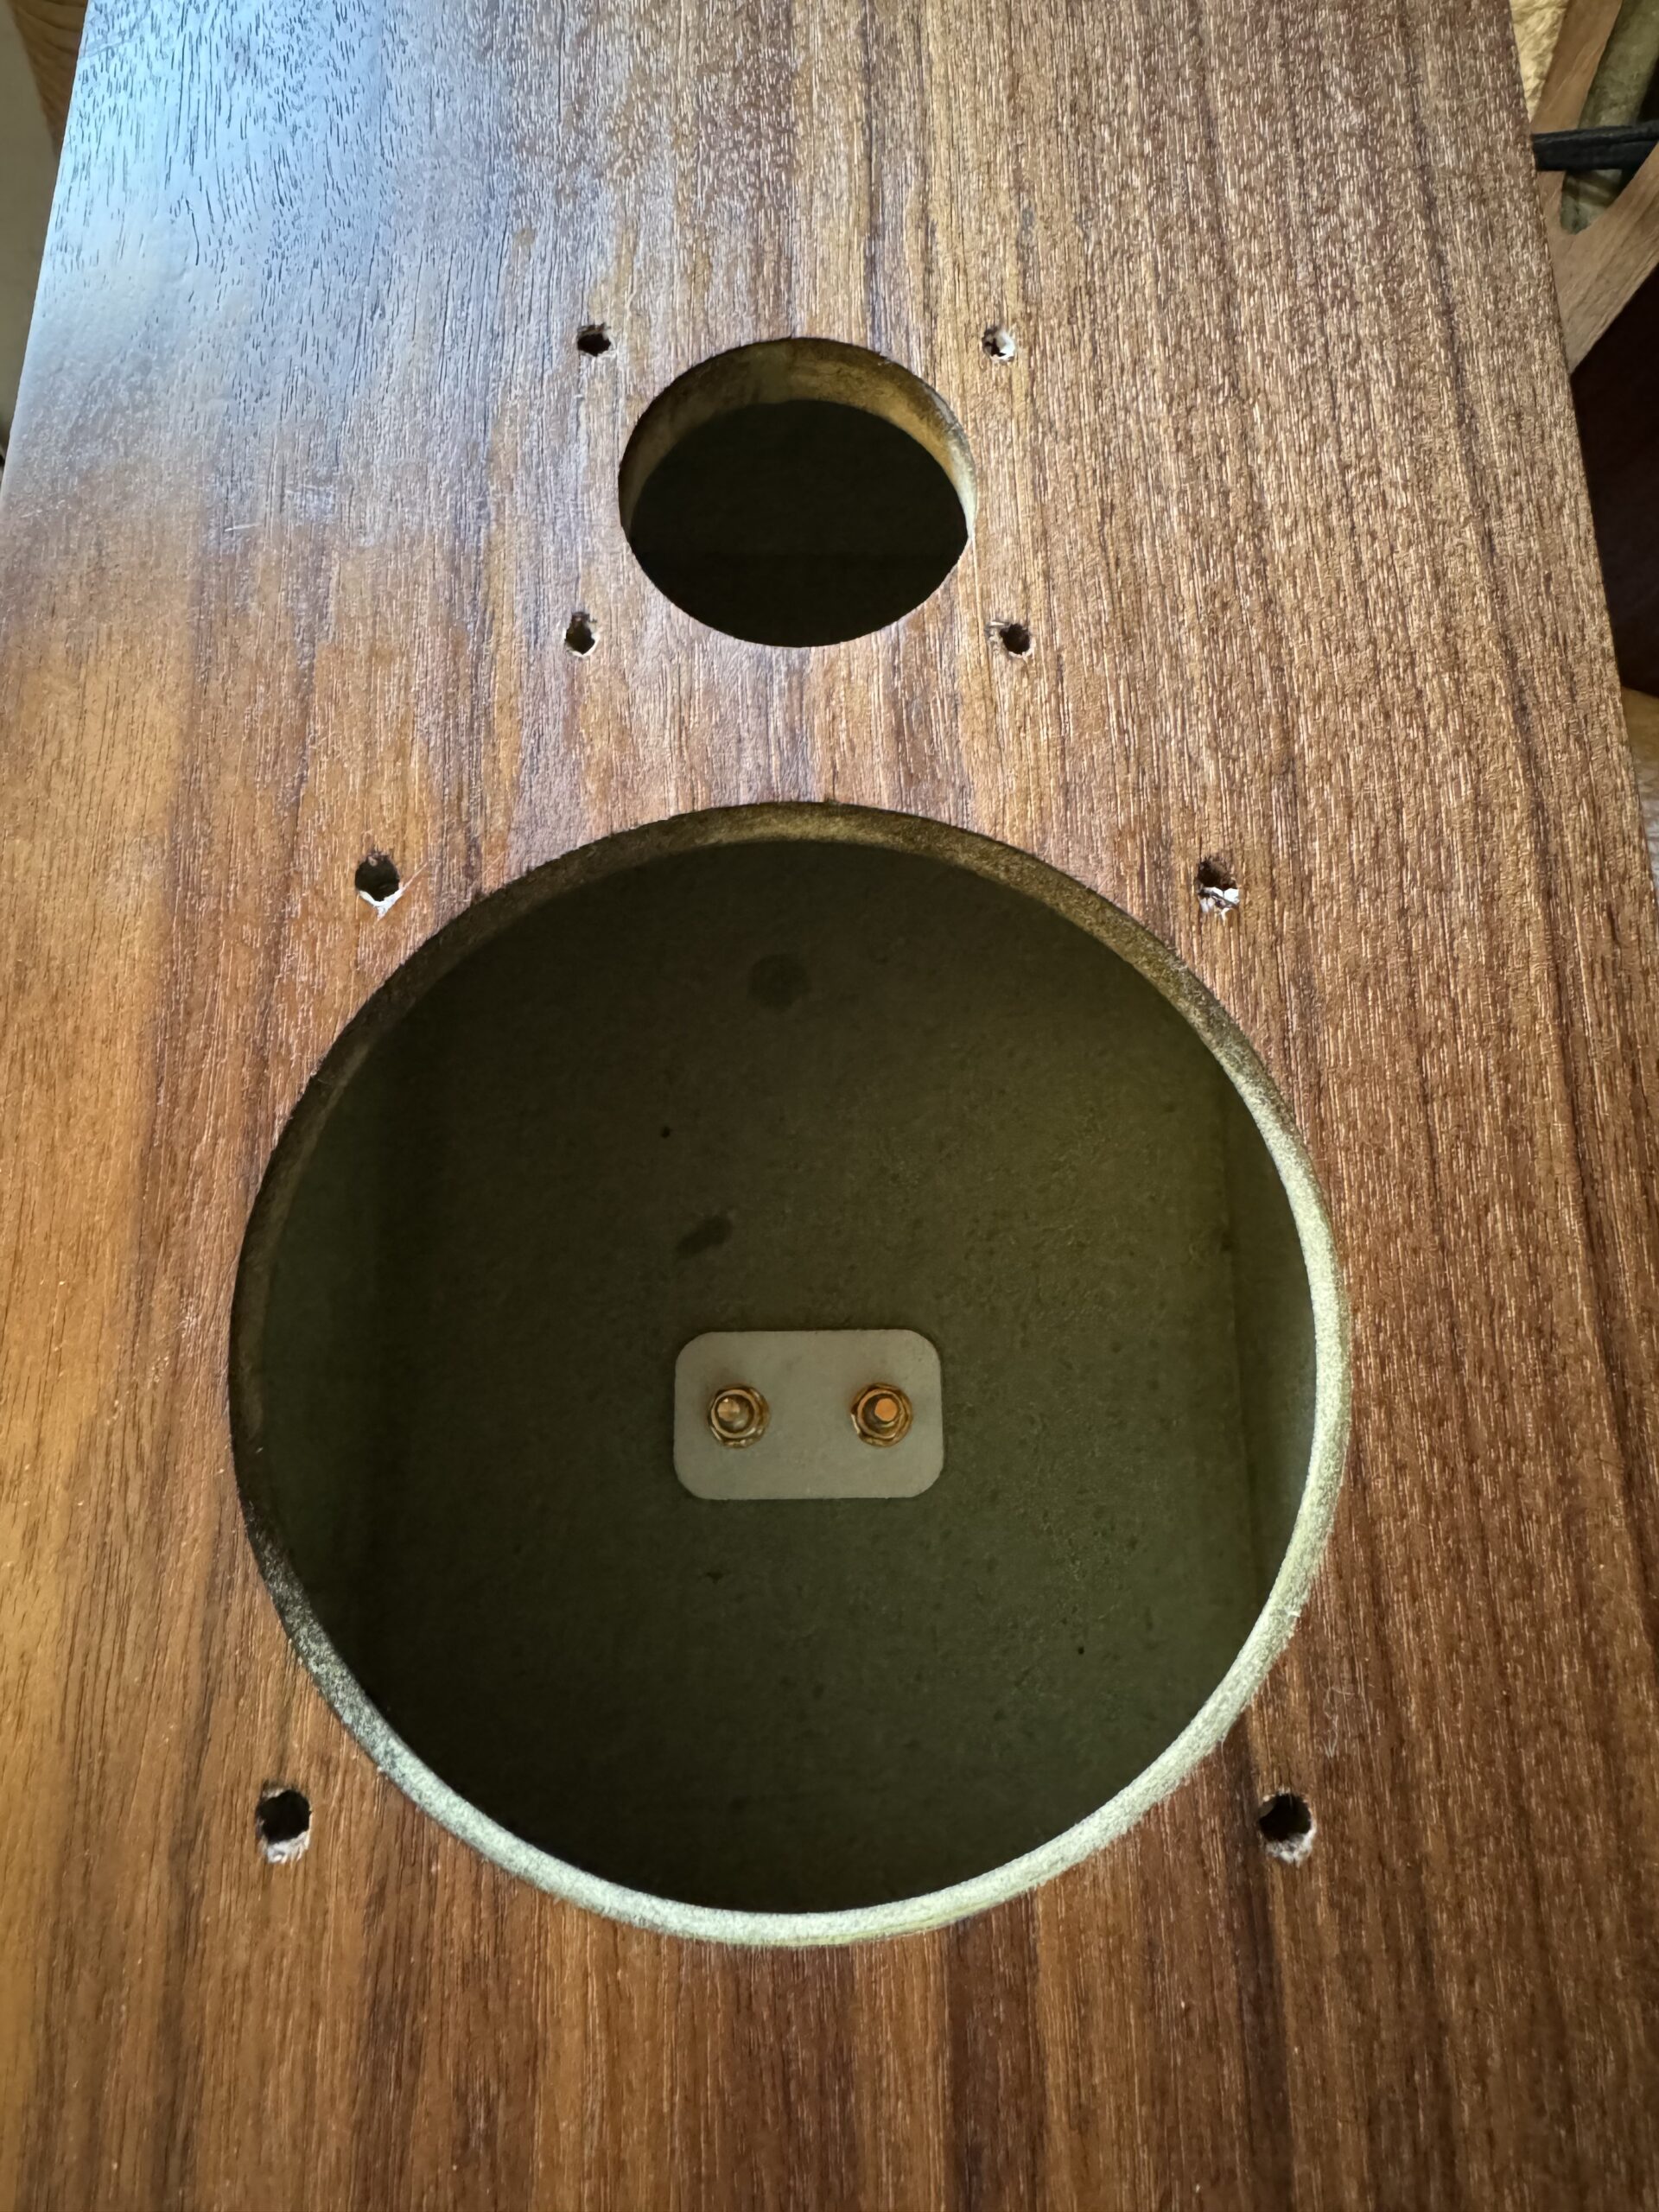
Assembly begins with the black plastic terminal plate and the associated white plastic washer, which are clamped by the terminals and provide a solid surface to prevent the nuts digging into the soft MDF. The external plate is fitted into the recess on the back, ensuring the correct orientation.
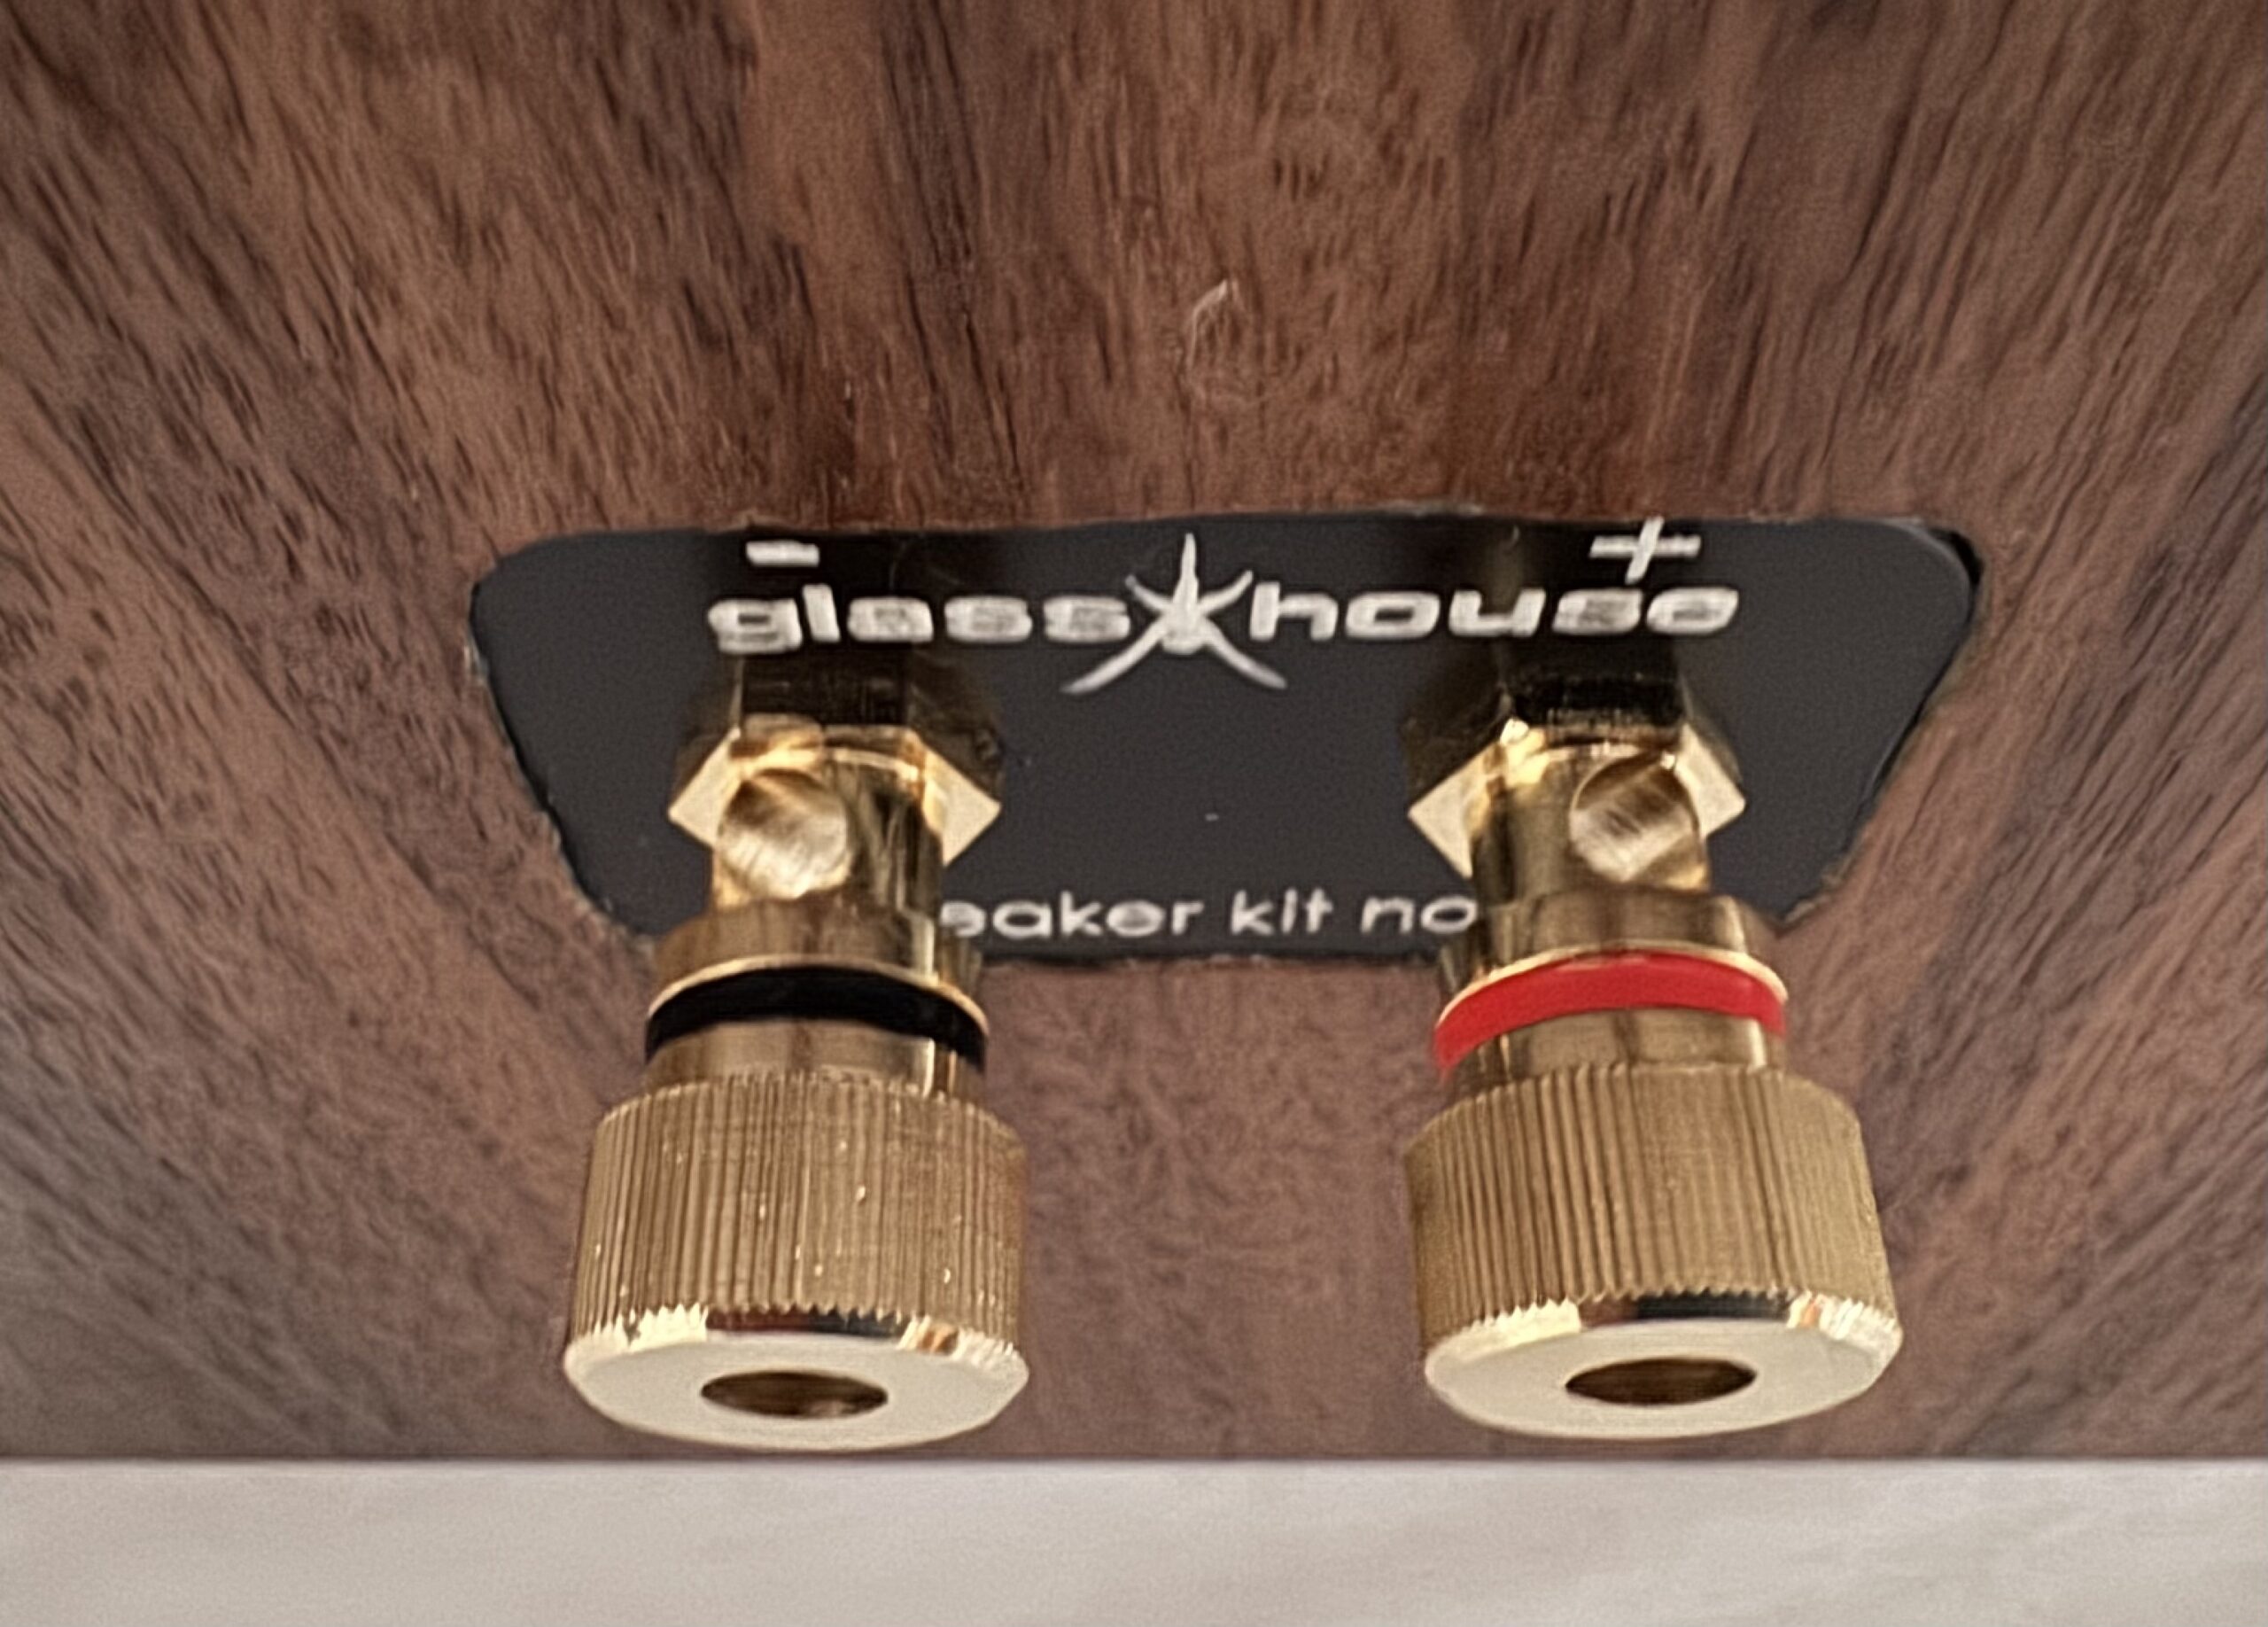
The terminals are then fed through the holes, pressed firmly home (they are an interference fit) and rotated by aid of a spanner or screwdriver to orient the hole in the side of the terminal post to your desired position. I set the hex nut at the base of the terminal parallel to the terminal recess, which angles the terminal post holes slightly in toward one another. You could set them at 45 degrees, straight up and down, straight out to the sides or any way you like.

Secure the terminals, and inner plastic washer, with an anti-shake toothed washer and nut from the inside. Use a box spanner to get them nice and tight, and an ordinary spanner on the net nut below the binding post to keep the orientation correct.
You can then seat the crossover board over the terminals, making sure to align the + and – (positive and negative) connections with their respective terminals. You may find a very slight discrepancy between the terminals and the holes you drilled in the crossover board. If that’s the case, enlarge the holes with a 6.5 mm drill bit, being careful not to hit the solder tags.
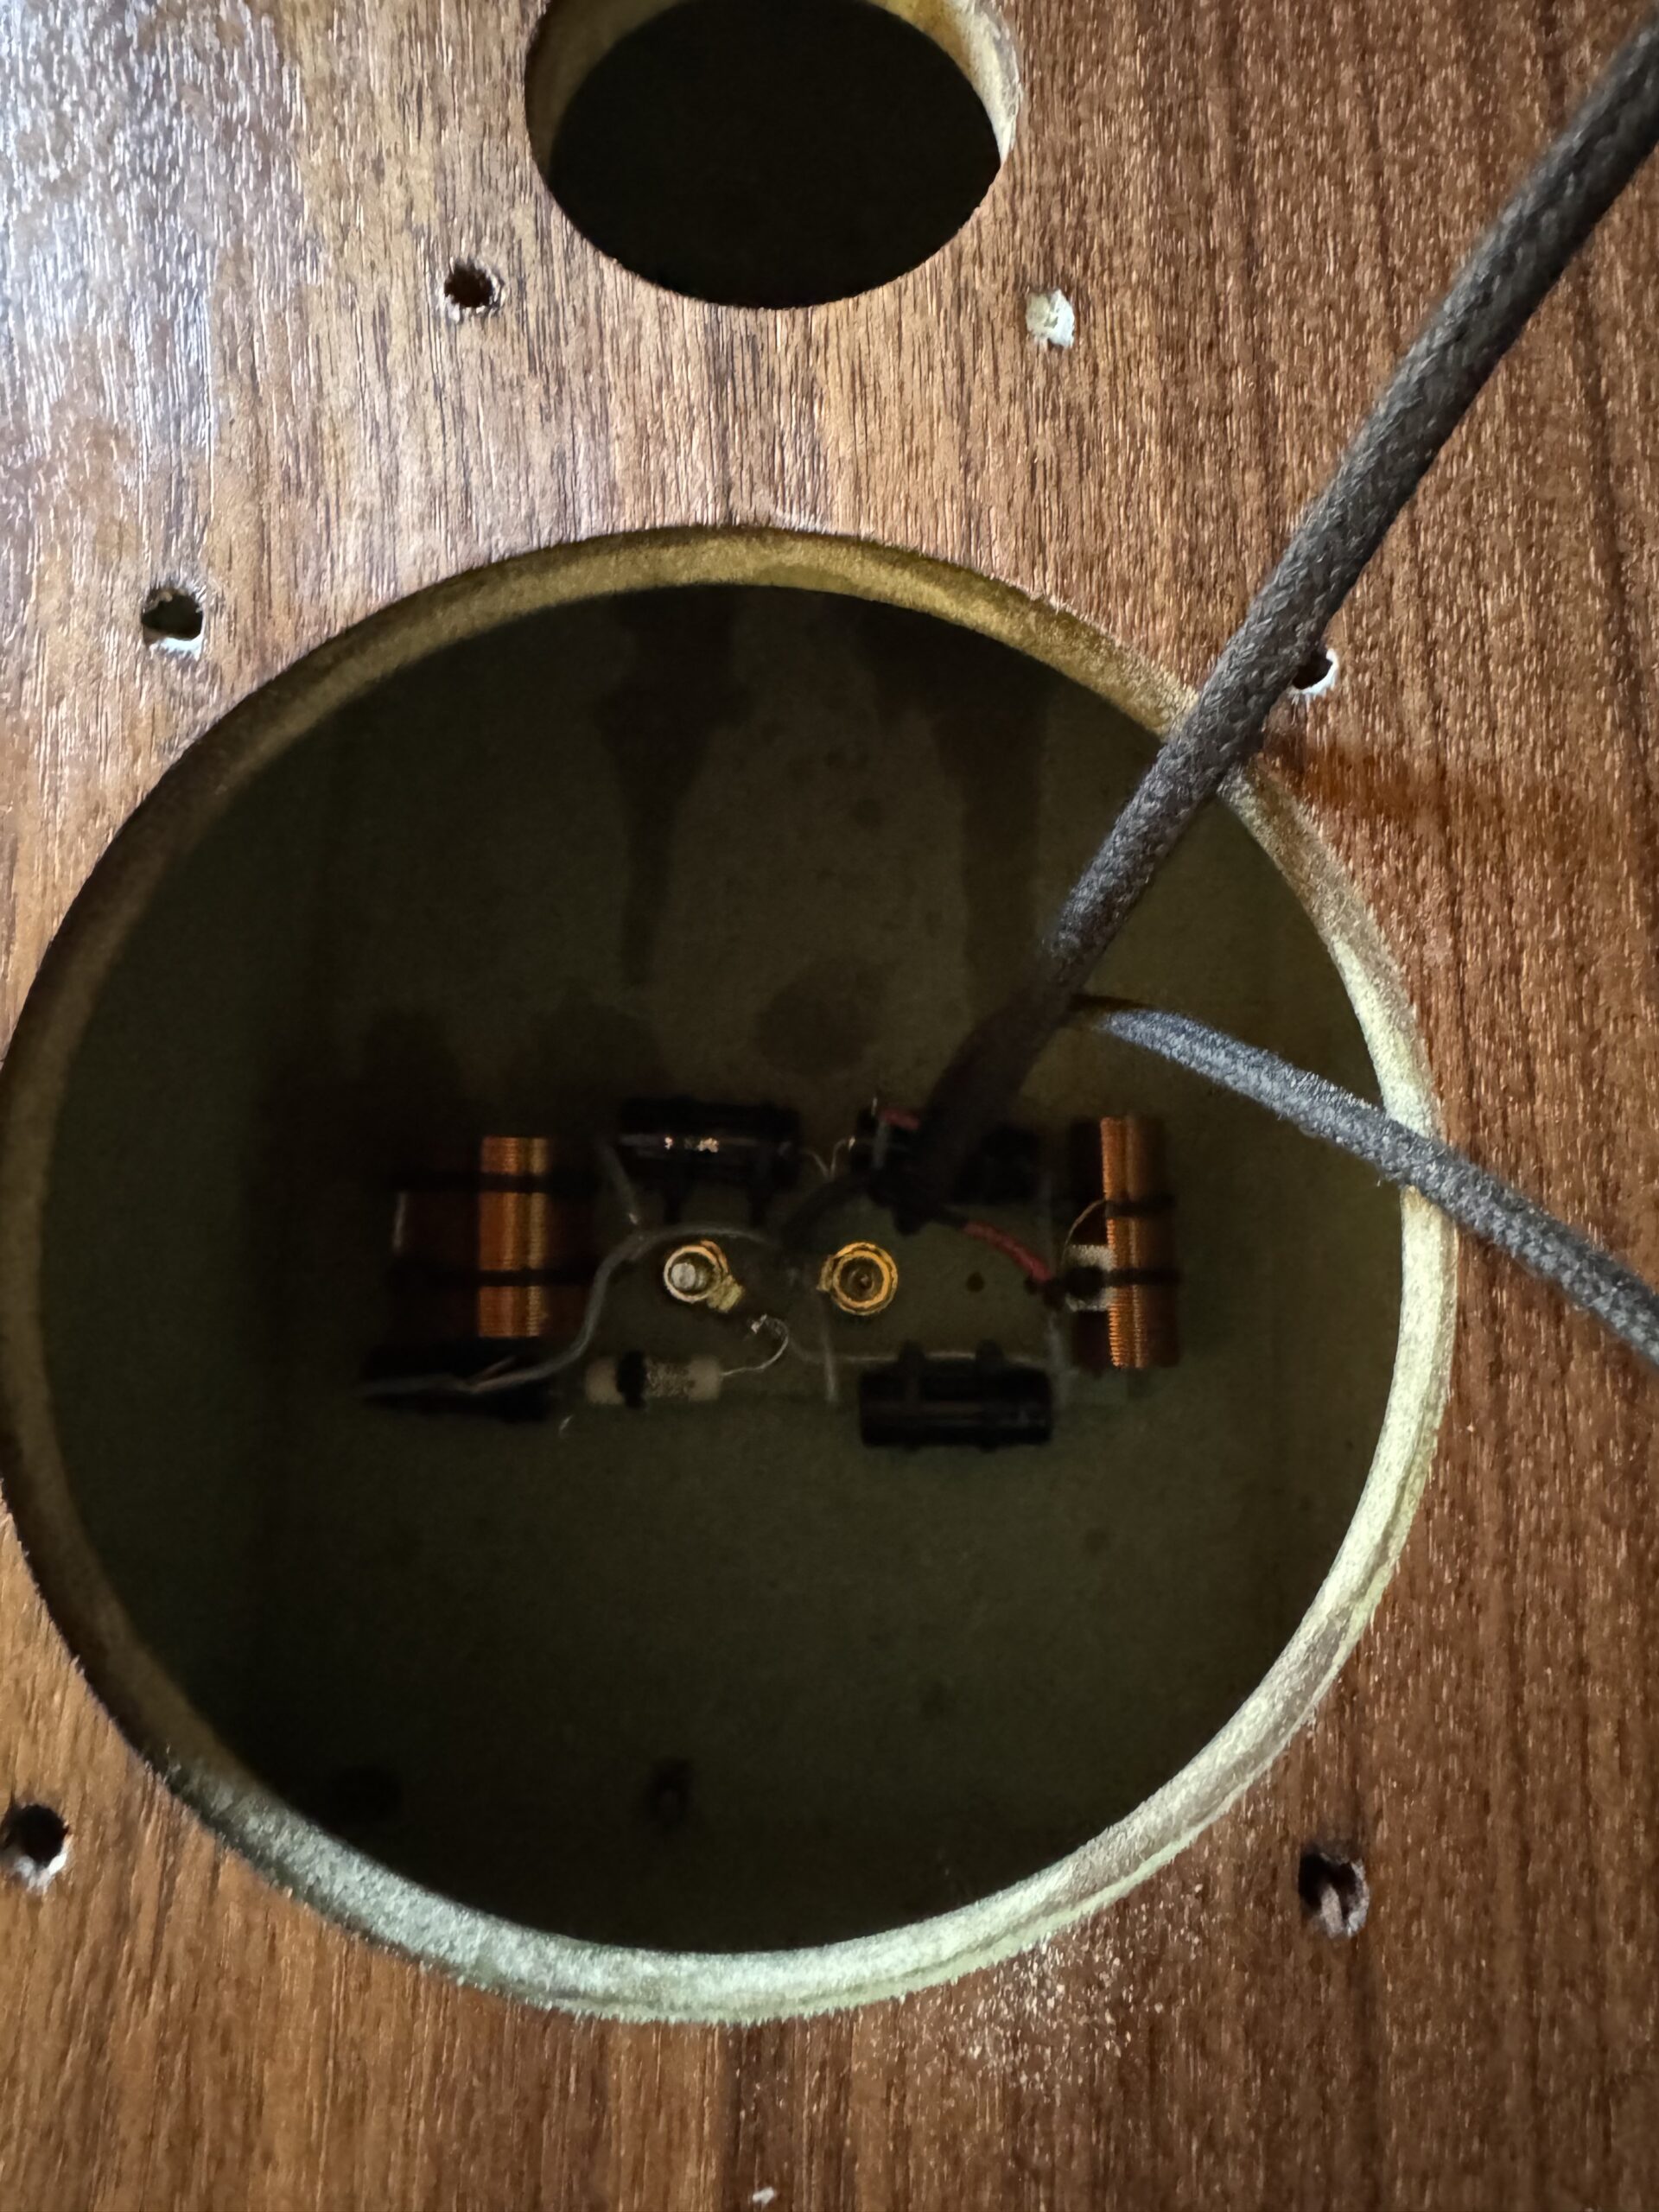
Fit the final anti-shake washers and nuts to hold the crossover in place. Get them finger tight, then use the box spanners to tighten them up but be careful that the solder tags don’t try to spin under pressure of the toothed washer. You want these tight, to make a good connection, but the last thing you want to do is break your connections.
Cut the provided polyester wadding material in half. It’s up to you how you arrange this, but I found that best results were achieved by stuffing it into the cabinet length ways.

Cut a small slot roughly in the middle of the half sheet beforehand to feed the cables through, then stuff it in and orient it as evenly as you can.
Bring the cables out of their respective holes on the front and connect them to the drivers, by soldering or using the spades.

Then situate the drivers and bolt them into place, tightening in a diagonal pattern to ensure they seat and seal correctly. A set of cap head bolts are provided but I didn’t like how obtrusive they were so replaced them with dome head bolts instead which give a neater finish.
My Thoughts
I was initially drawn to the Glasshouse speakers as they are a sealed design. Edgar Villchur of Acoustic Research and Henry Kloss, who later founded KLH, were the first to devise and popularise the acoustic suspension loudspeaker principle in the 1950s.
In an acoustic suspension design, the predominant restorative force used to drive the woofer ‘forward’ is the air trapped behind the driver diaphragm (the cone), by means of a sealed cabinet. To achieve this, in highly simplified terms, the elastic stiffness of the suspension components of a driver must be smaller, or negligible, as compared to the force acting upon it. For a detailed rundown of the acoustic suspension principle, see The Original US patent, granted in 1956. And there’s an interesting article Here on sealed vs acoustic suspension.
In general sealed loudspeakers whether true acoustic suspension or not will produce more accurate bass than a vented design, at the expense of apparent bass depth and output. There are certainly some exceptional vented designs out there, made possible by advancements in computer modelling and simulation. But I have never found a vented box as tuneful, or as accurate, as a sealed design. This is why I put a great deal of effort into restoring old ARs.
There aren’t many modern drivers suited to true acoustic suspension designs, and few suited to smaller, sealed boxes where a low frequency response is desired. There are very few commercial sealed designs on the market, and very few in the DIY realm. I think this is a great shame, and I’m glad to support any product that changes this.
The Glasshouse speakers sound, to my ears, quite marvellous. Regulars here will know I’m not a fan of subjective commentary. For those who would rather look at the data, I have included here the frequency response plots.
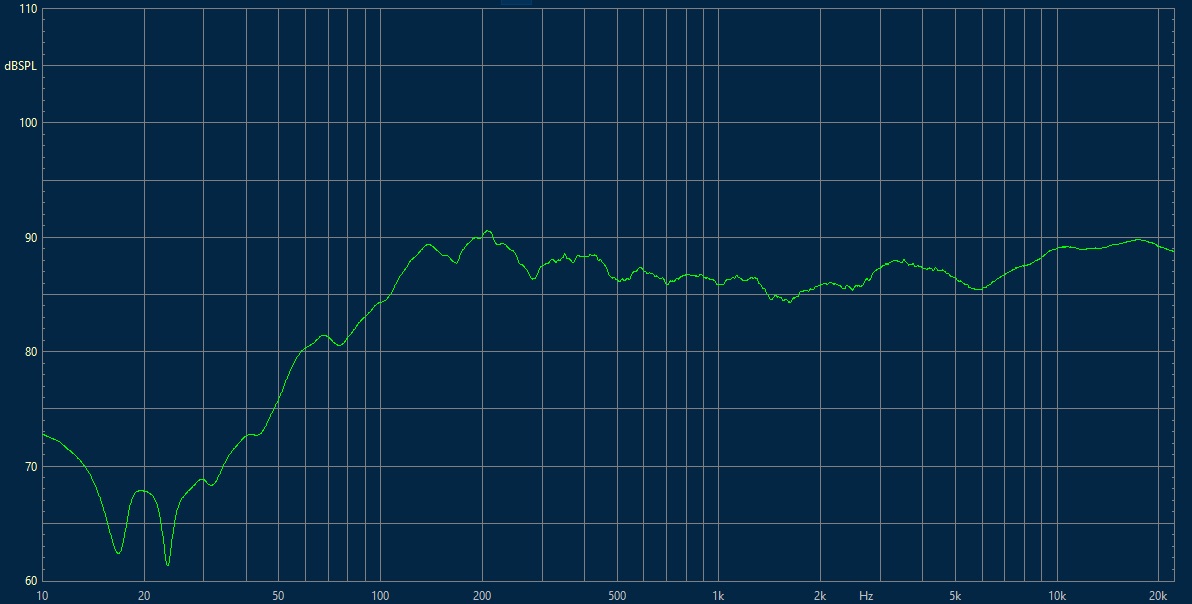
As we can see, the plots show a mid bass peak at around 100-150Hz,, with slight dips at 250 and 500Hz. This trxnaltes to real world performance and means some mid bass tonality common to smaller speakers. I suppose it would be described as ‘warm’ or ‘forward-sounding’. It’s a lively performance that highlights vocals and acoustic instruments, and would highlight any undesirable resonance in the cabinet – if there were any. Fortunately the cabinet is well-damped by design and behaves perfectly, the tap test revealing only slight tones with a fast decay.
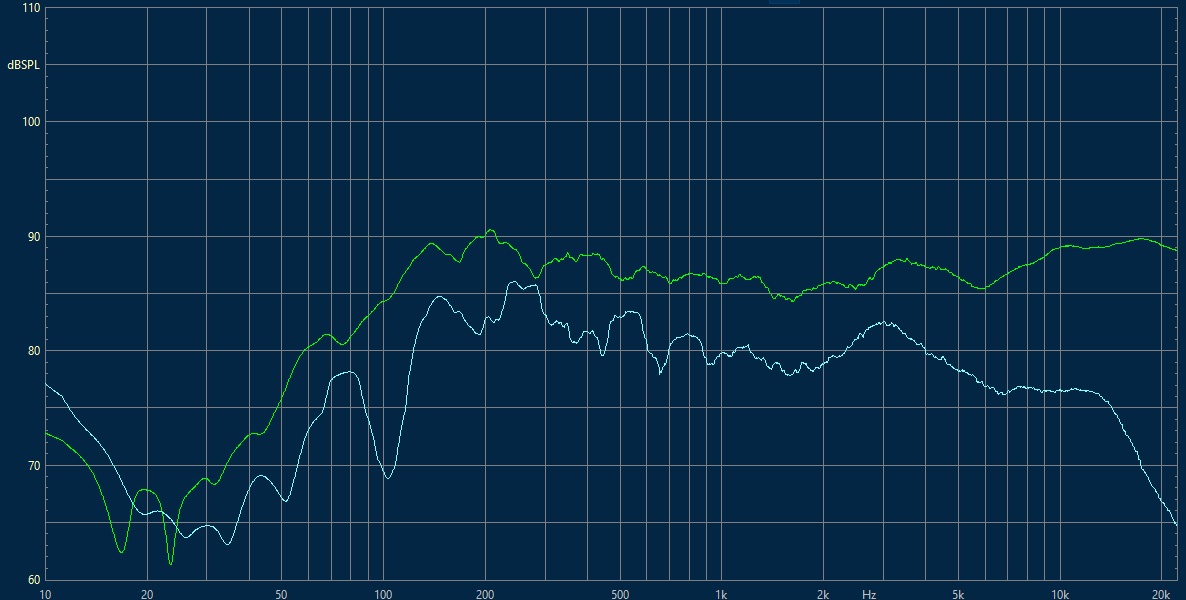
F3 of this speaker appears to be around 60Hz. F3 is the point where the bass is rolled off -3dB from flat, or an average SPL. Average sensitivity is around 87dB and there don’t appear to be any difficult impedance dips so far as my limited equipment can analyse, so these are a relatively easy load.
One of my many unpopular opinions is that valves, unless they’re powering a wall of Marshalls or an AC30, are best left in the ‘60s. Even many guitar pros hide a Kemper Profiler out of sight to generate their tones, with a wall of amps for show or reinforcement. Modern technology is just better. However if you are a fan of the vacuum tube, about 10W of output should drive these speakers well.
I favour solid-state muscle amps and modern class D behemoths capable of hundreds of watts of cool, efficient output. I fed the Glasshouse speakers from my Hypex Nilai500s and they moved some serious air for their tiny dimensions.
They’re relatively flat through the high frequencies, particularly through the crossover point which is well chosen and inaudible to my ear. They’re a sweet-sounding, detailed loudspeaker that are happy to play loud without apparent strain or distortion. I think you’d have to spend considerably more than their modest asking price to better them, even taking into account the time investment required to finish them to the standard they deserve.
As for the kit itself, it is a well-specified kit delivered with almost everything you need. The enclosure parts are cut to a high standard from a quality MDF, the provided fittings are good quality and the components are well-specified. Technical support, should you need it, will be excellent, provided in-house by Nick and his team.

I’ve thoroughly enjoyed this project and continue to enjoy the fruits of my labour. Hopefully this has enquired some of you to break out the tools and build a pair. I look forward to seeing how Glasshouse speaker kits develop in the future and hope to bring you more loudspeaker designs, builds and restorations in due course.
Discover more from Audio Appraisal
Subscribe to get the latest posts sent to your email.
Difficult to understand how a speaker design can be achieved with no primary specifications freely available this bass driver was specifically made for Ruark by Vifa, all attempts to get the specs has so far failed thus i cannot tell if the VAS rating is suitable for your box size, further for this size of box a flat response of just 120hz flat is not very good even the LS3/5A is better at 80hz and a smaller box; wouldn’t it have been better to have mounted the tweeter offset to improve defraction effects? It has been demonstrated that a higher RG value from cross-over values can reduce the loading on the bass driver reducing the resonance and allowing the response to go lower
the LS3/5a has about 1.2 ohms loss through the cross-over coils
this giving the bass driver more mobility and a lower freq response
you could do the same with the .63mmwire 2.7m/h coil giving 0.89 ohms
and a change by ratio the capacitor to 5.6uf this would enable the loading to allow a lower bass response if you also placed layers of BAF inside the cabinet
to effect an isothermal loading you could achieve a low freq of around 70hz
almost 1 octave better than current….. suggest 5 layers of 1inch BAF..
this will produce a very smooth response and reduce any hollowness
that is in evidence…
Vincent
Thanks for your insight. I had no involvement in the design of the speaker so I can’t clarify any of the design choices. However I don’t think anyone is claiming this is an LS3/5A equal. Producing a good LS3/5A even DIY will cost significantly more to do it right, and retail examples will set you back 10 times the price of this kit. I would imagine hi-fi collective tested samples of the driver to obtain measurements to come up with the design, or as vifa stockests they have access to manufacturer datasheets that aren’t published. This is speculation. Having built them what I can say is that this is a very enjoyable, musical speaker. Is it perfect? no. Is it the be all and end all, sonically or measurably? no. But it is proof that there is more than 1 way to crack an egg. Hopefully Nick can shed some light on the design choices and your suggestions.